¶ Hardware
¶ Flash HBA
Sources:
Broadcom: Broadcom downloads
LSI HBA info: LSI SAS 2008 RAID Controller/ HBA Information
¶ Why crossflashing a HBA?
Most HBA cards you can buy are configured with IR firmware by default. In this mode the card will take care of the RAID functionality. If you want to use software RAID (or ZFS) you don't want that. You want your OS to take care of that. Therefor you have to (cross)flash most cards to IT mode (some have native IT mode capability, like the earlier mentioned HP H220).
HP, now HPE, is notorious for being very picky about the hardware you install. If it is not HP(E) labeled/branded, the server doesn't recognize the sensor data and assumes the worst. This results in very high fan speeds and thus an unbearable amount of noise. So in the HP server I had to install an HP branded HBA: the HP H220.
¶ Google it
The guides are a compilation of multiple guides that are available online. If you search for crossflash lsi it <your card here> you will probably find the perfect one for you. At the end of each guide I have listed the ones that helped me most.
Rebranded cards:
Dell Perc H310 = LSI 9205-8i
HP H220 = LSI 9205-8i
IBM M1015 = LSI 9220-8i
IBM M1115 = LSI 9211-8iI'm not quite sure if you really "have to" use the exact firmware from broadcom. If I understand correctly, all these cards are based on the LSI SAS2008 chip and thus can be flashed with the same firmware.
¶ General steps
-
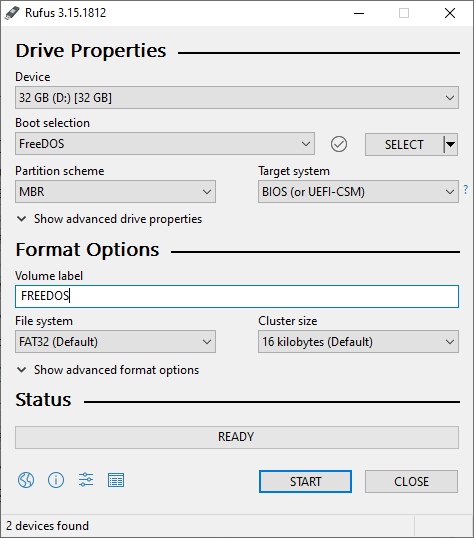
Prepare a DOS bootable USB stick. On Windows I use Rufus for that.
-
Download the flash tools or full archive.
-
Extract and copy the flash tools to the USB drive.
¶ Dell Perc H310
Sources:
Dell H310: https://tylermade.net/2017/06/27/how-to-crossflash-perc-h310-to-it-mode-lsi-9211-8i-firmware-hba-for-freenas-unraid/
Dell H200 + H310: https://techmattr.wordpress.com/2016/04/11/updated-sas-hba-crossflashing-or-flashing-to-it-mode-dell-perc-h200-and-h310/
Dell H310: https://techmattr.wordpress.com/2014/06/13/revert-your-perc-h310-back-to-its-dell-firmware
Do not use this guide when you have a H310 mini, you will end up with a bricked device like me. Go here for instructions on how to flash a mini: https://fohdeesha.com/docs/perc.html. Should you have a bricked device, you can unbrick it, but you need some hardware, skills and patience I guess.
-
Download the latest firmware from the
LSIAvagoBroadcom website.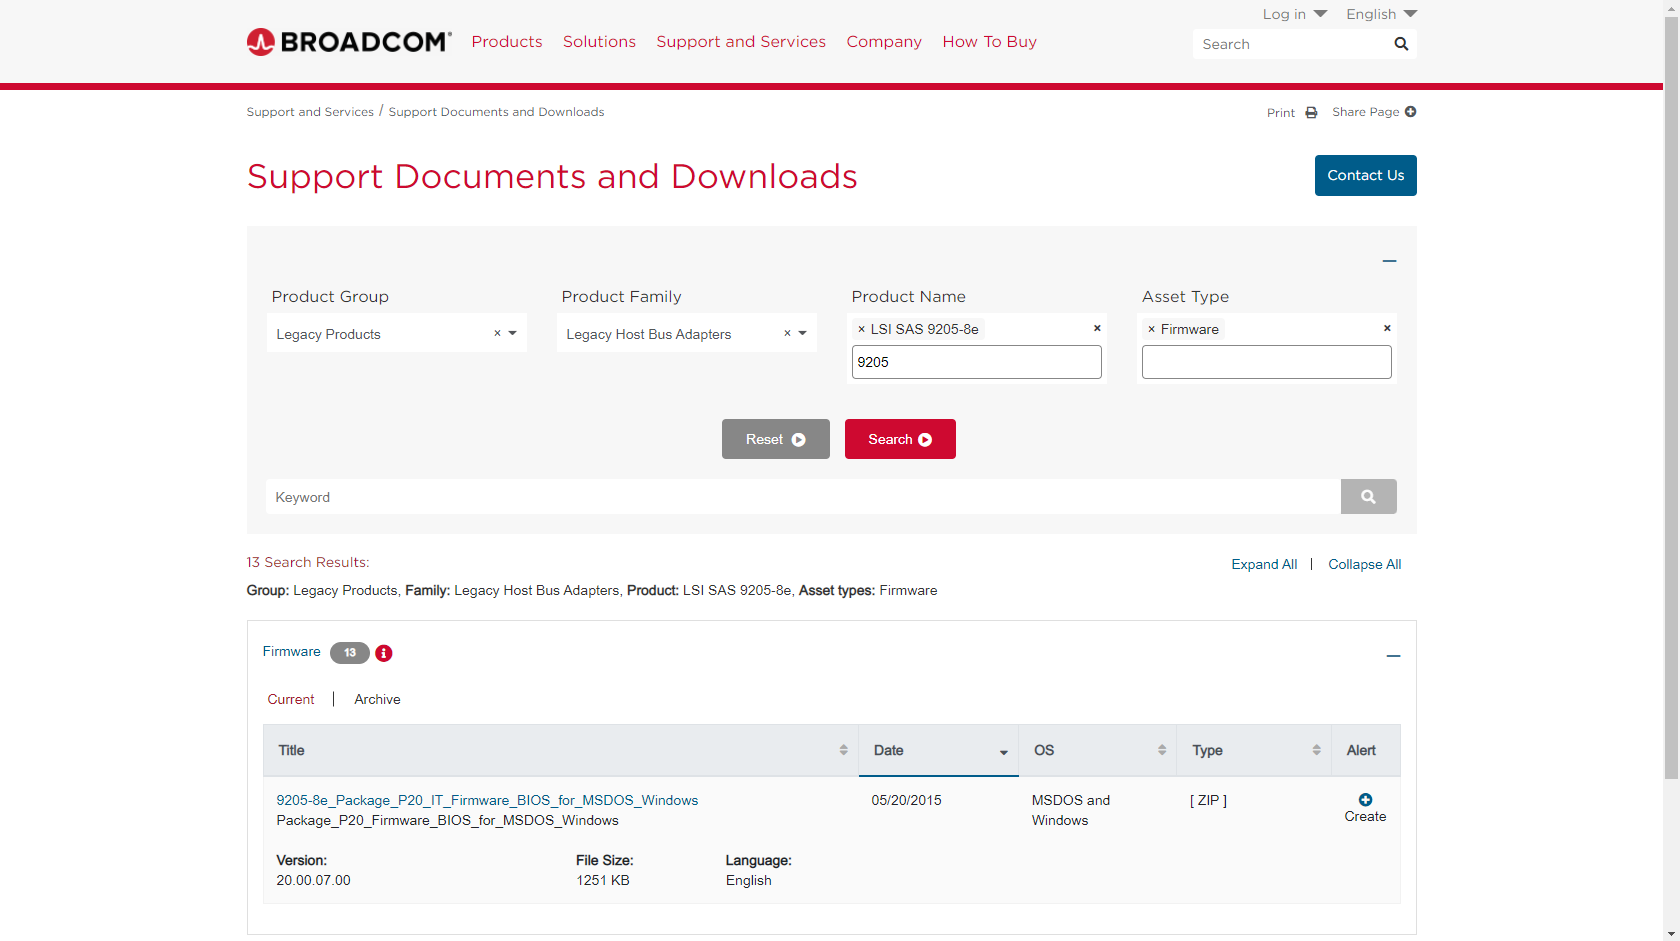
-
Extract and copy files to the USB drive:
Firmware\HBA_9205_8e_IT\9205-8e.bin,sasbios_rel\mptsas2.romandsas2flash_dos_rel\sas2flsh.exe -
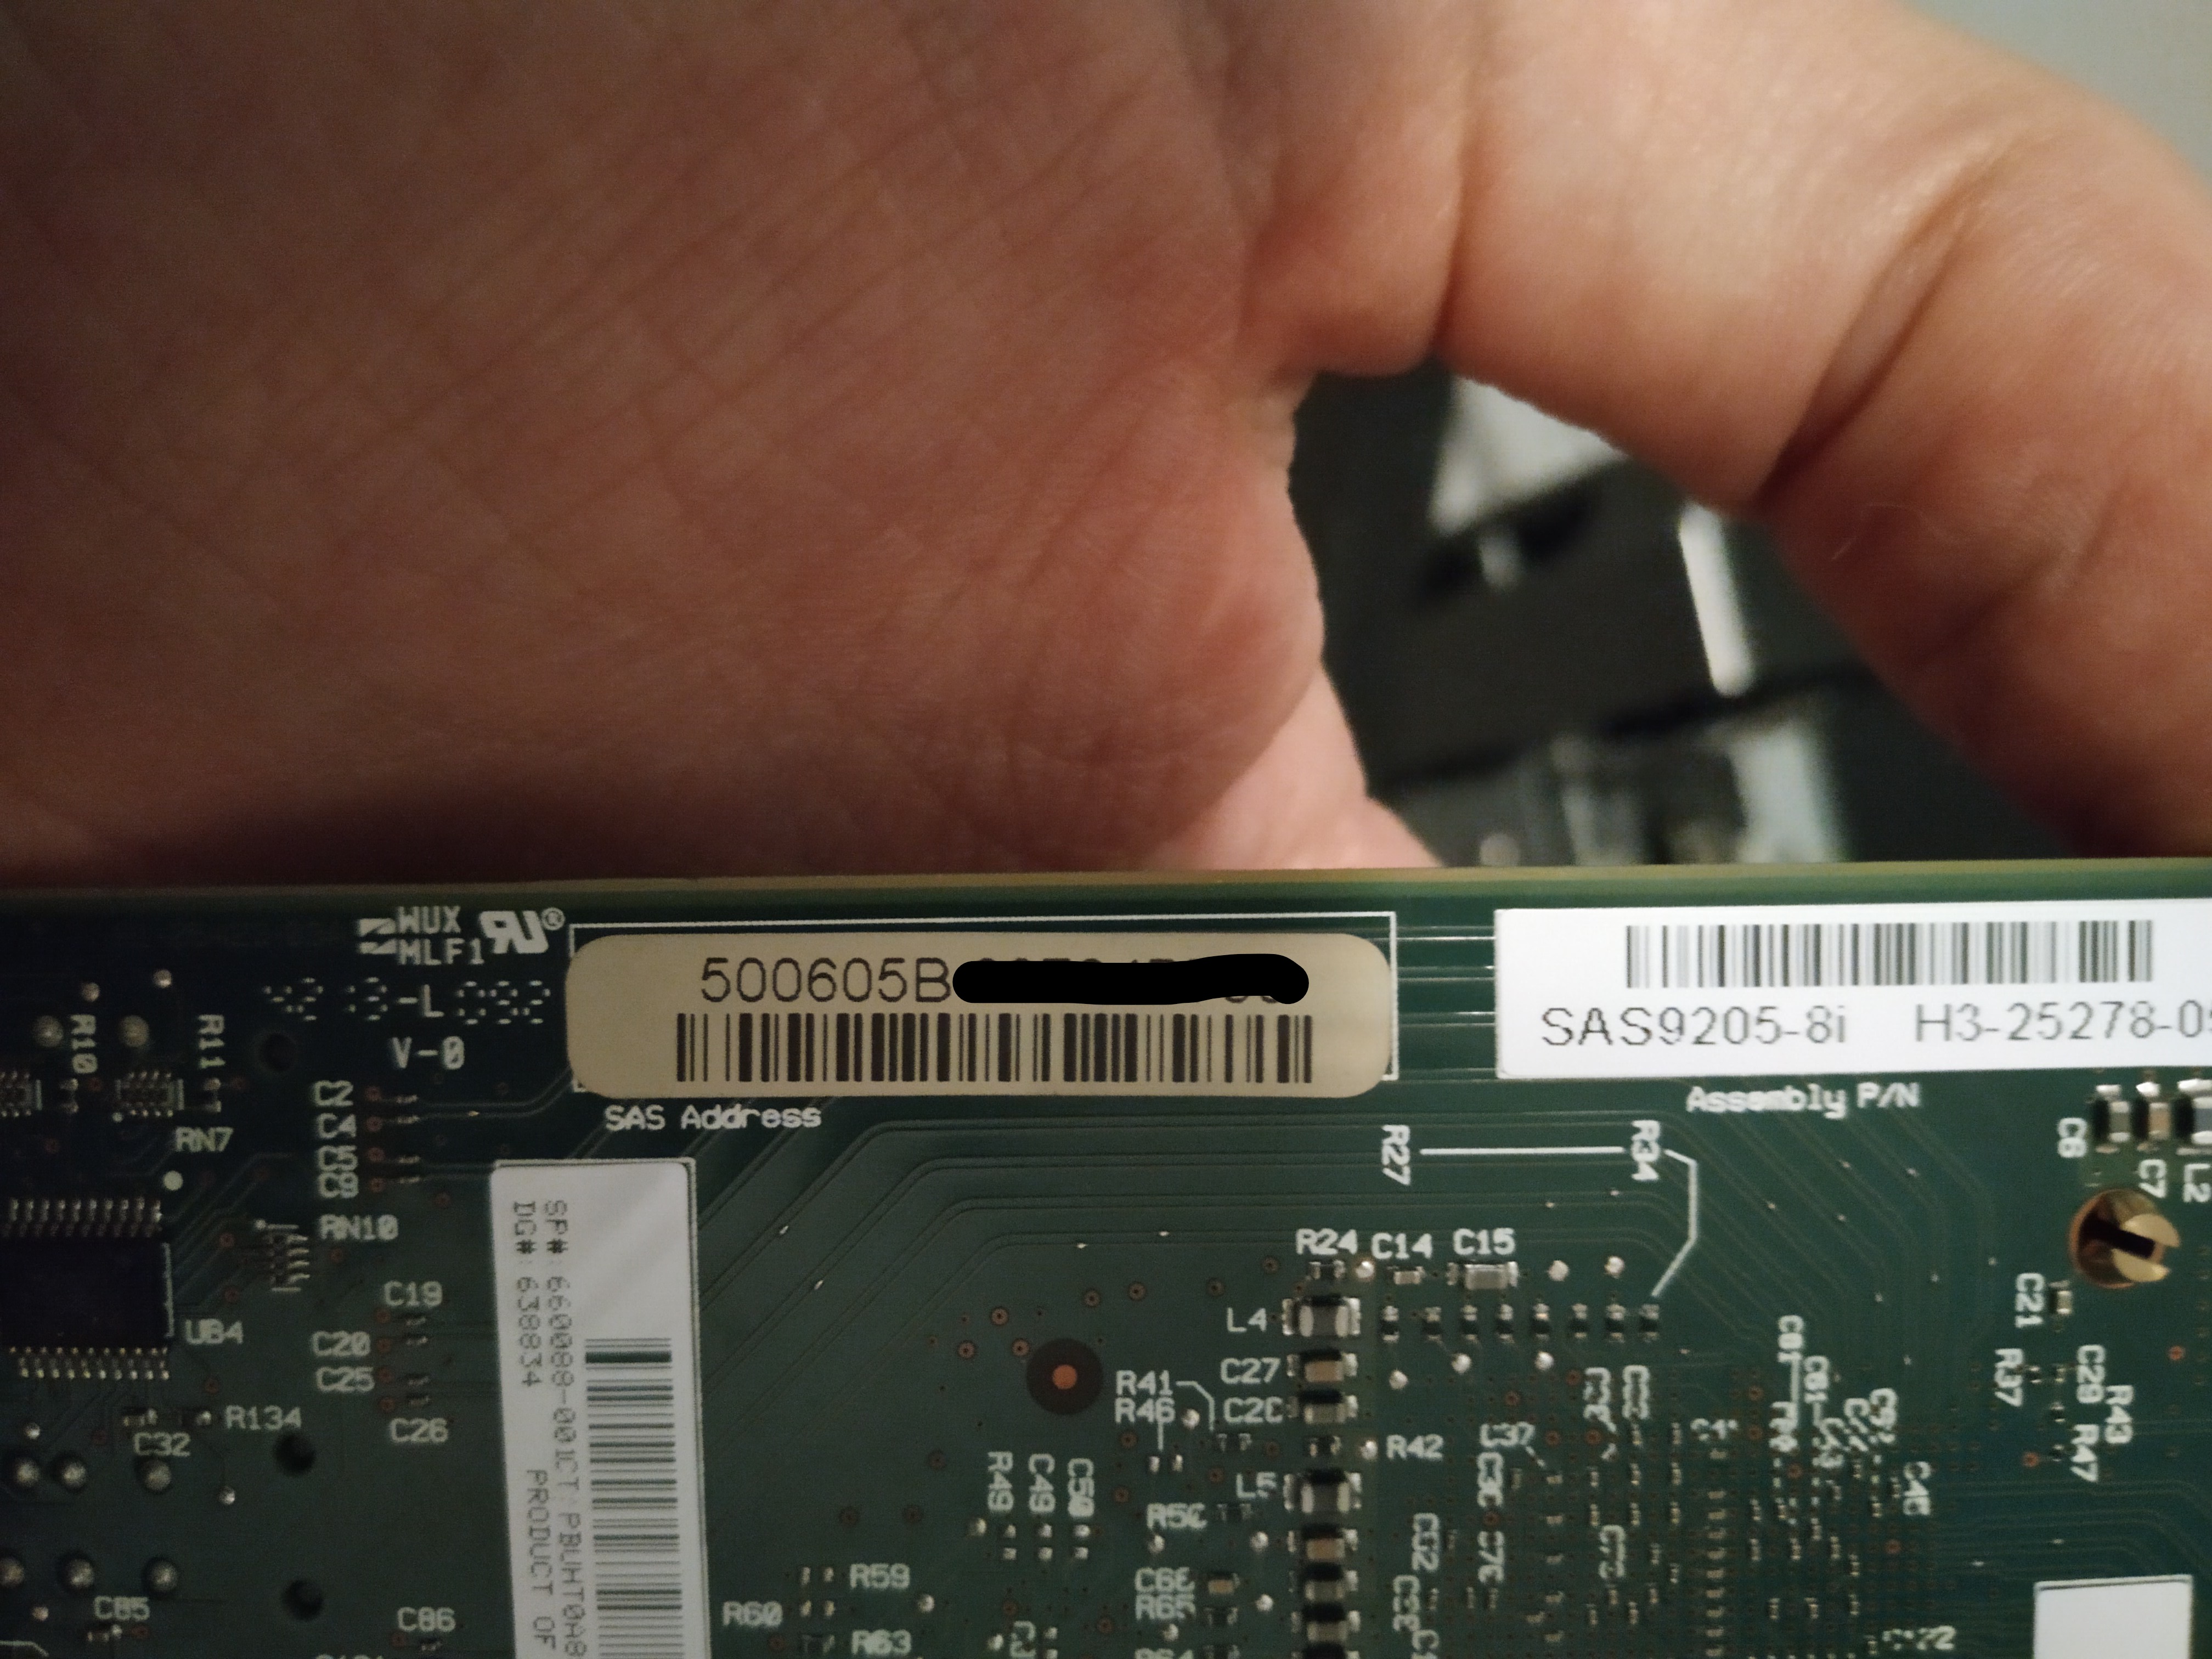
Find the SAS address of your card. This is very important!! Copy it from the label on the card. It should be something like "500605Bxxxxxxxxx". Or find it during the flashing procedure.
-
When booting in BIOS and UEFI mode:
-
Boot the server from USB. You should now see a DOS command line.
C:\>_ -
Type and run the following command to find the SAS number if you haven't done so in step 2.
megacli.exe -AdpAllInfo -aAll -page 20 -
Hit enter to scroll through the screens until the SAS address is shown. Write it down if you haven't done so already. This is very important!!
-
Run the next commands one by one to wipe the existing firmware:
megarec.exe -writesbr 0 sbrempty.bin
megarec.exe -cleanflash 0
-
-
BIOS mode:
-
Reboot back to USB and flash with the Dell HBA firmware
sas2flsh.exe -o -f 6GBPSAS.fw -
Enter the SAS number (change to the number -without spaces and dashes- you wrote down in step 2):
s2fp19.exe -o -sasadd 500605Bxxxxxxxxx -
Reboot back to USB and flash the LSI firmware
sas2flsh.exe -o -f 2118it.bin -
You are done. Reboot.
-
If you get
"ERROR: Failed to initialize PAL. Exiting program.", your motherboard is set to use UEFI and you have to flash using the EFI shell: see below.
-
UEFI mode:
-
Copy
bootx64.efifrom the full archive to the USB stick. -
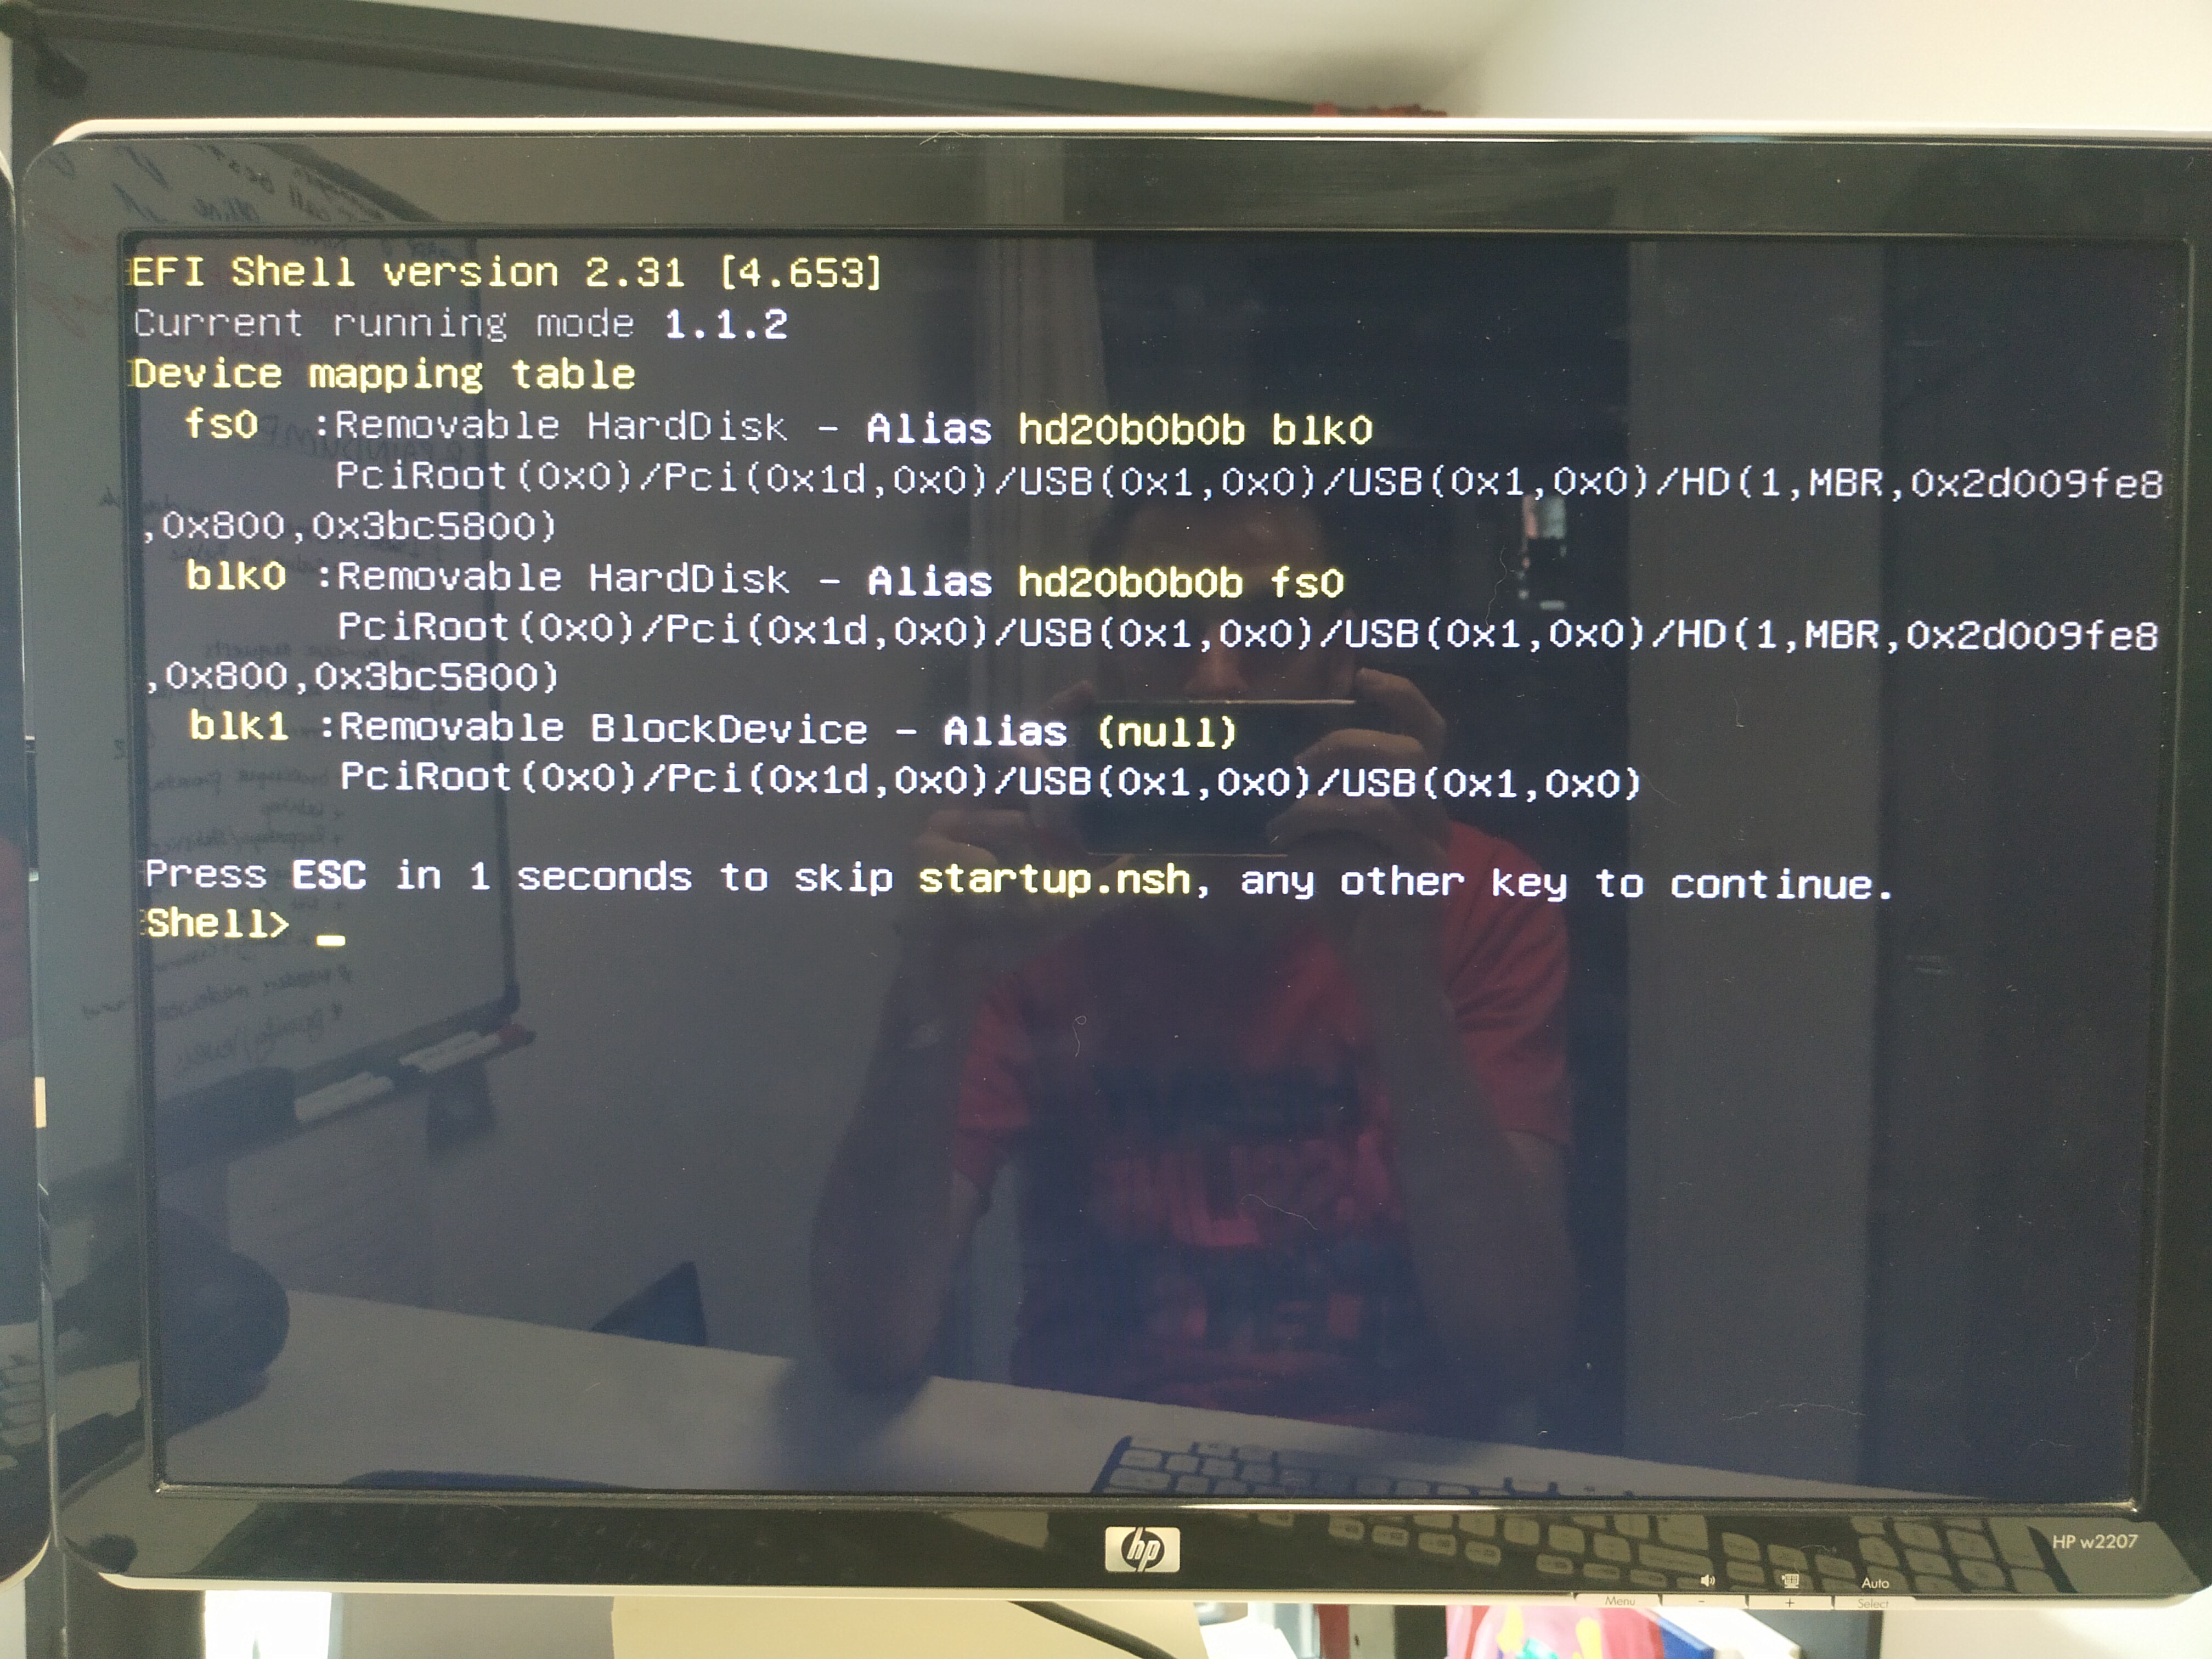
Reboot the server to EFI shell. This should be a setting in the BIOS of your motherboard.
-
Select the USB drive by typing, in my case,
fs0:. Typemap -bto get a list of devices if you don't see them. -
Flash the Dell HBA firmware:
sas2flash.efi -o -f 6GBPSAS.FW -
Enter the SAS number (change to the number -without spaces and dashes- you wrote down in step 2):
sas2flash_p19.efi -o -sasadd 500605Bxxxxxxxxx -
Reboot again back to EFI shell and flash the new firmware:
sas2flash.efi -o -f 2118it.bin -
You are done. Reboot.
-
¶ HP H220
Sources:
HP H220: [HOW-TO] Fix loud HP server fans with an HP H220 HBA installed
HP H220: HP firmware v13
-
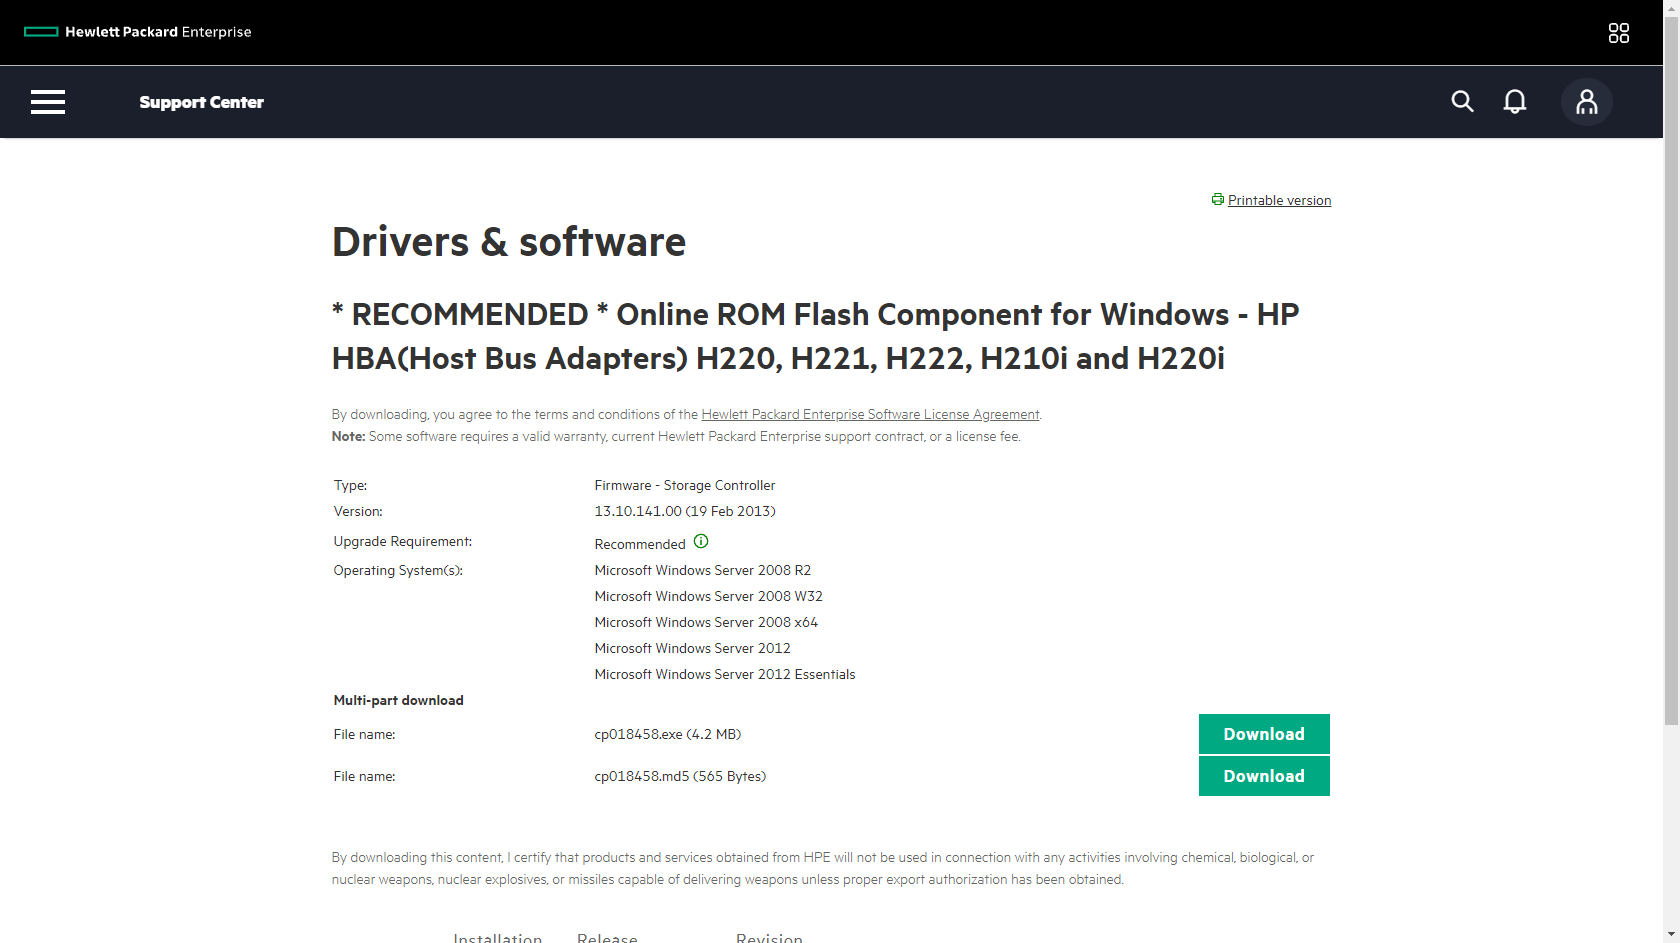
Download the version 13 of the firmware from the HP website.
-
Extract and copy files to the USB drive:
H220_it.fwandmptsas2.rom -
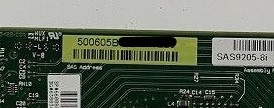
Find the SAS address of your card. This is very important!! Copy it from the label on the card. It should be something like "500605Bxxxxxxxxx". Or find it during the flashing procedure.
-
When booting in BIOS mode (my HP server only has BIOS):
-
Boot the server from USB. You should now see a DOS command line.
C:\>_ -
Type and run the following command to find the SAS number if you haven't done so in step 2.
sas2flsh.exe -listall -
Find the number of the card (0 if only one is installed) and use that number in the next command.
sas2flsh.exe -c 0 -list -
Write it down if you haven't done so already. This is very important!!
-
Run the next commands one by one to wipe the existing firmware:
sas2flsh.exe -o -e 7 -
Flash the new firmware and BIOS:
sas2flsh.exe -o -f H220_it.FW -b mptsas2.ROM -
Reboot the server to BIOS and enter the SAS number (change to the number -without spaces and dashes- you wrote down in step 2):
sas2flsh.exe -o -sasadd 500605Bxxxxxxxxx -
You are done. Reboot.
-
¶ IBM M1115
Sources:
M1015: https://www.servethehome.com/ibm-serveraid-m1015-part-4/
M1115: https://blog.gimpe.com/2014/04/flashing-ibm-m1115-sas-9223-with-lsi-sas-9211-8i-firmware-to-use-with-esxi-5-freenas-guest-wrdm/
M1115: https://www.syxin.com/2014/03/crossflashing-an-ibm-m1115-raid-controller-to-lsi-firmware/
-
Download the latest firmware from the
LSIAvagoBroadcom website.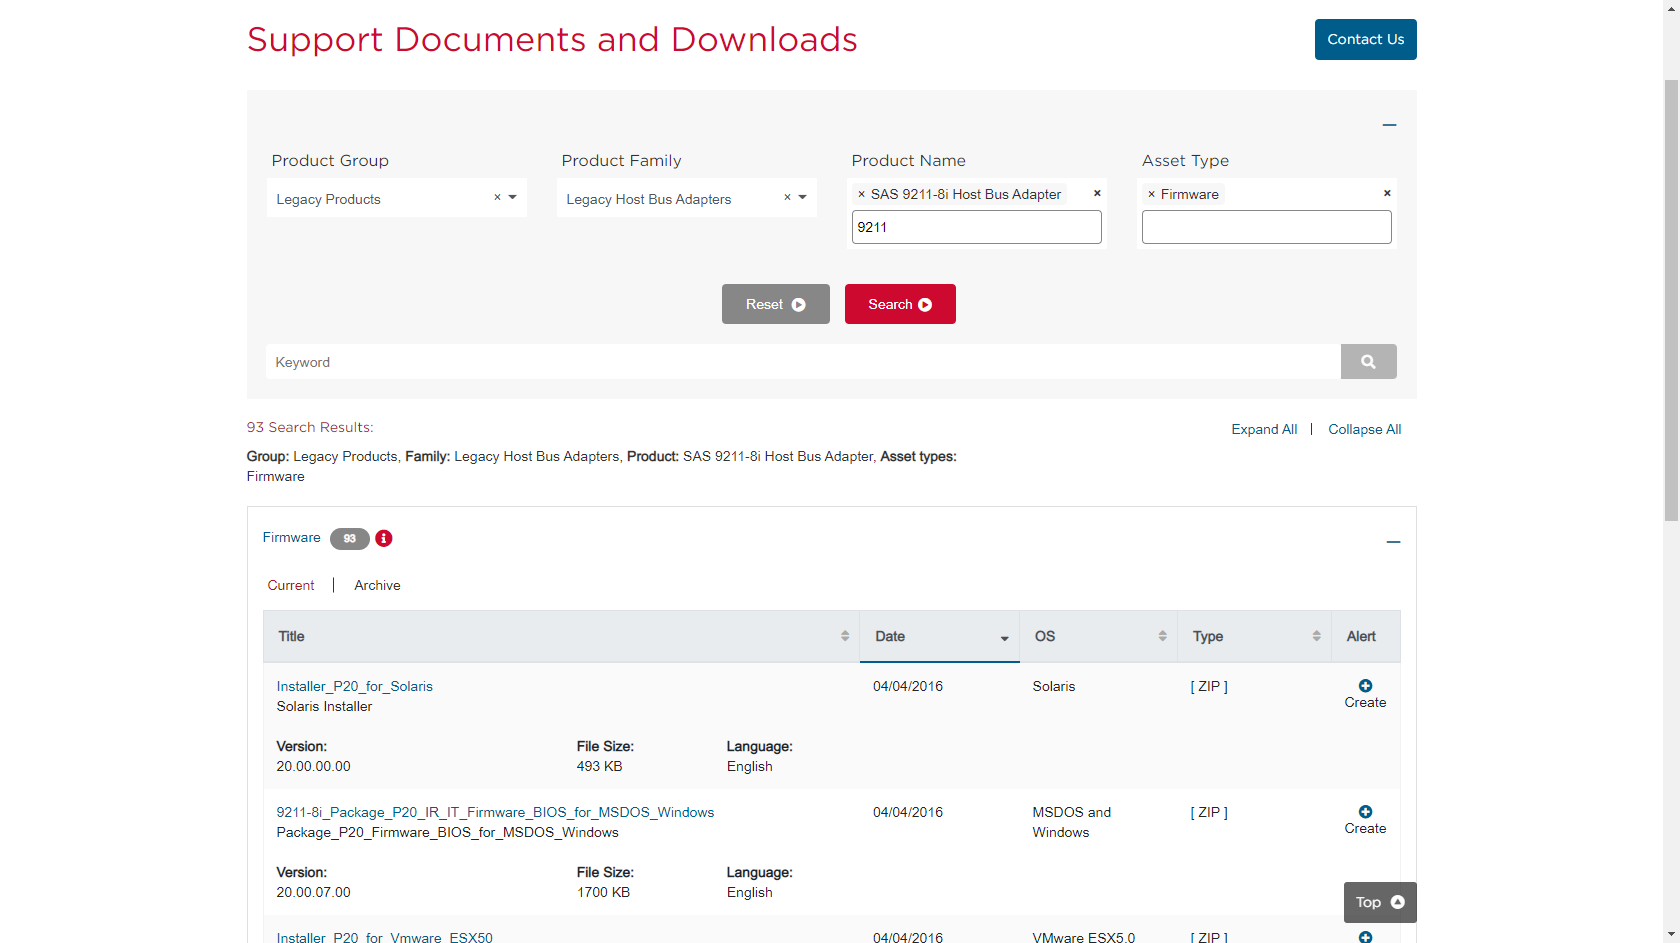
-
Extract and copy files to the USB drive:
Firmware\HBA_9211_8i_IT\2118it.bin,sasbios_rel\mptsas2.romandsas2flash_dos_rel\sas2flsh.exe -
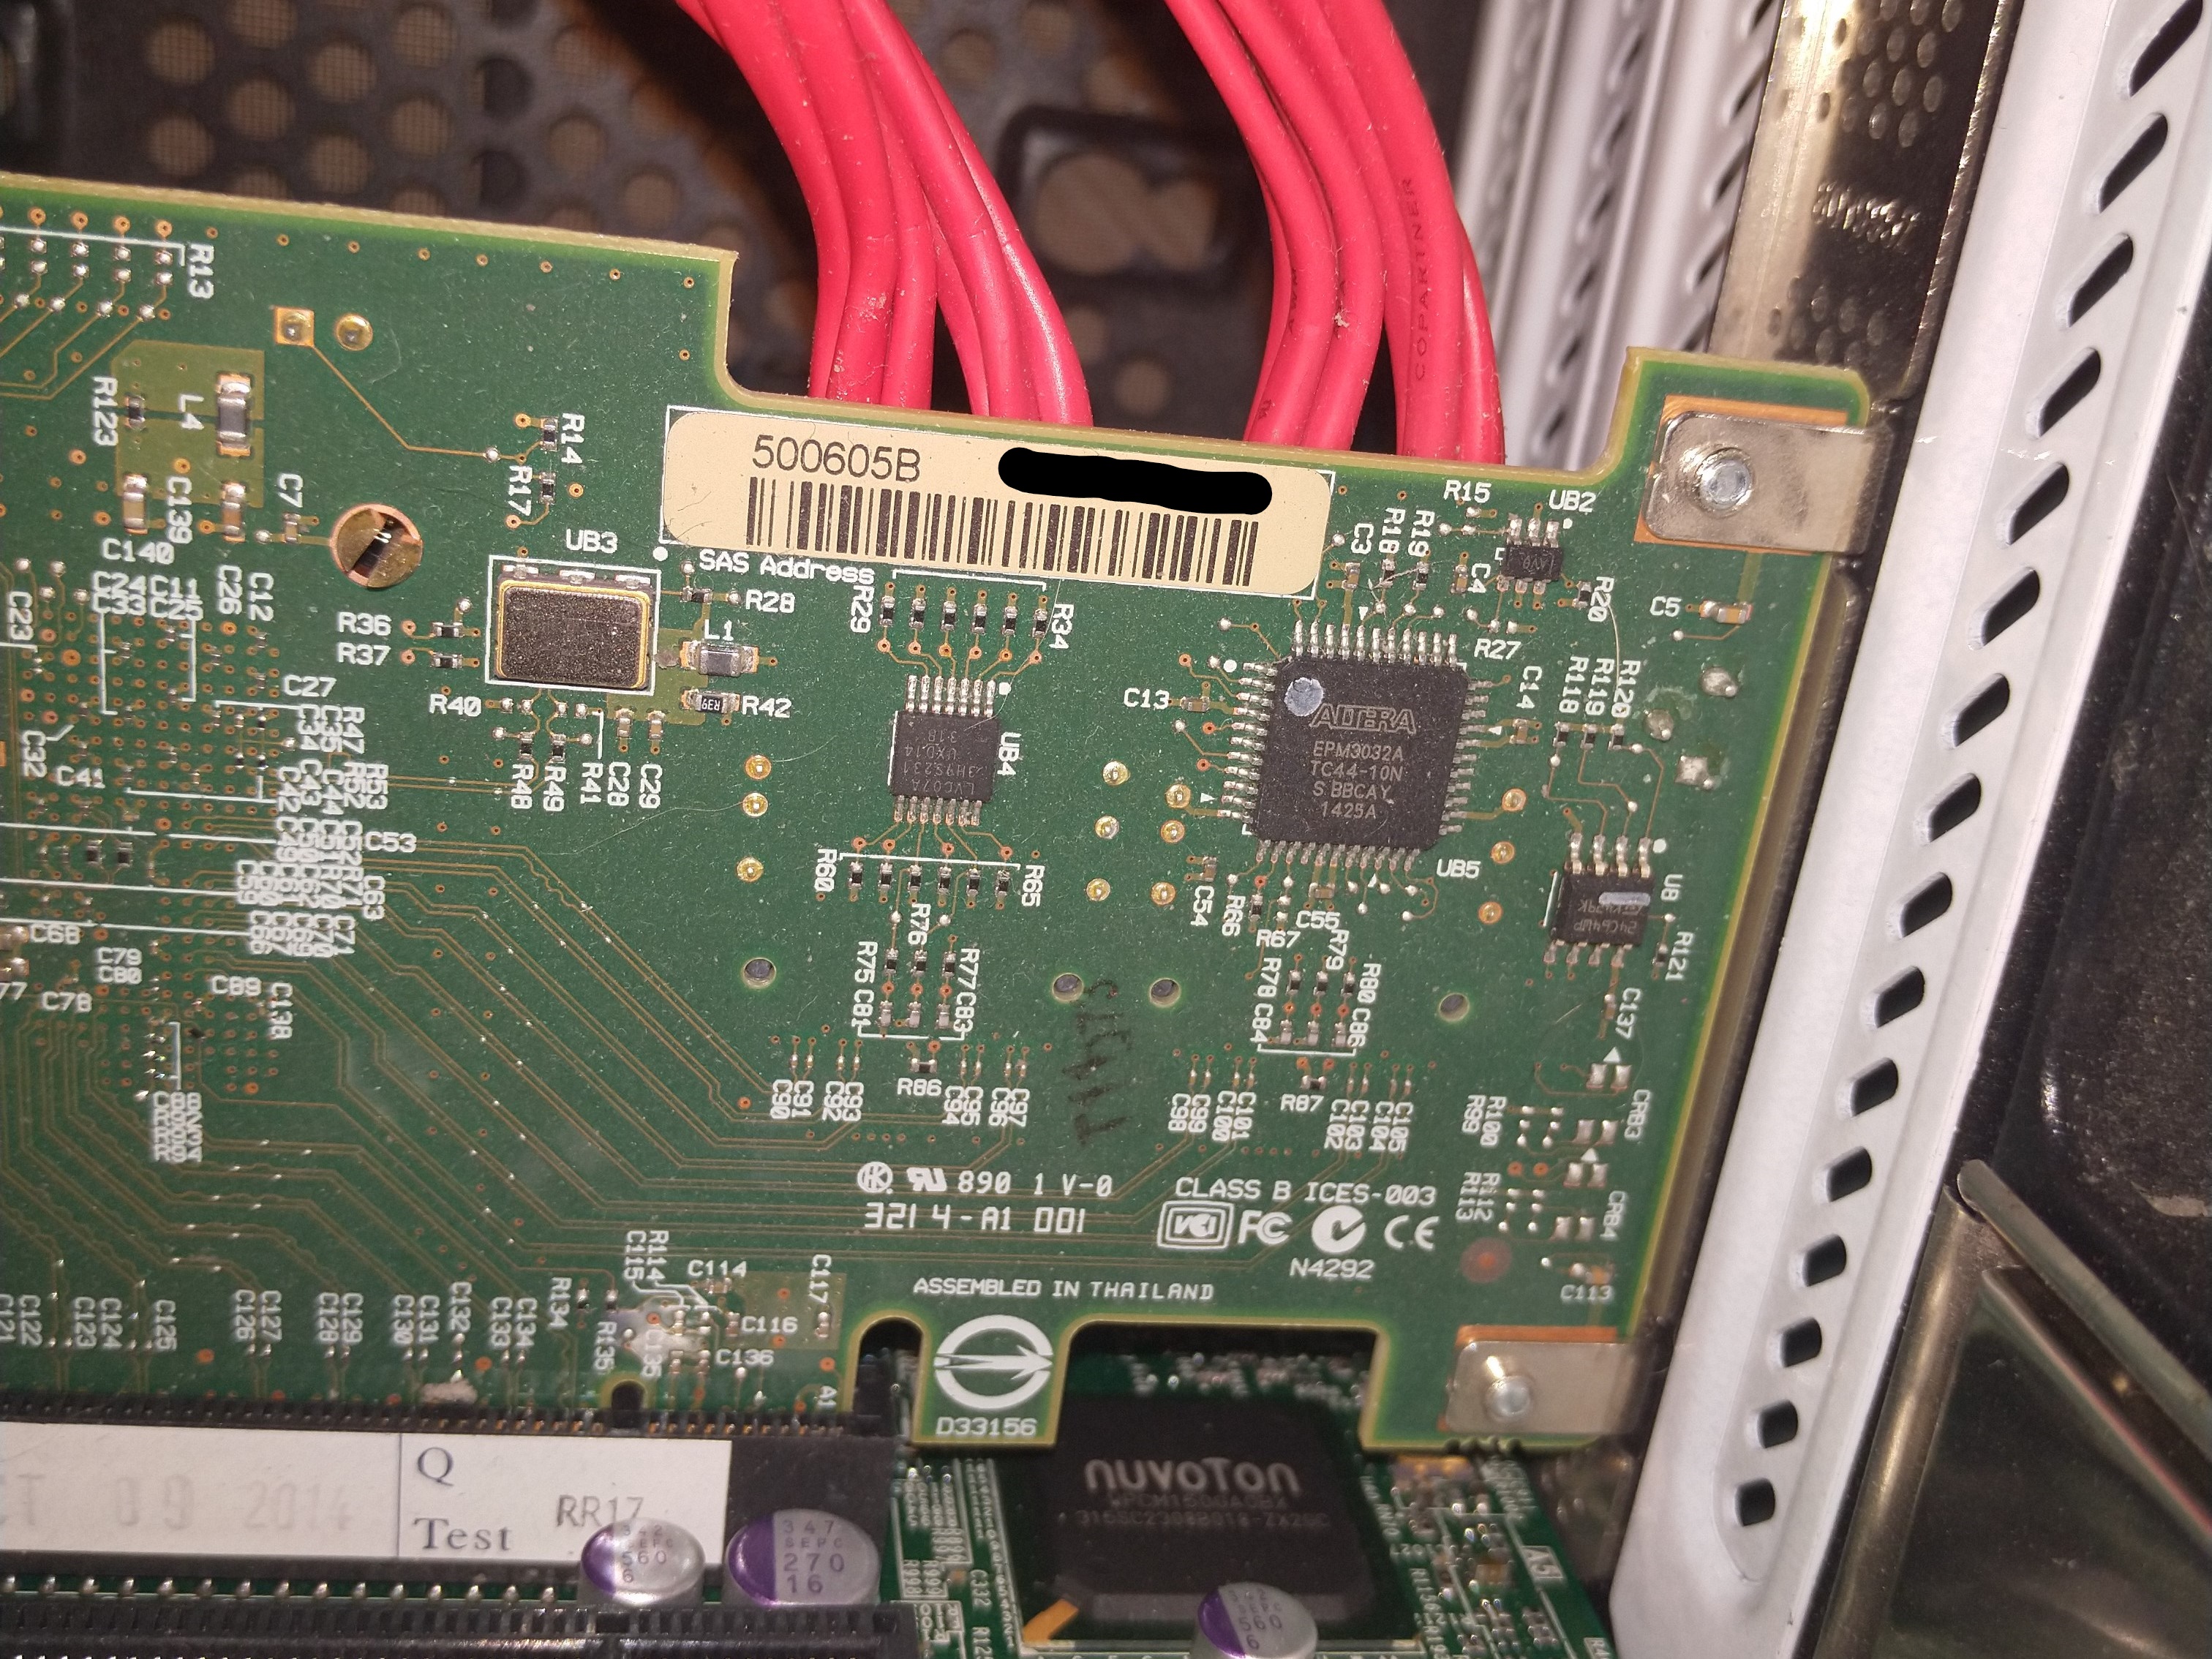
Find the SAS address of your card. This is very important!! Copy it from the label on the card. It should be something like "500605B xxxxxxxxx". Or find it during the flashing procedure.
-
When booting in BIOS and UEFI mode:
-
Boot the server from USB. You should now see a DOS command line.
C:\>_ -
Type and run the following command to find the SAS number if you haven't done so in step 2.
sas2flsh.exe -listall -
Find the number of the card (0 if only one is installed) and use that number in the next command.
sas2flsh.exe -c 0 -list -
Write it down if you haven't done so already. This is very important!!
-
If you get
"ERROR: Failed to initialize PAL. Exiting program.", your motherboard is set to use UEFI and you have to flash using the EFI shell: see step 6.
-
BIOS mode:
-
Run the next commands one by one to wipe the existing firmware:
megarec.exe -writesbr 0 sbrempty.bin megarec.exe -cleanflash 0 -
Reboot back to USB and flash with the new firmware and BIOS (you do not have to flash the rom if you will be using the HBA for TrueNAS, cut
-b mptsas2.romfrom the command).sas2flsh.exe -o -f 2118it.bin -b mptsas2.rom -
Enter the SAS number (change to the number -without spaces and dashes- you wrote down in step 2):
sas2flsh.exe -o -sasadd 500605Bxxxxxxxxx -
You are done. Reboot.
-
-
UEFI mode:
-
Copy
bootx64.efifrom the full archive to the USB stick. -
Reboot the server to EFI shell. This should be a setting in the BIOS of your motherboard.

-
Select the USB drive by typing, in my case,
fs0:. Typemap -bto get a list of devices if you don't see them. -
Type and run the following command to find the SAS number if you haven't done so in step 2.
sas2flash.efi -listall -
Find the number of the card (0 if only one is installed) and use that number in the next command.
sas2flash.efi -c 0 -list -
Write it down if you haven't done so already. This is very important!!
-
Reboot to DOS and run the next commands one by one to wipe the existing firmware:
megarec.exe -writesbr 0 sbrempty.bin megarec.exe -cleanflash 0 -
Reboot back to EFI shell and flash the new firmware and BIOS (you do not have to flash the
.romif you will be using the HBA for TrueNAS, cut-b mptsas2.romfrom the command).sas2flash.efi -o -f 2118it.bin -b mptsas2.rom -
Enter the SAS number (change to the number -without spaces and dashes- you wrote down in step 2):
sas2flash.efi -o -sasadd 500605B0xxxxxxxx -
You are done. Reboot.
-
¶ Installation
¶ Create a VM for TrueNas
-
Click on "local (pve)" on the left. Select "ISO Images" and click "Upload". Upload the TrueNas image.
-
Create a VM. Open the link in a new tab or window and follow the instructions. Use values below in the create VM steps.
-
General: select Start at boot and optionally set Start/Shutdown order.
-
OS: set the Guest OS Type to "Other" and select the TrueNAS image as ISO image.
-
System: set Machine to
q35and enable Qemu agent. Leave other values at default setting. -
Disks: select SCSI as Bus/Device and set the Disk size to 8-16 GB. Select the Discard option and SSD emulation (if installing on SSD). Add two additional disks, the first will be SLOG, the second L2ARC:
- SLOG: 16G, select Discard option and SSD emulation, unselect Backup
- L2ARC: 200G, select Discard option and SSD emulation, unselect Backup
-
CPU: set the number of Sockets to the number of physical CPU's your server has (1 in my case) then set the number of Cores (6) and VCPUs (6). The number of vCPU's = Sockets x Cores. Set Type to
hostand select Enable NUMA if the host machine has multiple sockets. Lastly set "extra CPU Flag" aes to on. -
Memory: TrueNAS with ZFS loves RAM so set is as high as possible. Setting a minimum is of no use here as TrueNAS (ZFS) will take everything it can: disable Ballooning Device.
-
Network: Select the network Bridge that should be used by TrueNAS and select "VirtIO" as model.
-
¶ Install TrueNas
-
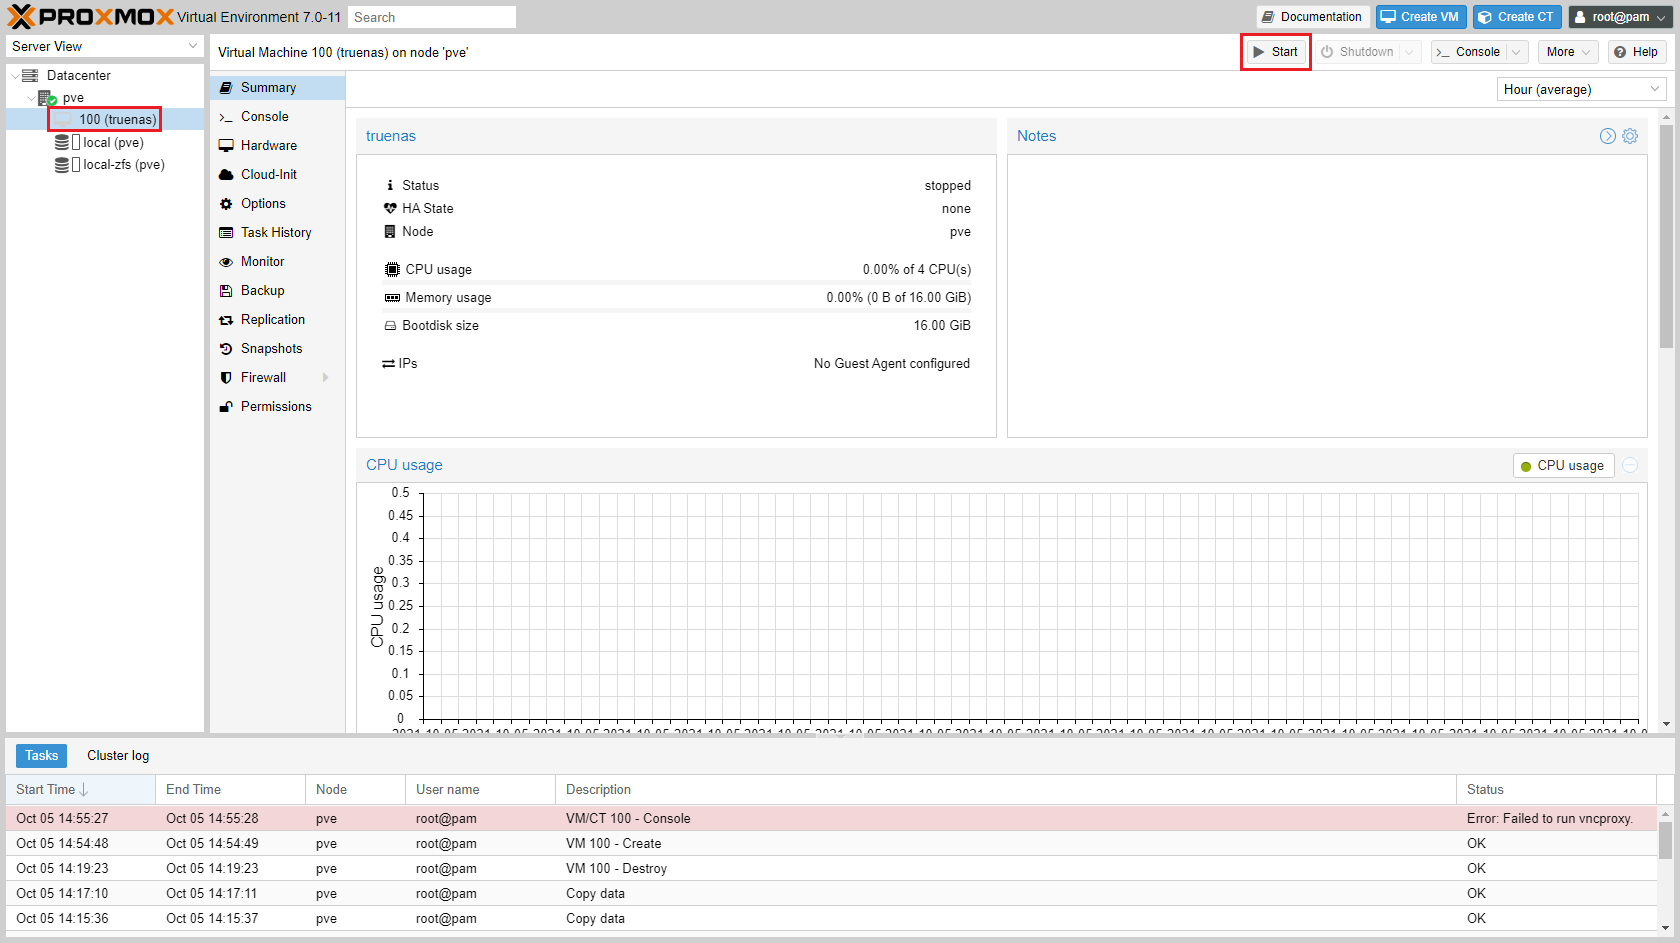
Go to the VM and start it.
-
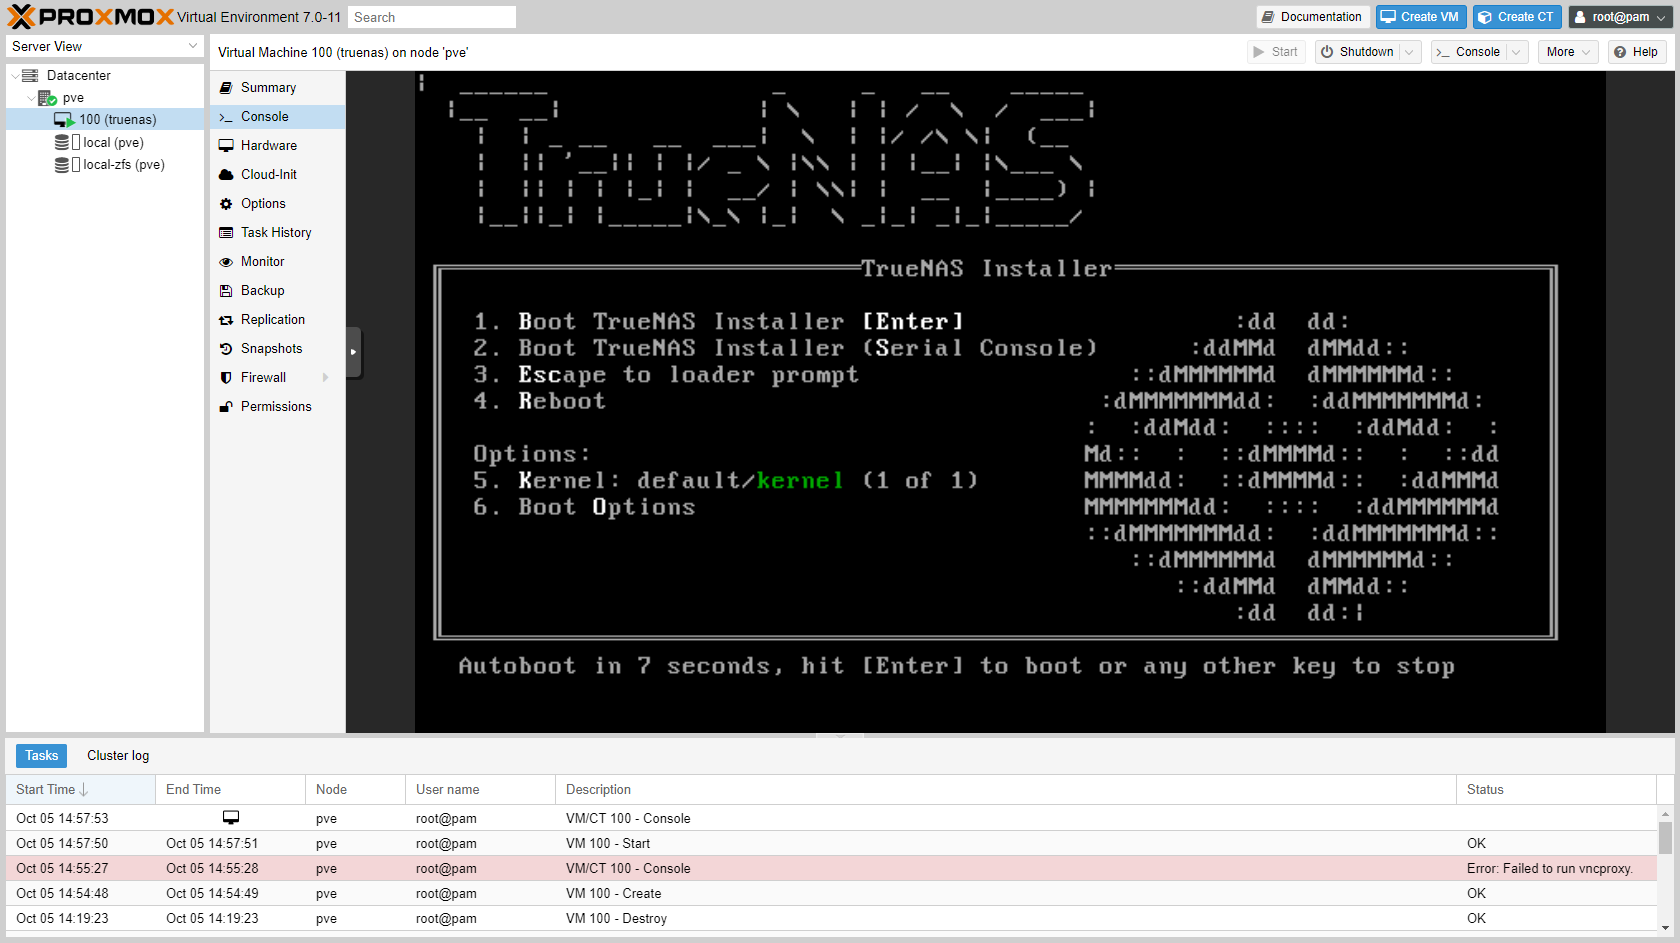
Open the console and the installer should be started.
-
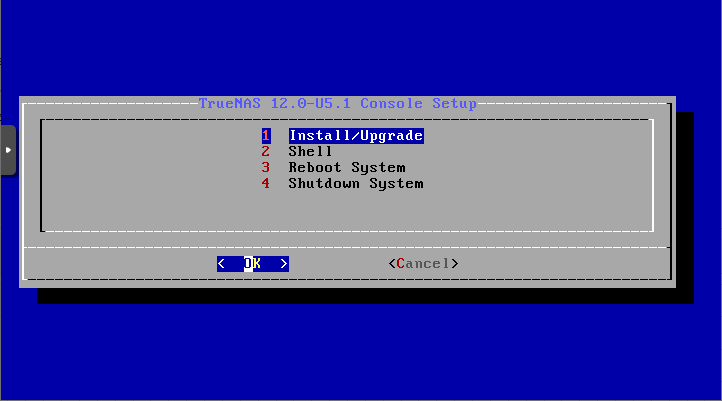
Select "Install/Upgrade" and press 'enter' to continue.
-
Press 'space' to select virtual harddisk
da0and 'enter' to continue.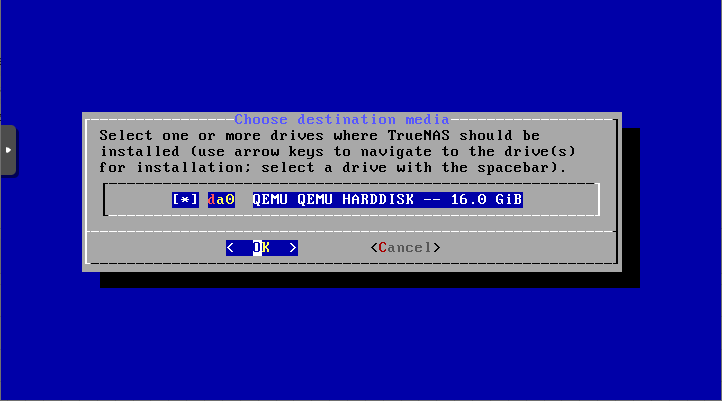
-
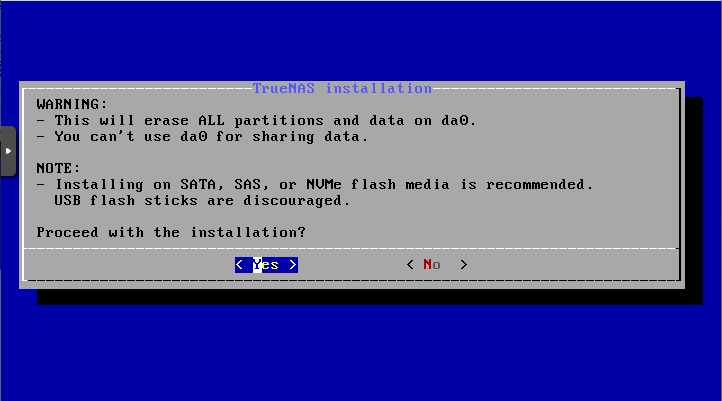
You will get a warning. Press 'enter' to continue.
-
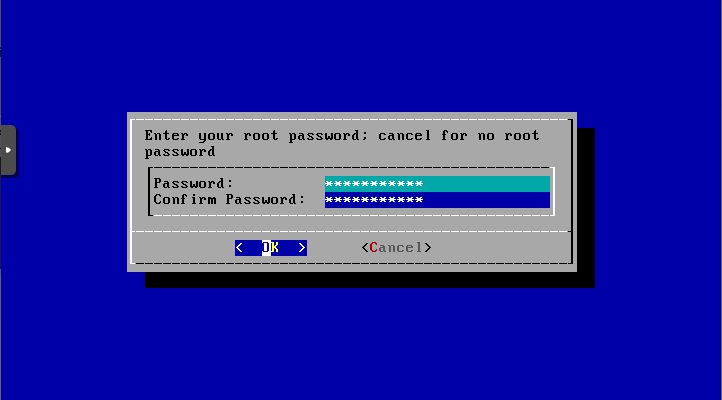
Enter a password.
-
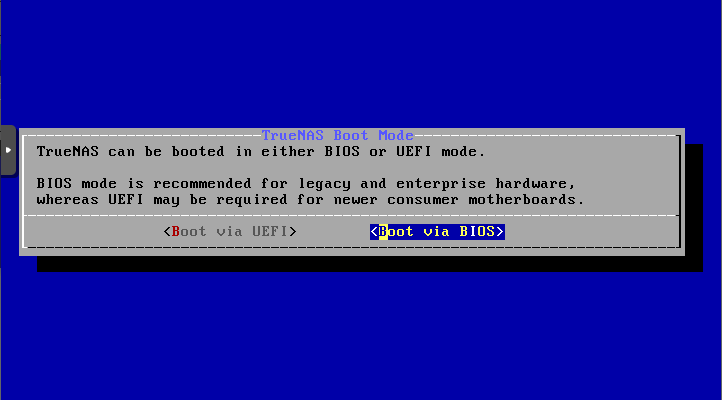
Choose to boot via BIOS.
-
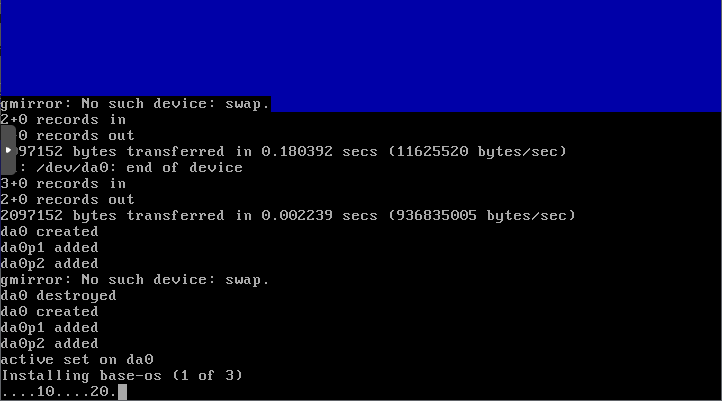
Installation will start. Depending on the underlying harddisk type this can take a few minutes.
-
When installation is done reboot the system.
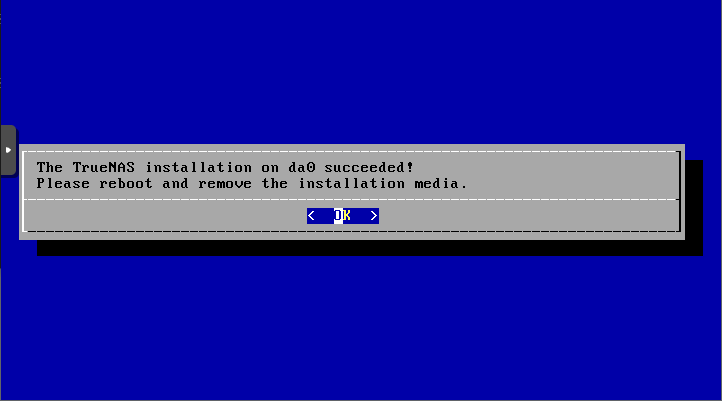
Although the installer asks to remove the installation medium, do not do this. After removing, the reboot "button" does not work anymore. You can always remove it later using the Proxmox GUI.
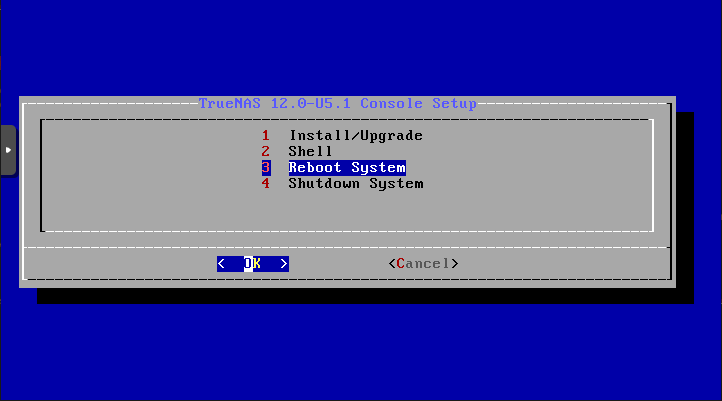
-
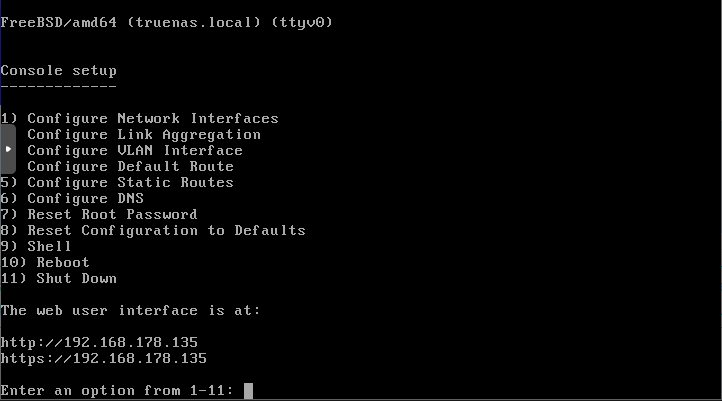
After reboot you can login using the WebGUI. The address will be displayed in the console.
¶ Add storage disks
The best way to add storage disks to TrueNAS is by passing a HBA straight to the VM. In How to enable PCIe passthrough in Proxmox you can read how to enable this in Proxmox. If you have enabled passthrough, you can continue.
-
Shutdown the VM.
-
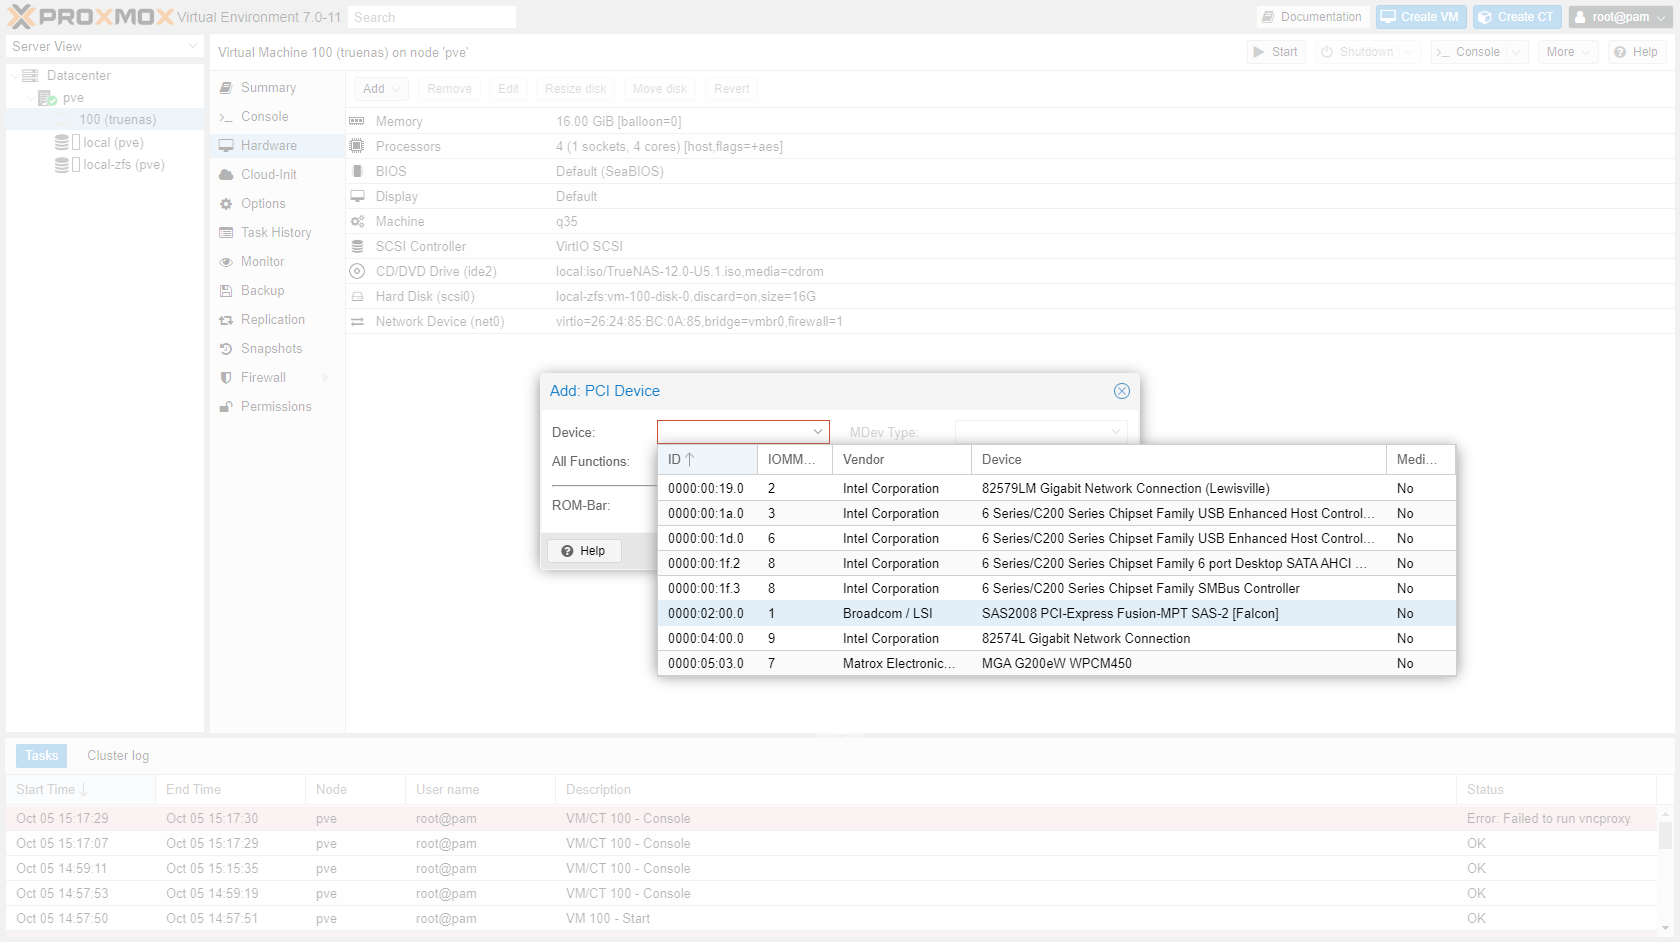
Add the HBA as a PCI Device to the VM. Select the correct device and select "All functions".
-
Start the VM. The HBA will be booted inside the VM.
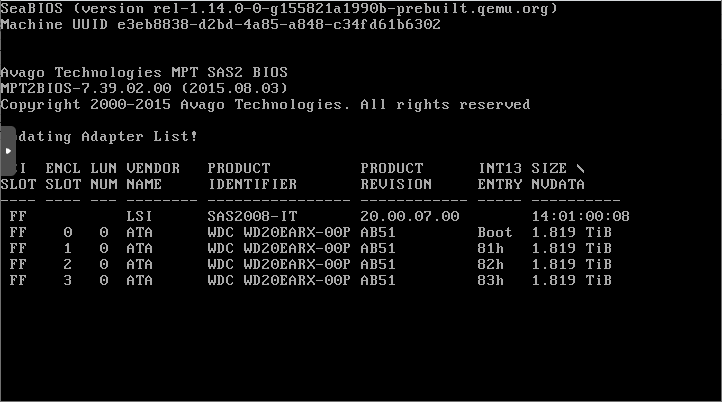
Initially when I added the PCIe HBA, TrueNAS inserted the drives attached to the HBA in front of the OS disk. During boot the VM wanted to boot from a HBA drive instead of the virtual OS drive. After disabling the boot option of the HBA TrueNAS booted fine. To disable the boot option on a LSI card, you have to erase the BIOS.
¶ Configuration
¶ Create a storage pool
Sources:
https://www.servethehome.com/an-introduction-to-zfs-a-place-to-start/
https://arstechnica.com/information-technology/2020/05/zfs-101-understanding-zfs-storage-and-performance/
https://www.truenas.com/community/threads/slideshow-explaining-vdev-zpool-zil-and-l2arc-for-noobs.7775/
https://www.digistor.com.au/the-latest/Whether-RAID-5-is-still-safe-in-2019/
You have TrueNAS for storage, so the first thing you want to do is create a storage pool. This is a set off disks grouped together to store data. Obviously this is an oversimplification. Read this article for a more in depth introduction into how ZFS works.
-
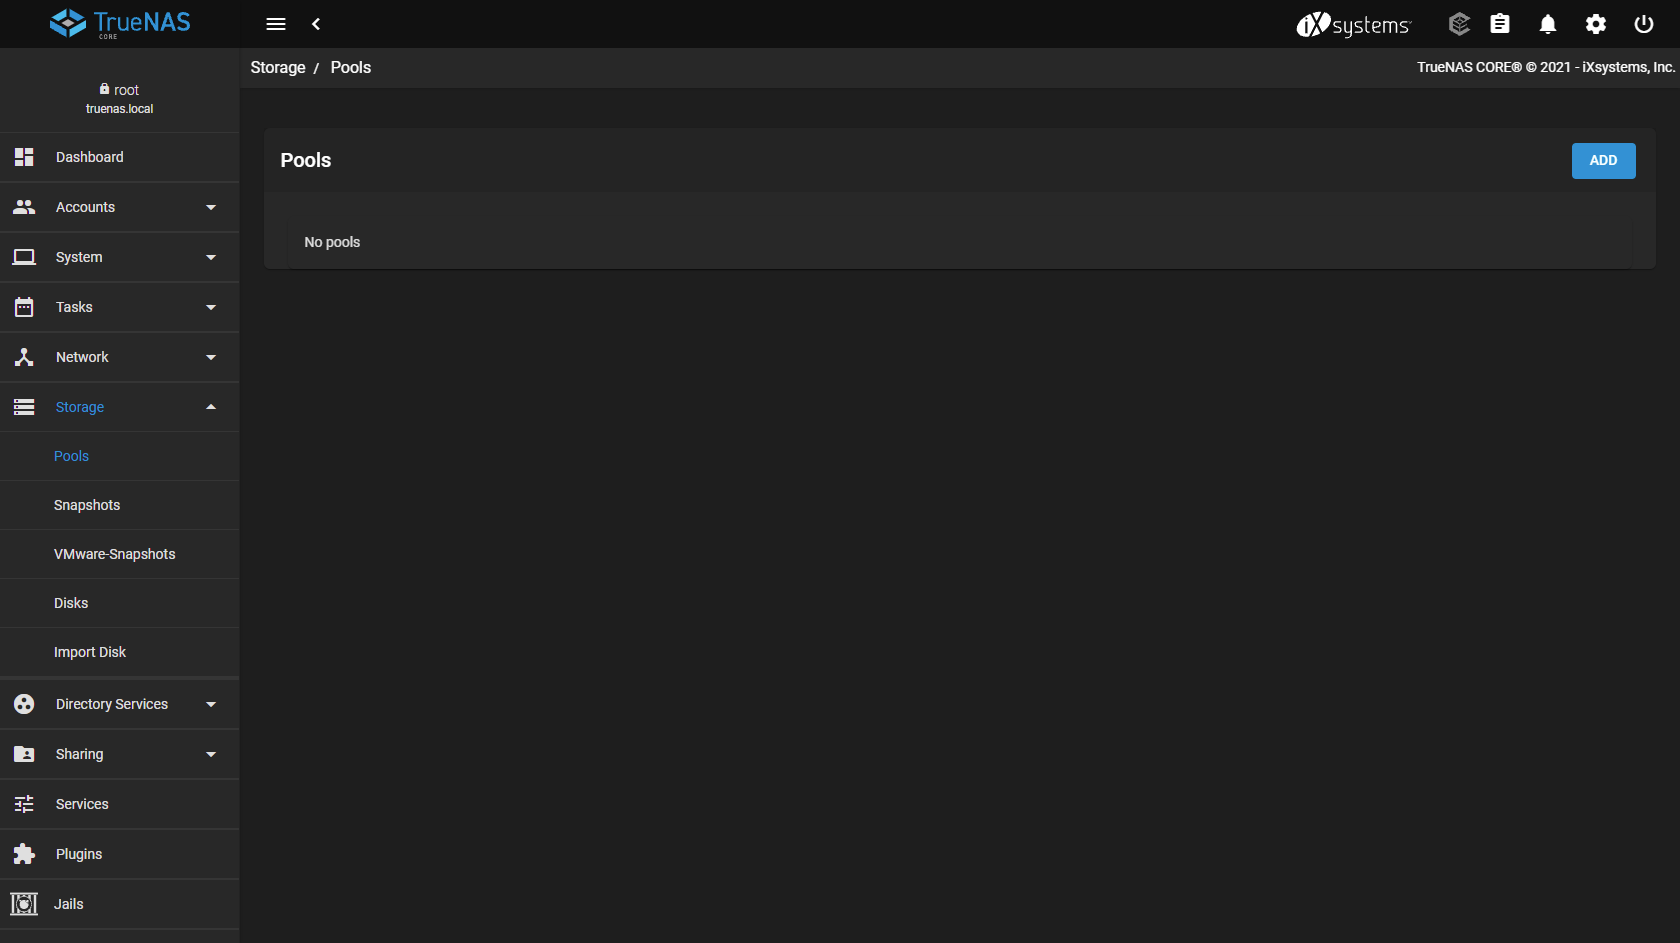
Open the TrueNAS WebGUI and go to "Storage".
-
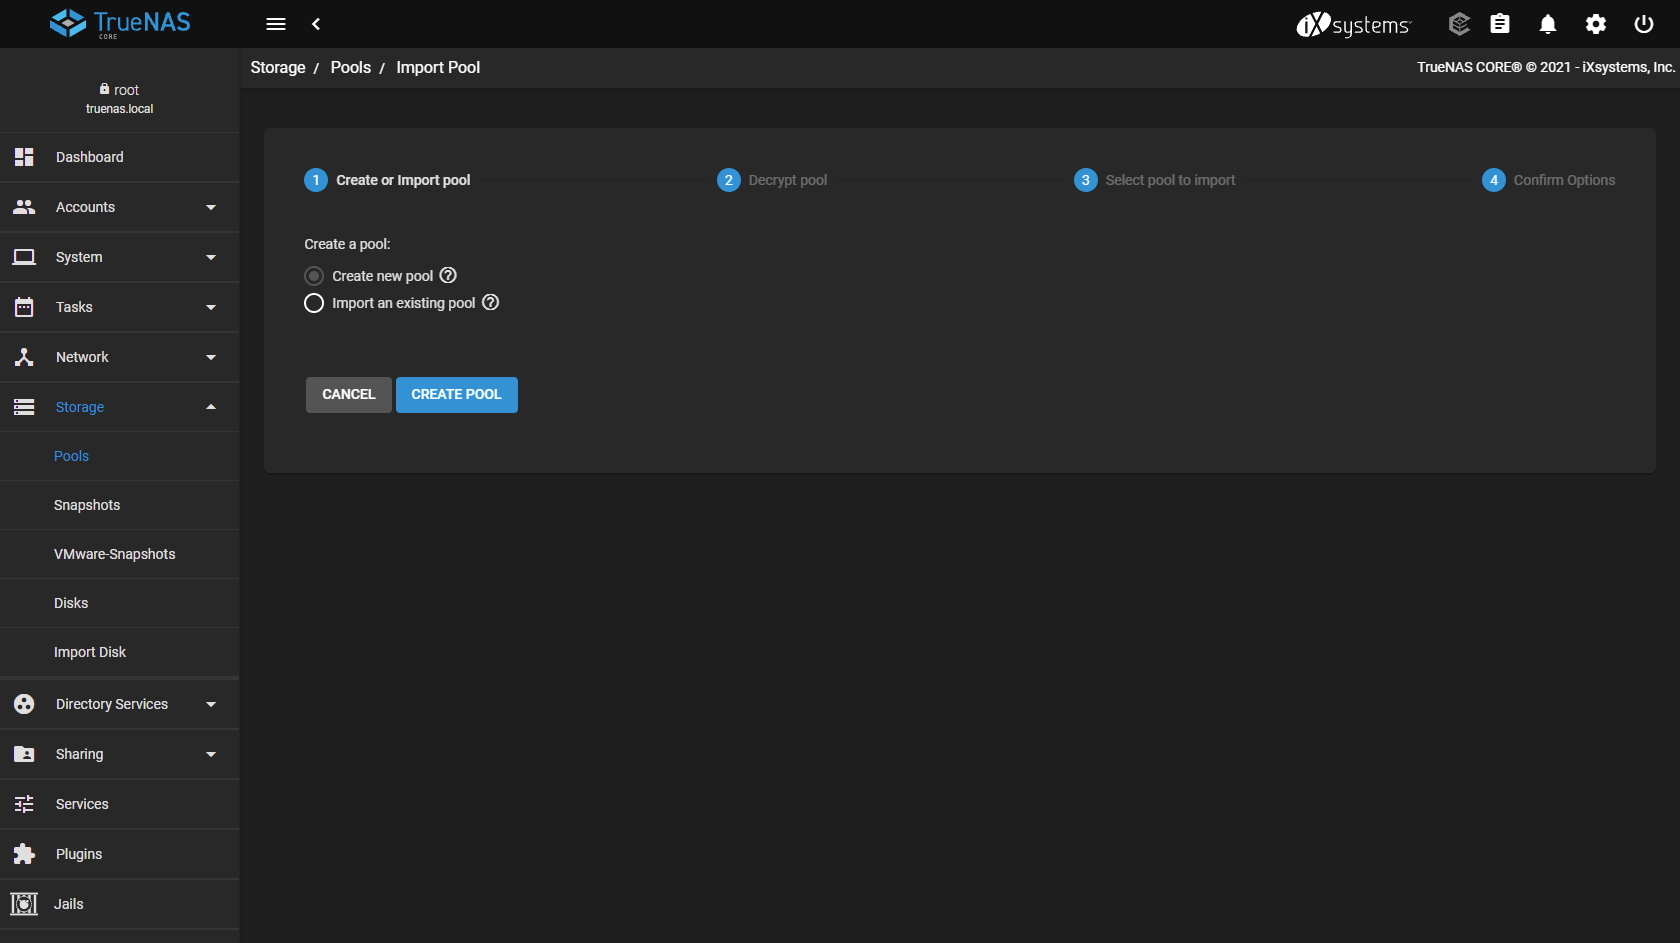
Click "Add" and in the new window click "Create Pool".
-
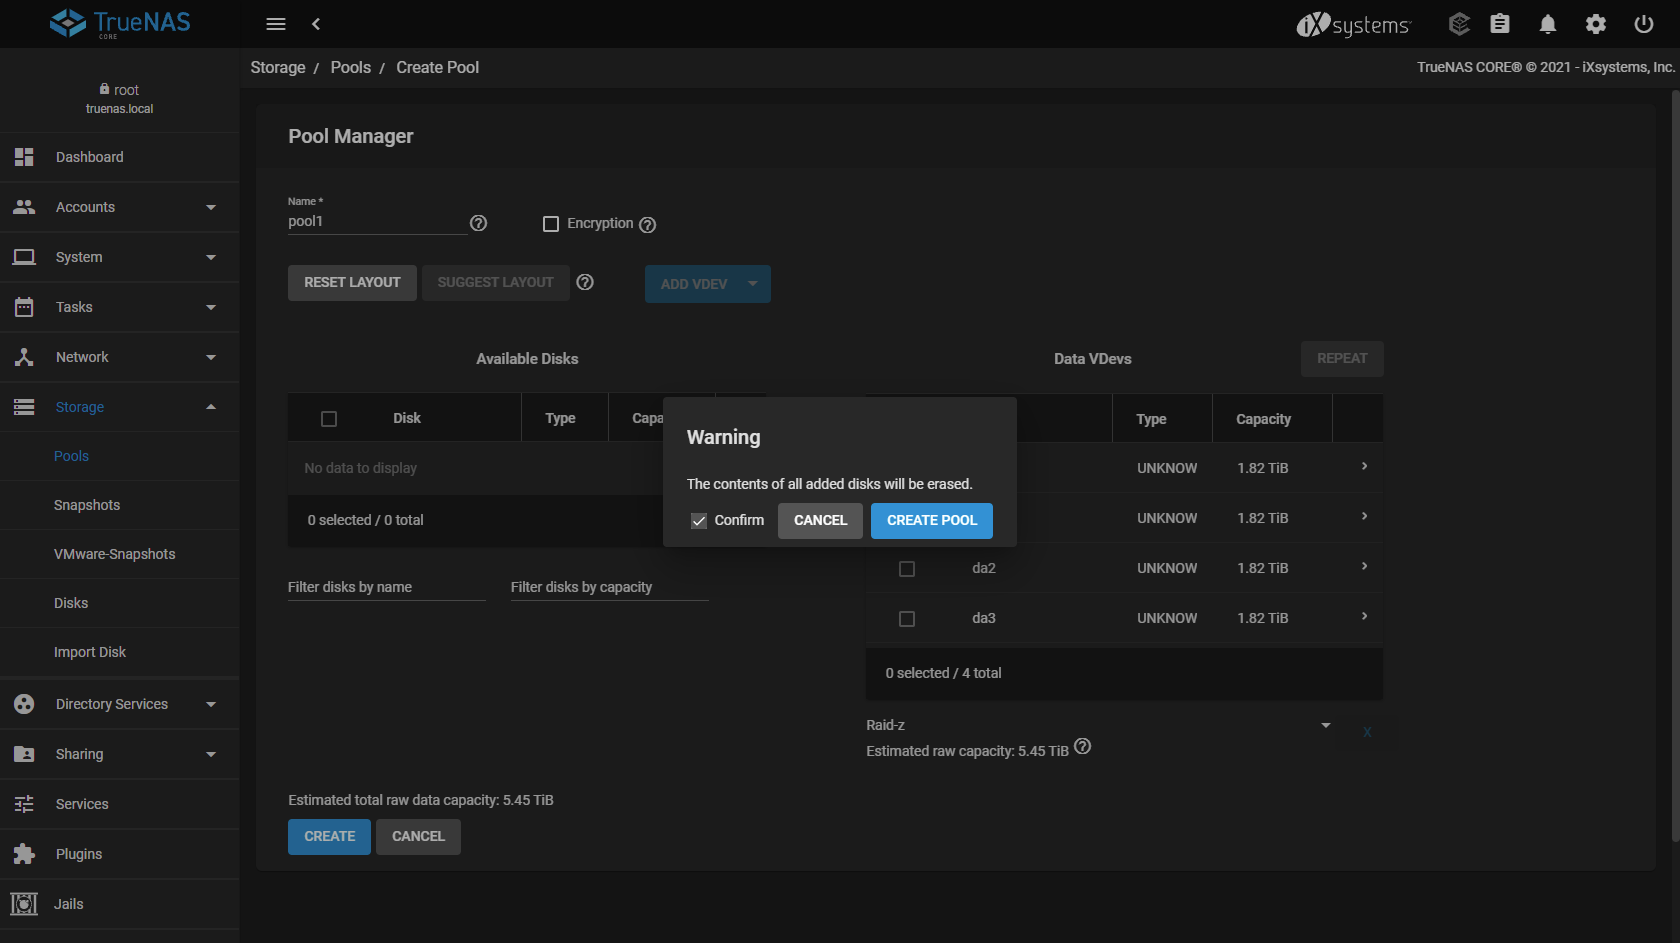
Give the pool a name (
pool1) and select the disks you planned to use for data storage. In this example I have 4 2TB disks that I combine in a single RAID-Z VDev. Keep in mind that this is not recommended (anymore) and you probably want to use (more disks) with RAID-Z2.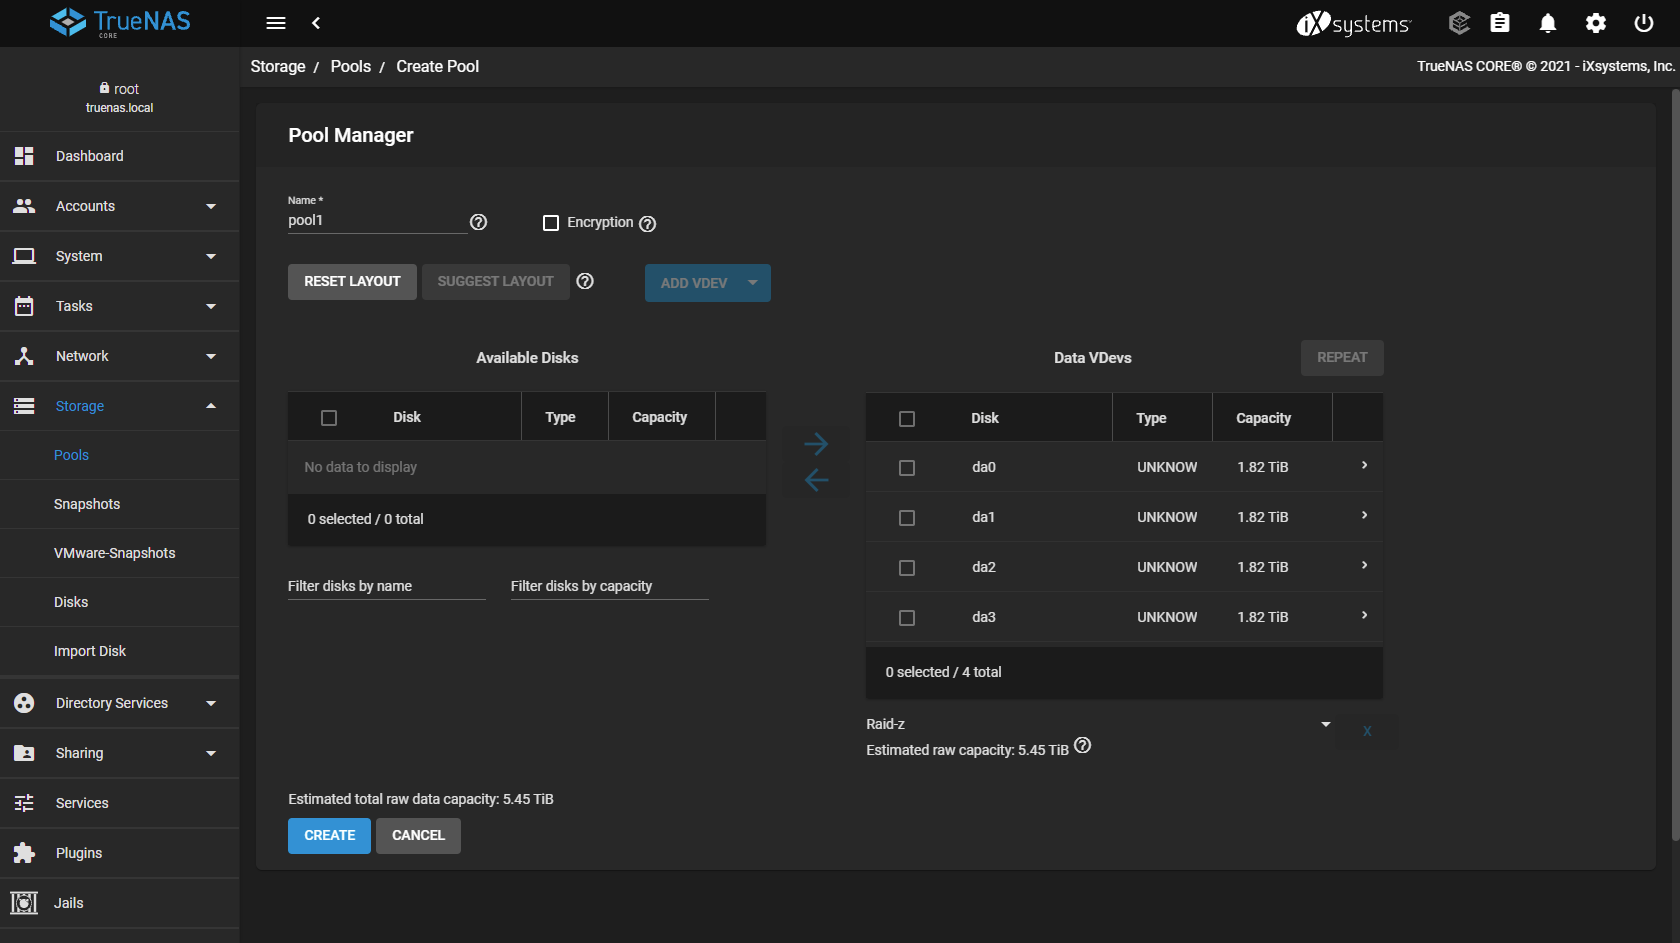
-
Now also add the 16G virtual disk as SLOG and the 200G virtual disk as L2ARC. To set this type, click the "ADD VDEV" button and select the appropriate one.
-
Confirm that you want this pool to be created.
-
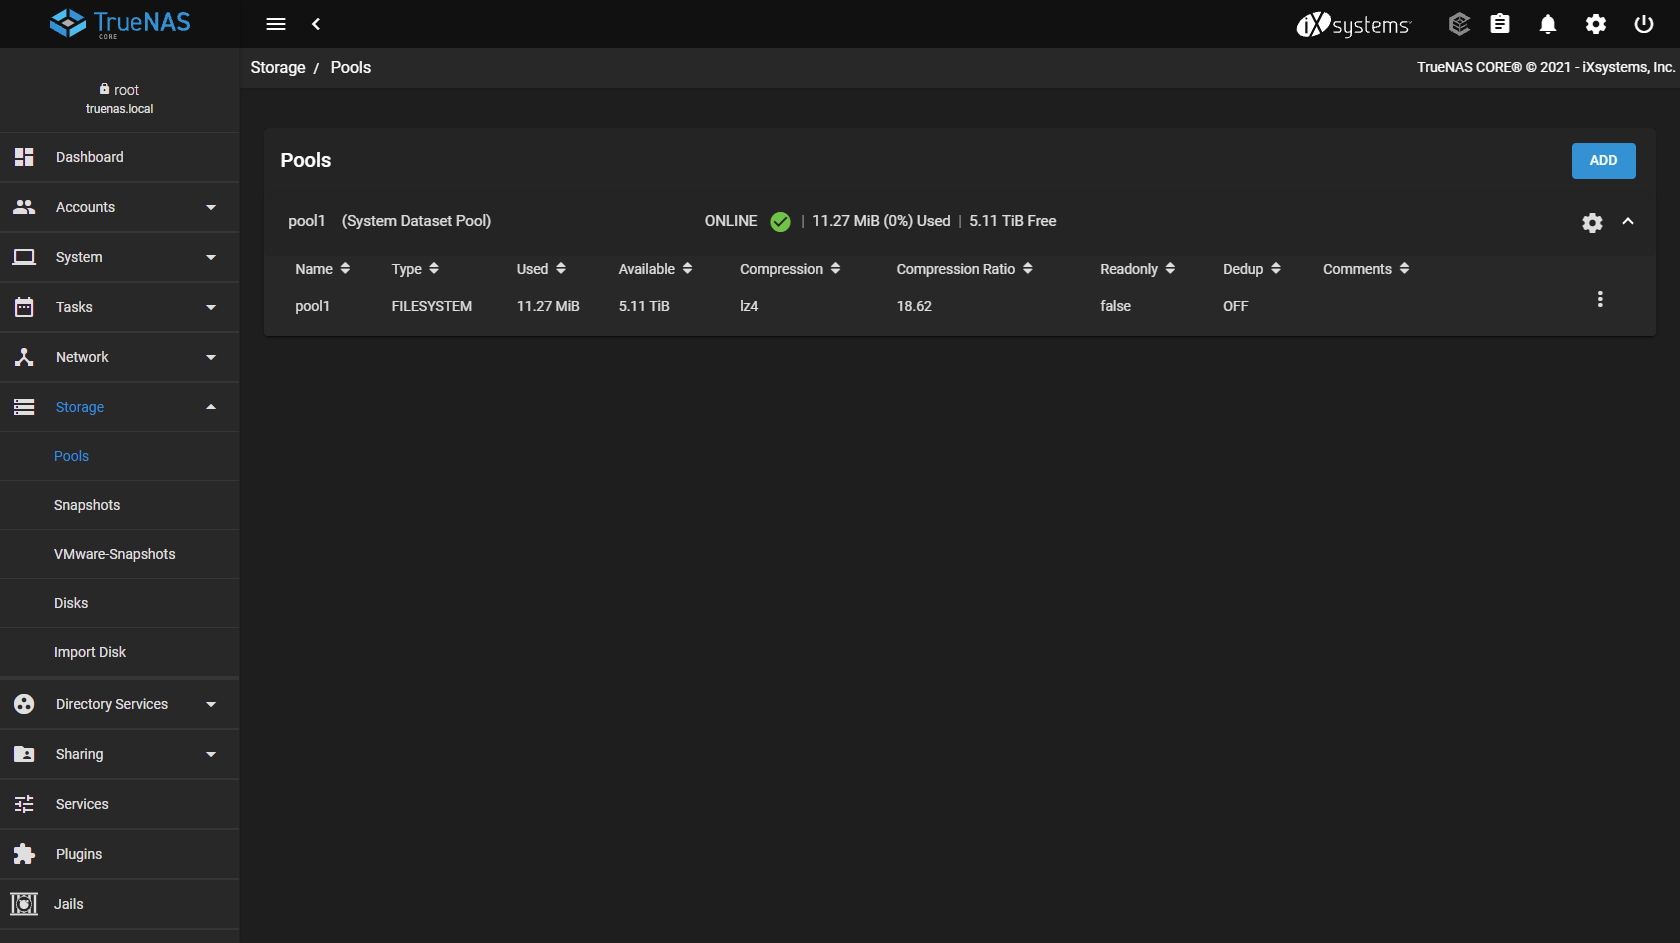
You now have a storage pool.
¶ S.M.A.R.T. Checks and Scrubs
Sources:
https://www.truenas.com/community/threads/scrub-and-smart-testing-schedules.20108/
https://yadafaber.com/scrub-and-smart-testing-schedules-for-freenas/
Now that your storage pool is up, you have to keep track of the health of that pool and the underlying disks. This can be done by scheduling regular S.M.A.R.T. tests to check the health of your disks and schedule "scrubs" to check the health of your pool (data) and correct errors. Read more about the specifics in this thread on the TrueNAS forums.
¶ S.M.A.R.T. checks
-
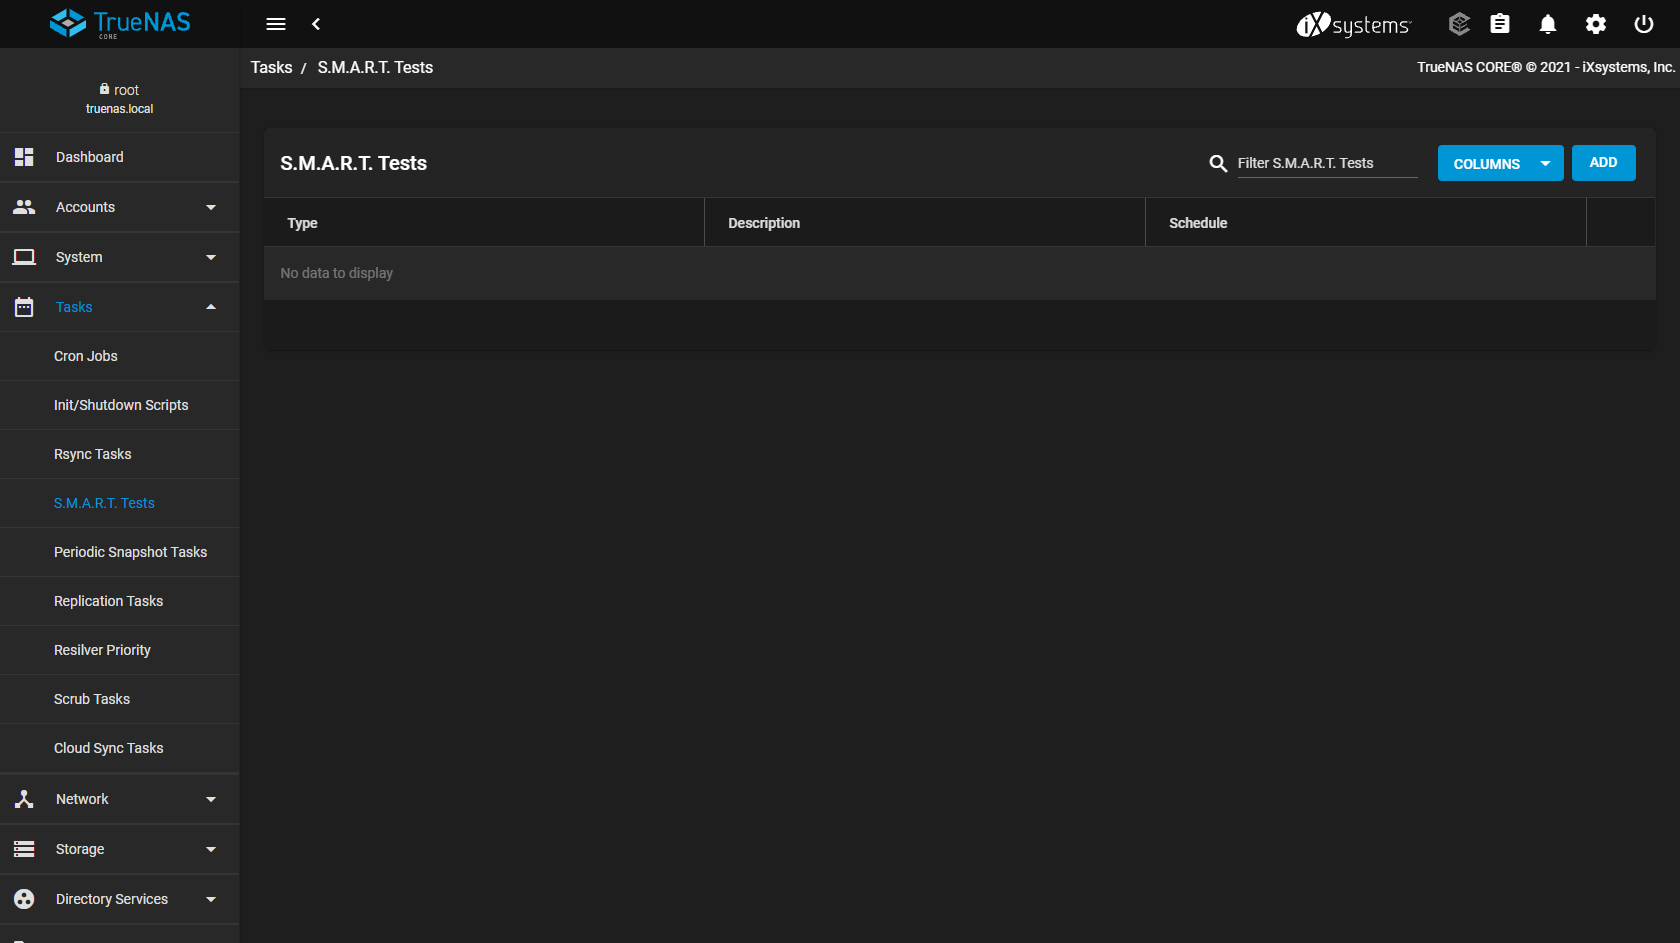
Go to "Tasks" -> "S.M.A.R.T. Tests" and click the "Add" button.
-
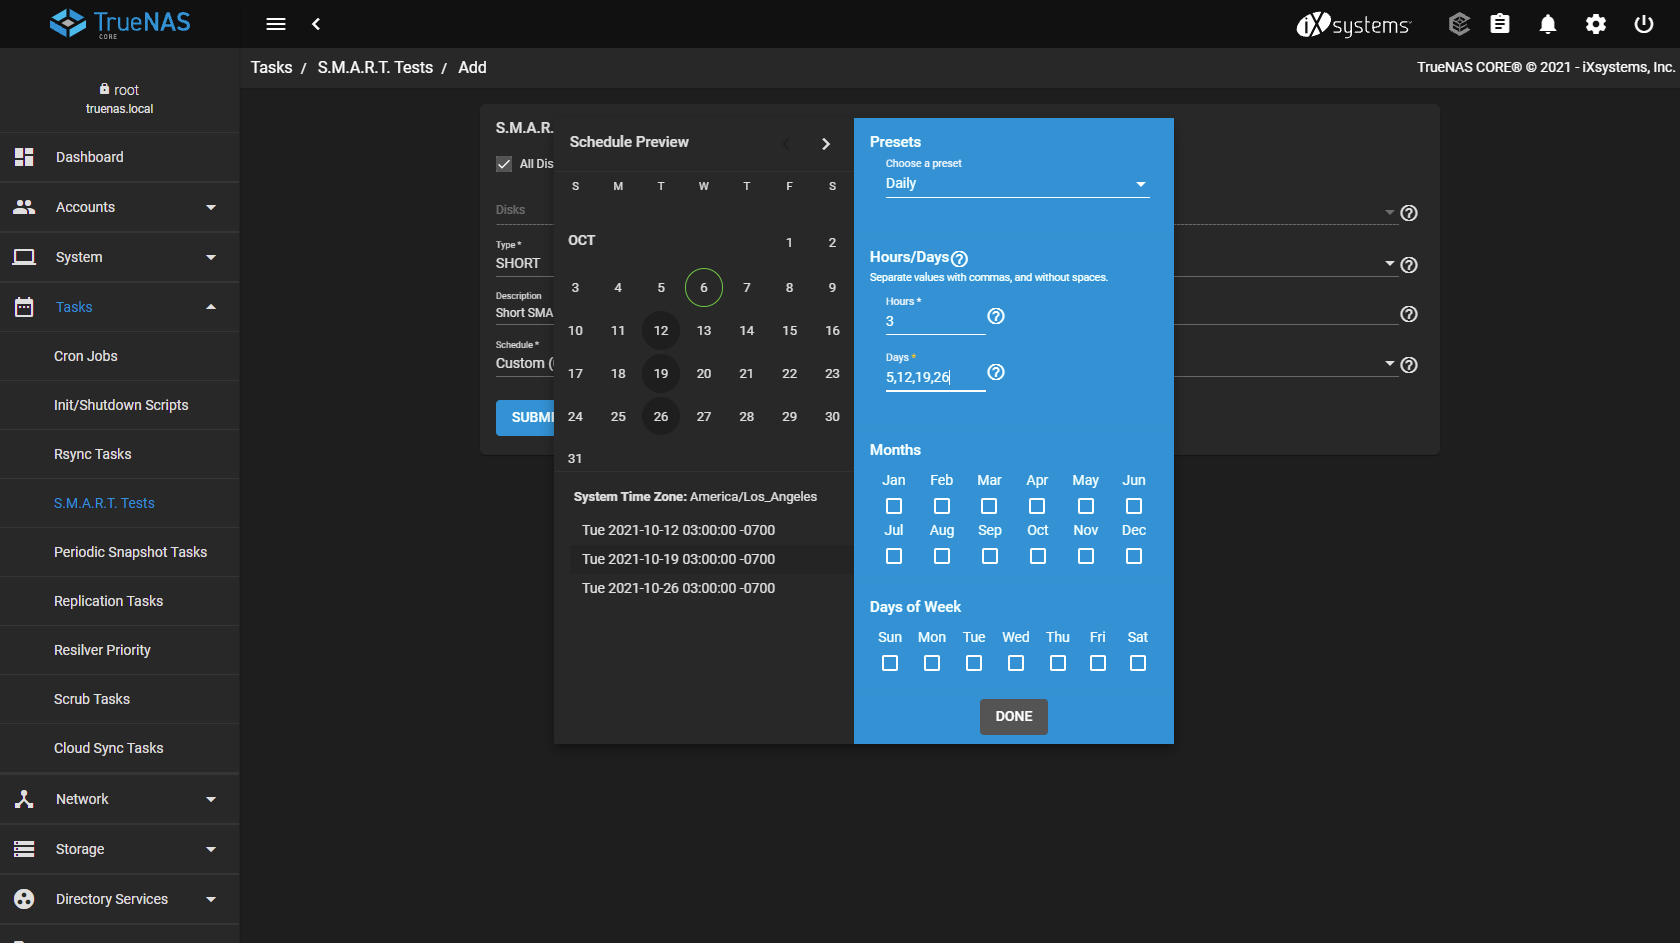
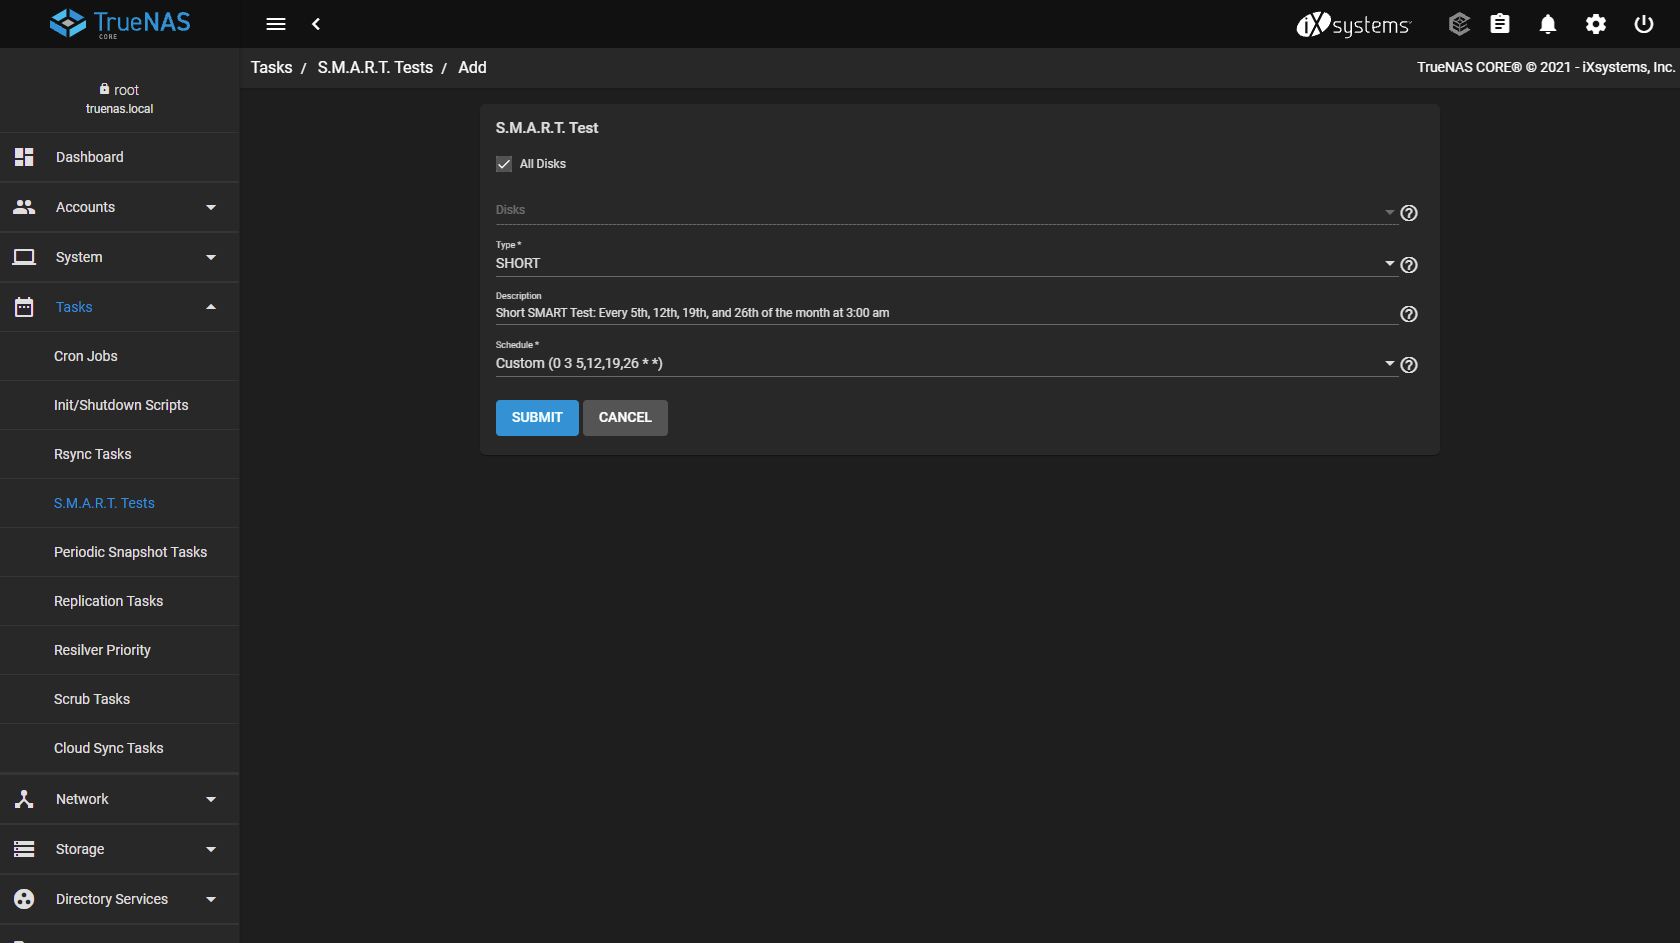
Check "All Disks", choose Type "SHORT" and give it a description, for example:
Short SMART Test: Every 5th, 12th, 19th, and 26th of the month at 3:00 am.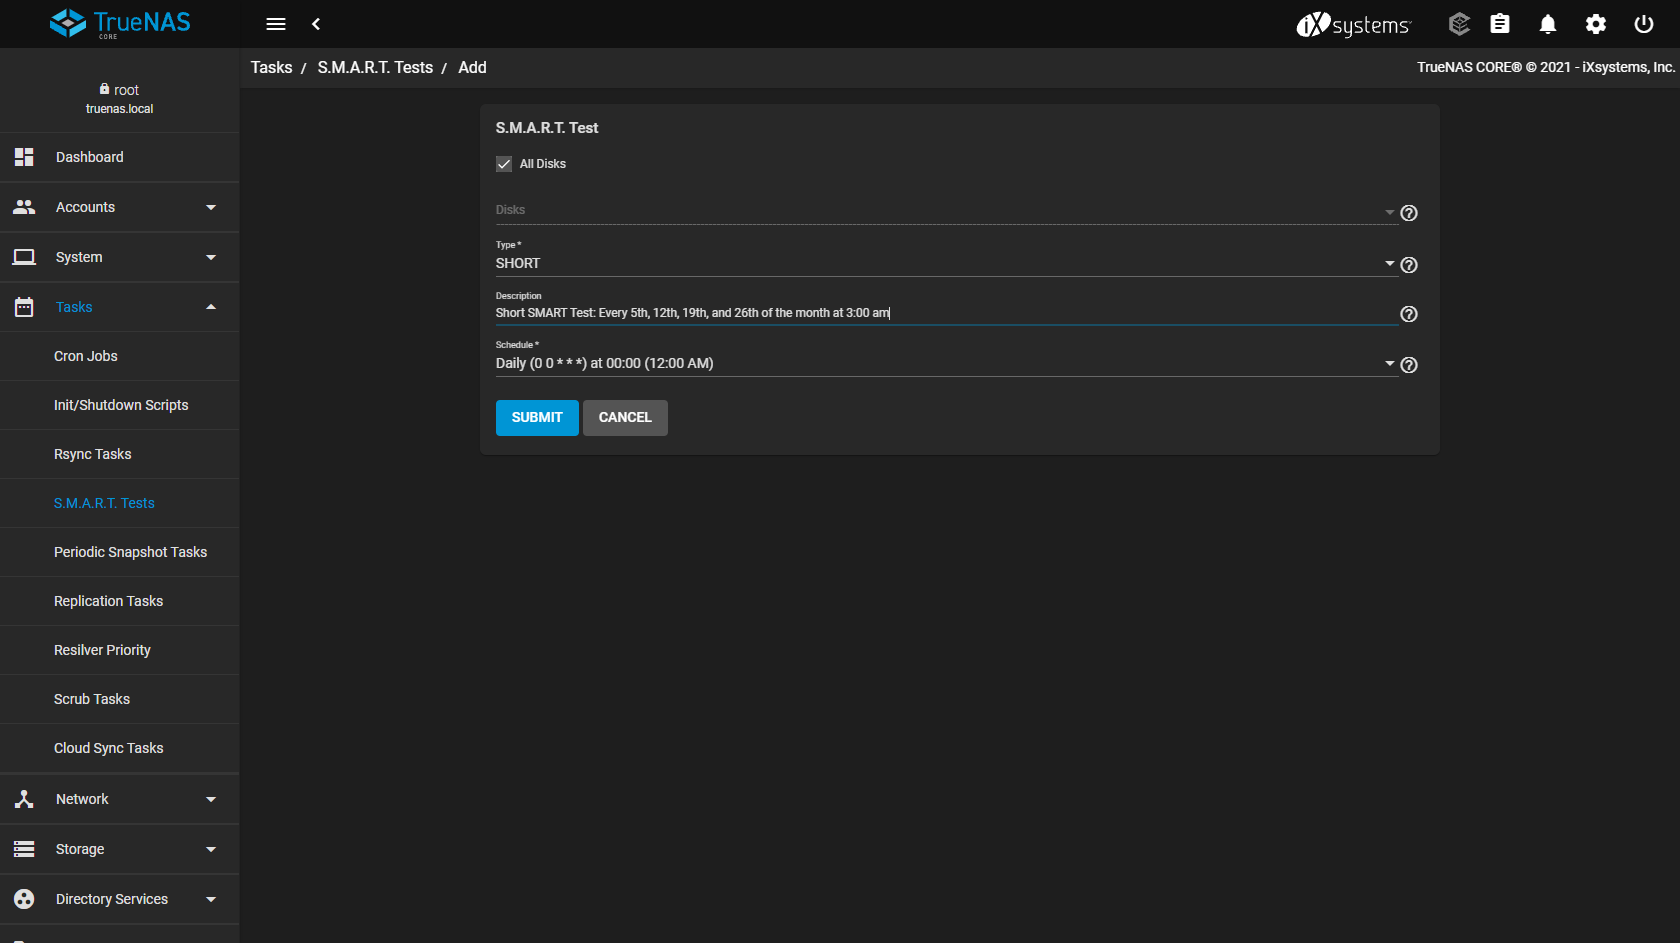
-
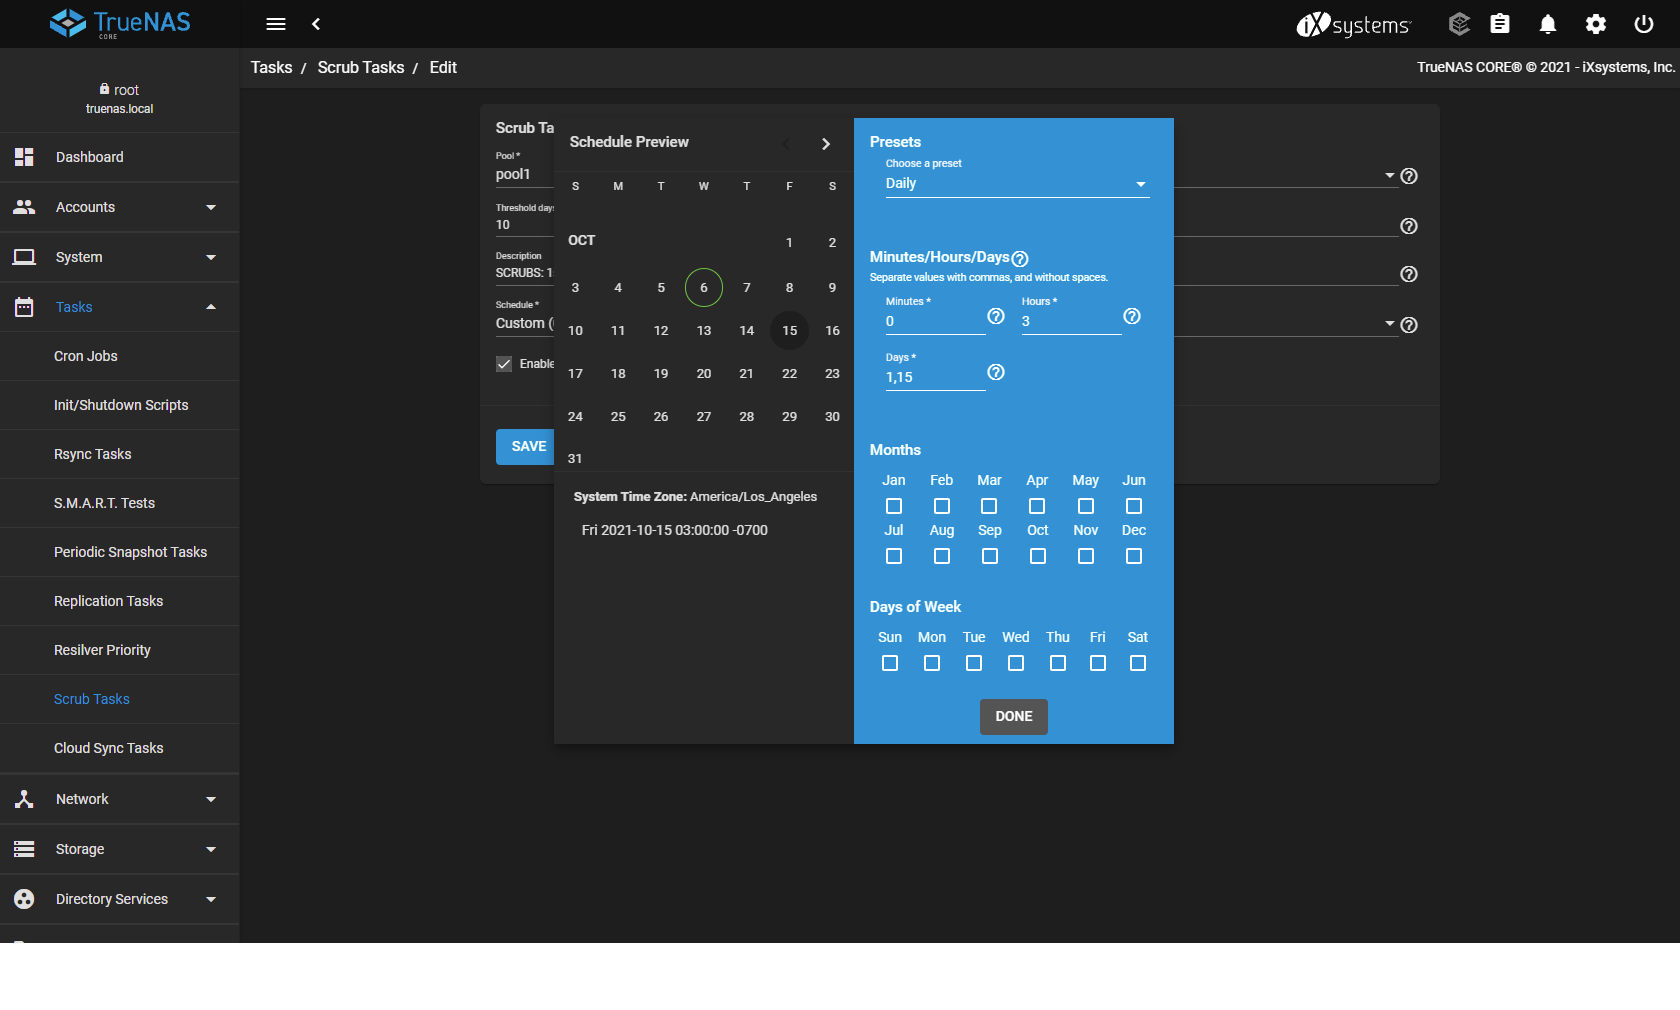
Click on the schedule and choose "Custom". This will open a popup where you can enter a schedule. I followed the advice from the forums, see the description in previous step.
-
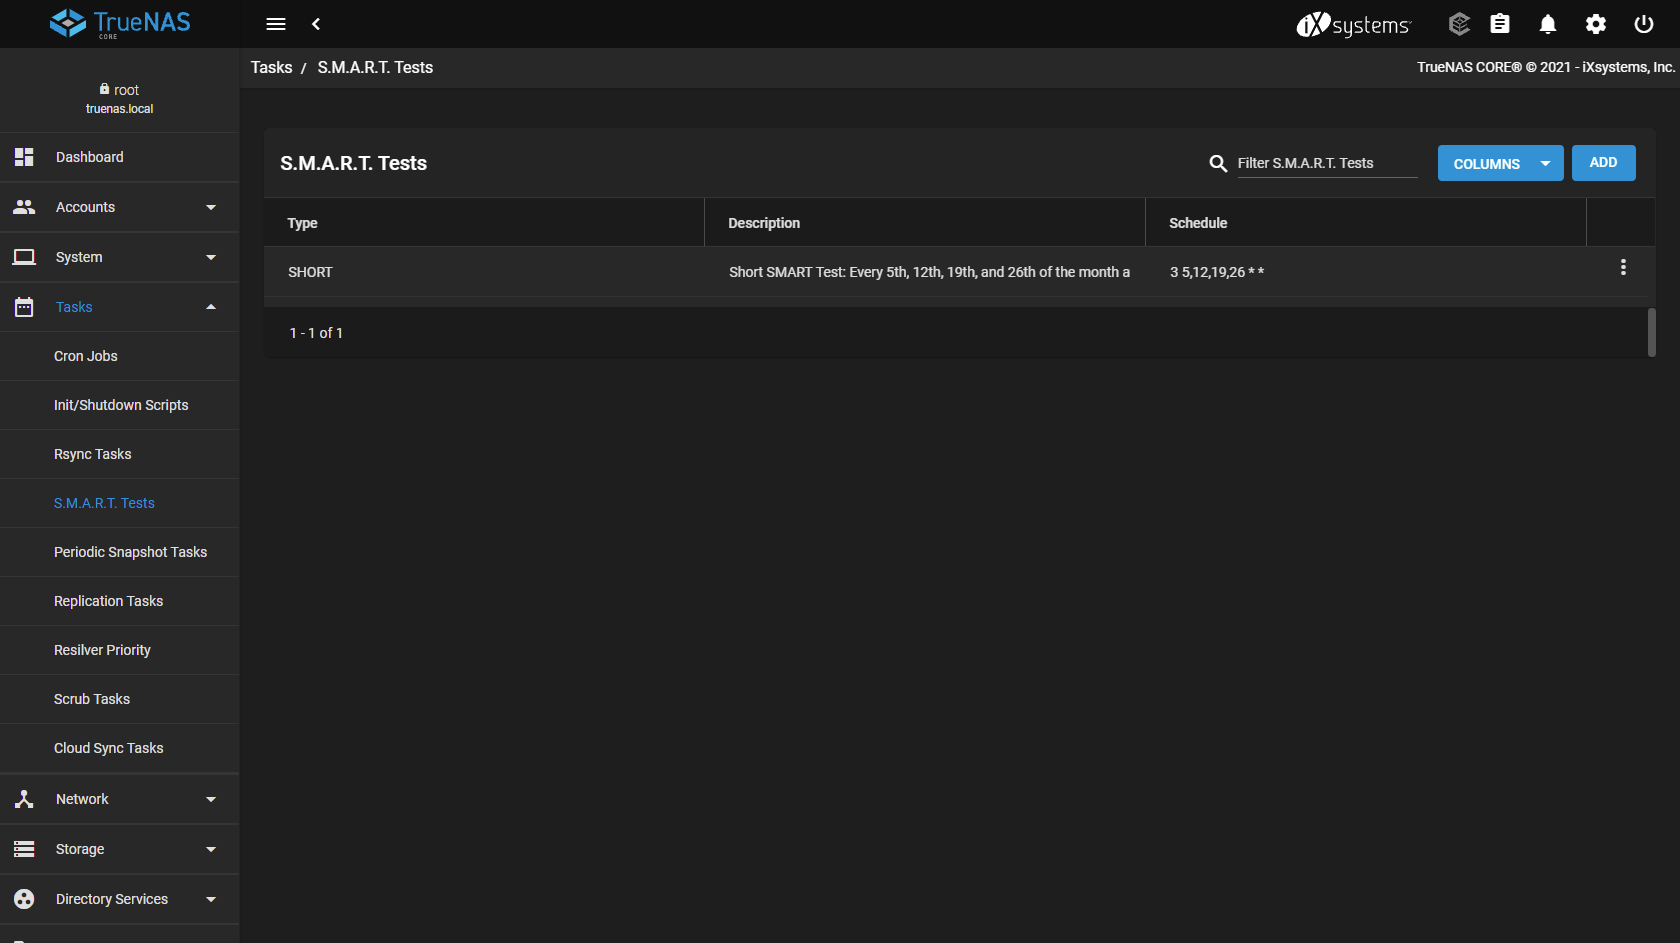
Click "Submit" to save the schedule.
-
Click the "Add" button again.
-
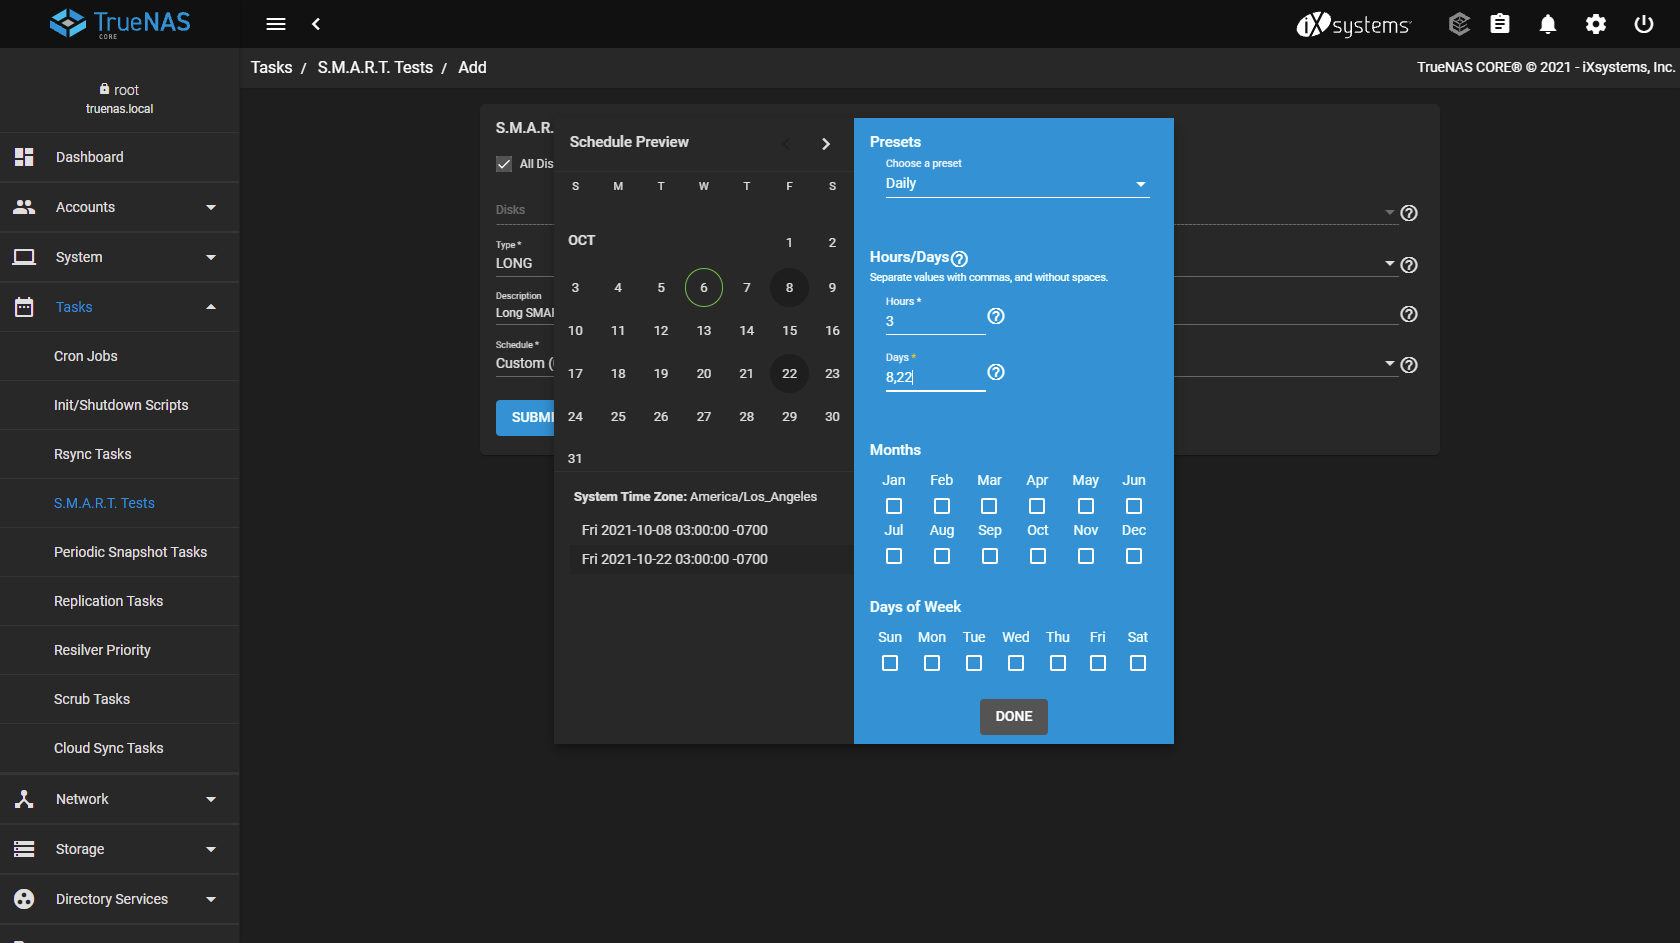
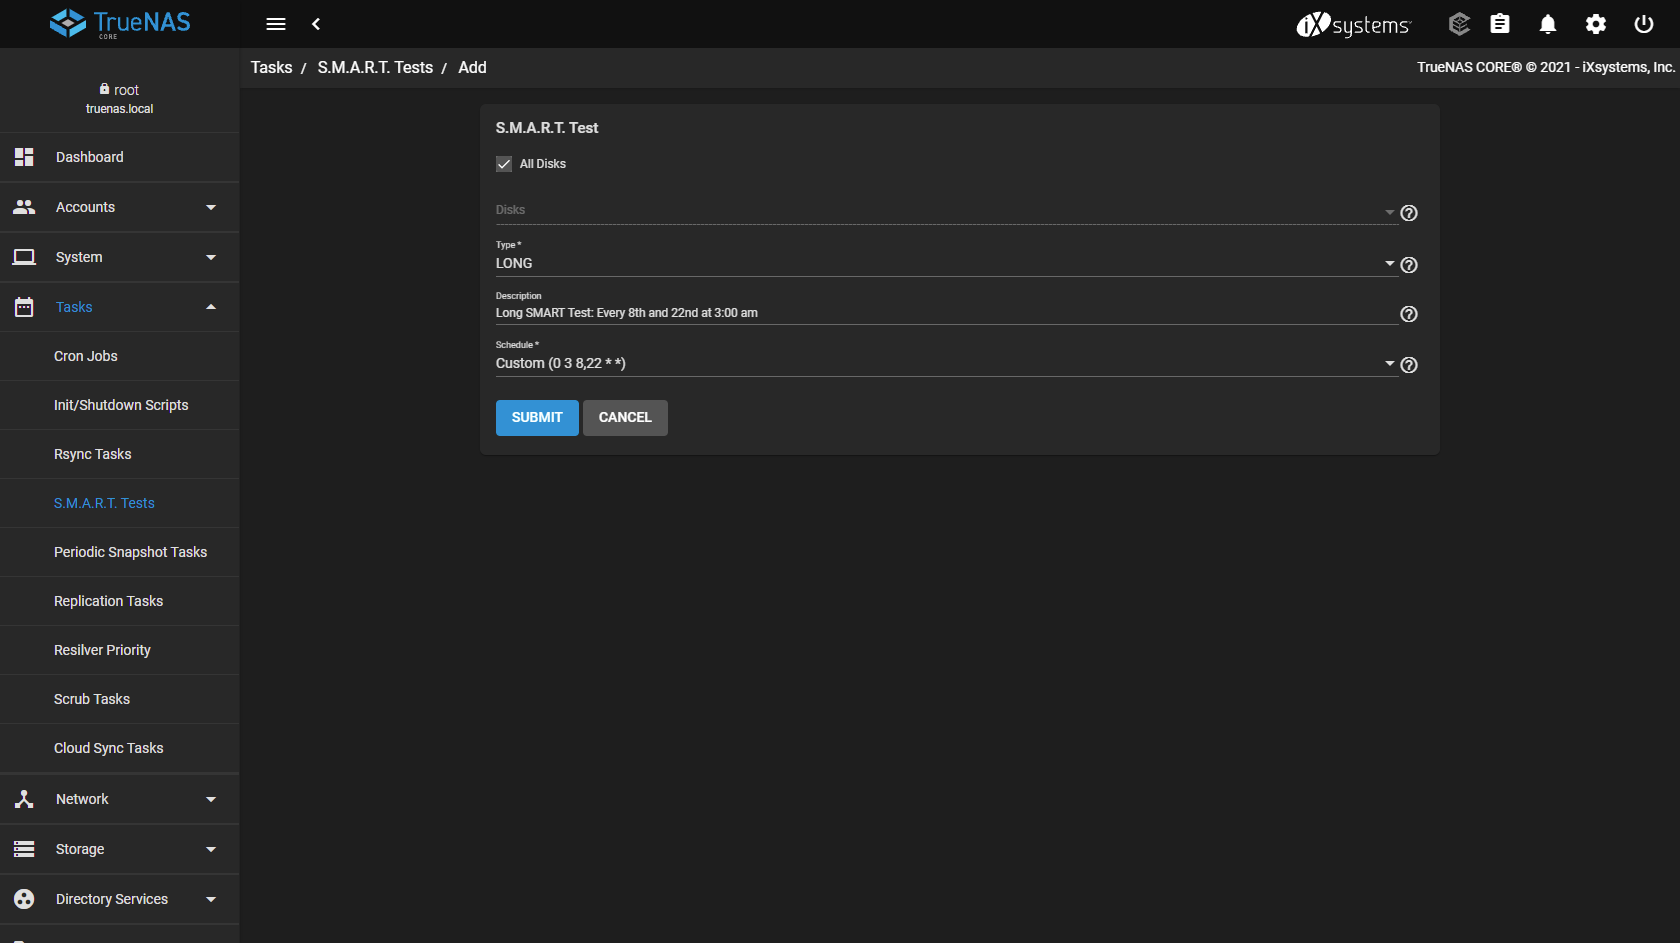
Check "All Disks", choose Type "LONG" and give it a description, for example:
Long SMART Test: Every 8th and 22nd at 3:00 am.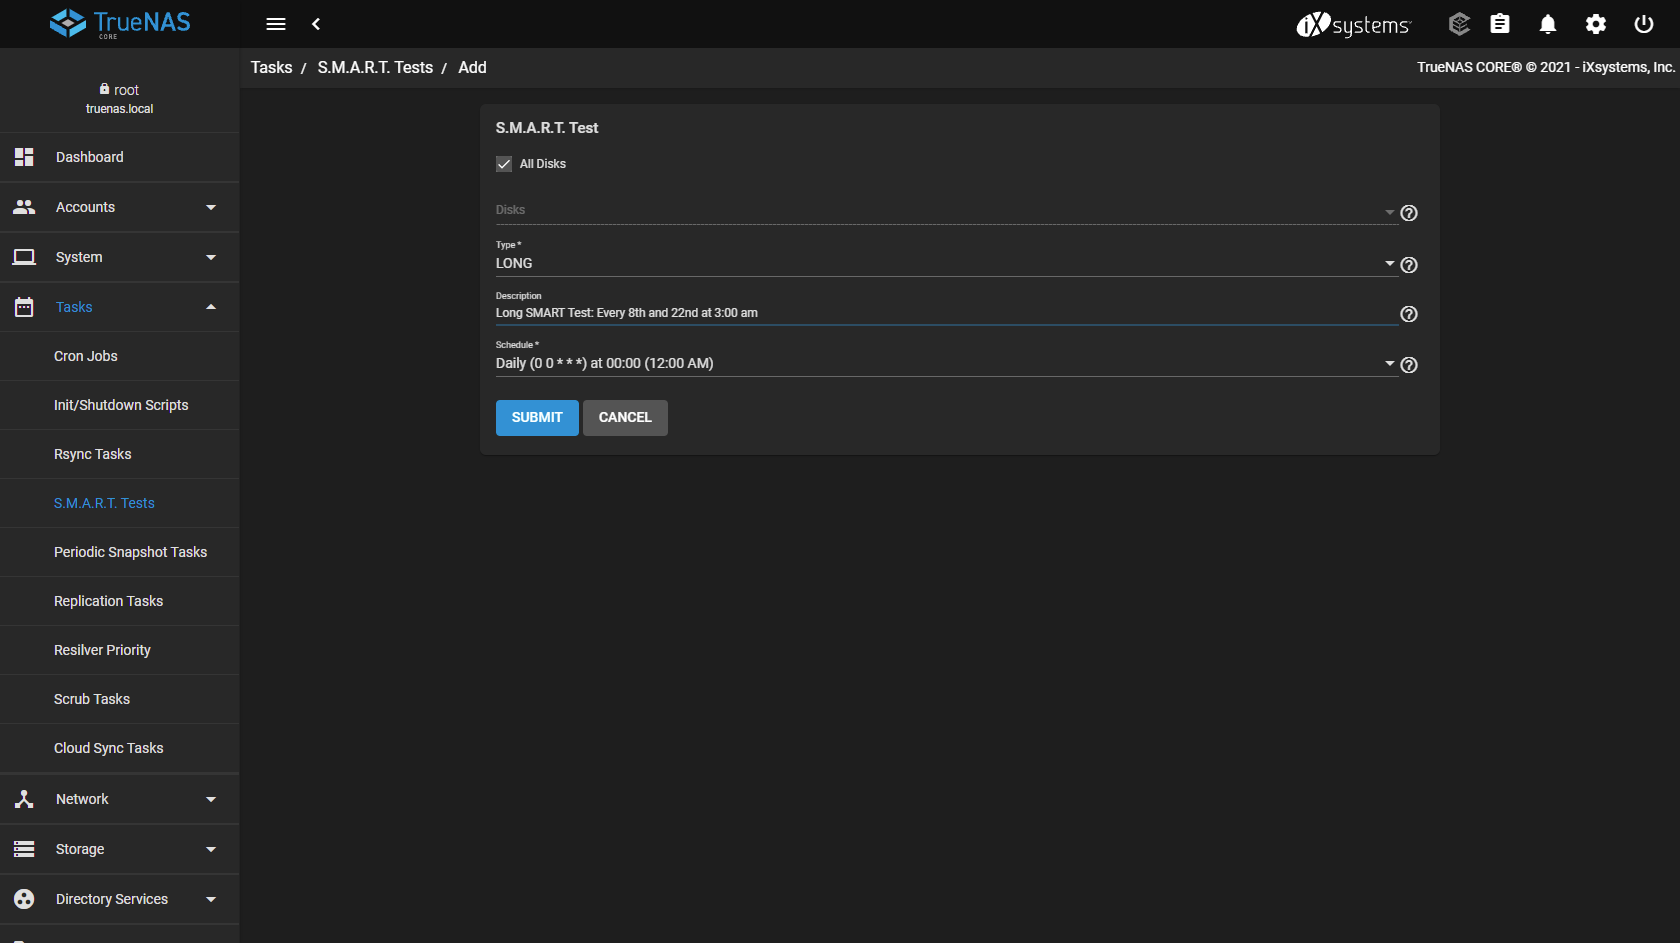
-
Click on the schedule and choose "Custom". This will open a popup where you can enter a schedule. I followed the advice from the forums, see the description in previous step.
-
Click "Submit" to save the schedule.
-
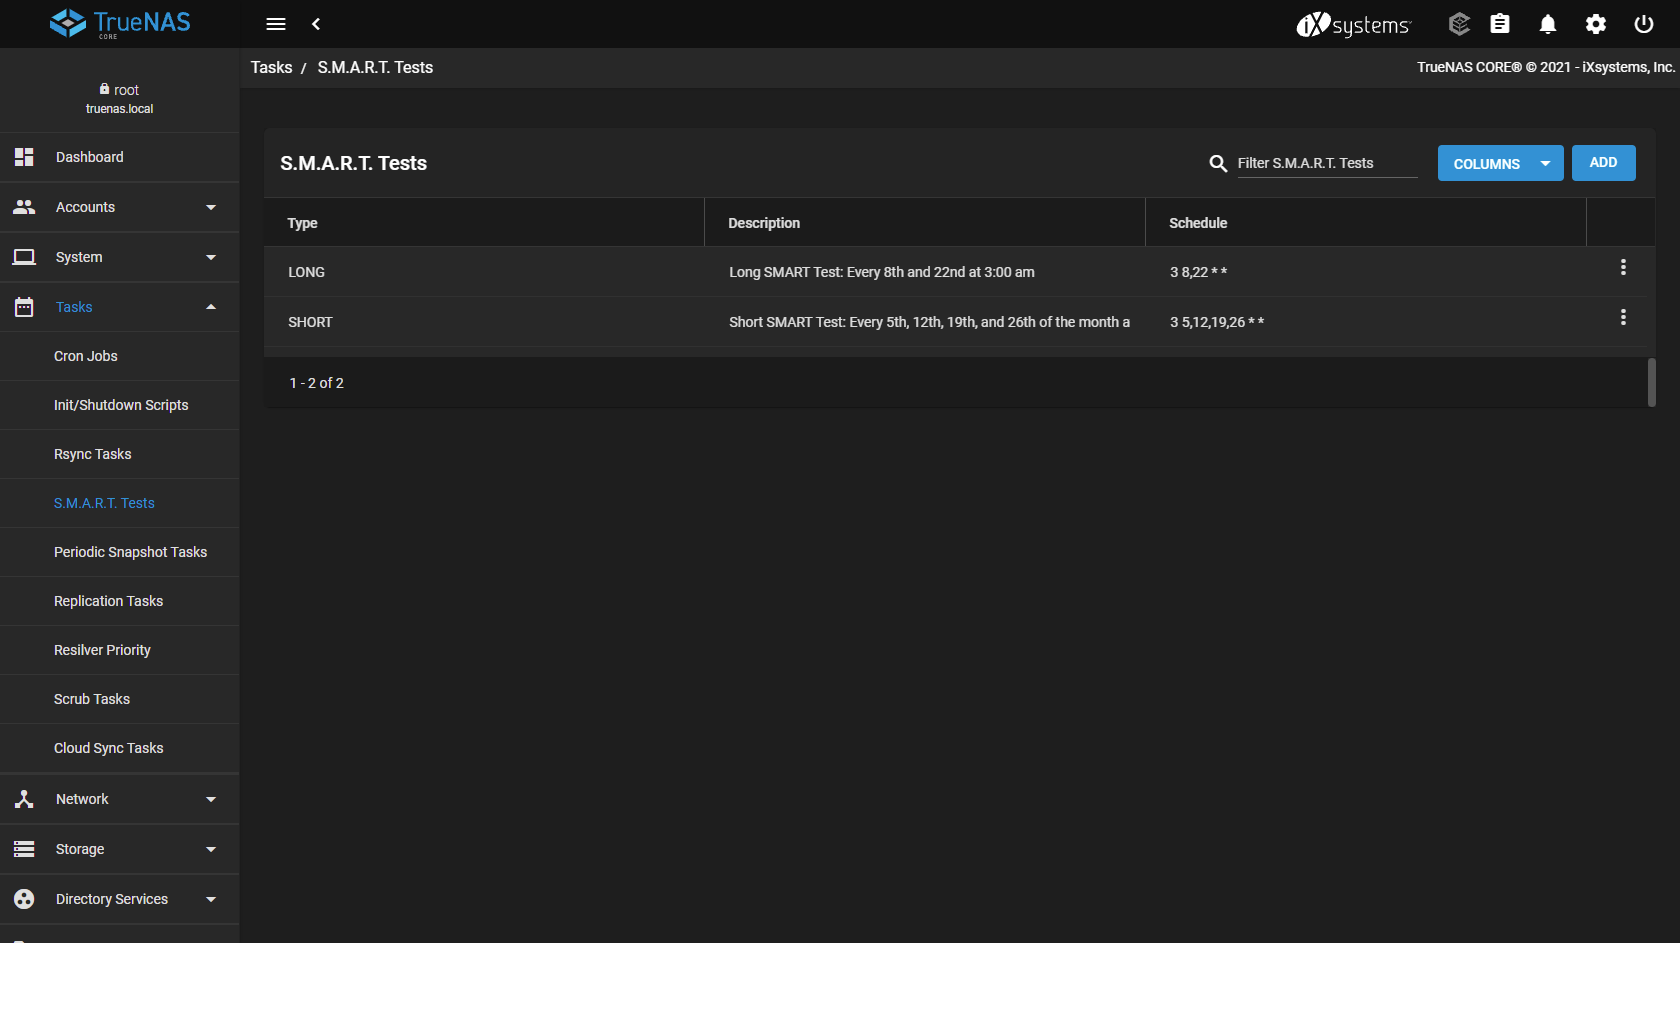
You have now added the S.M.A.R.T. health checks and will be notified by TrueNas is something is wrong. This will be configured in Configure reporting
¶ Scrubs
-
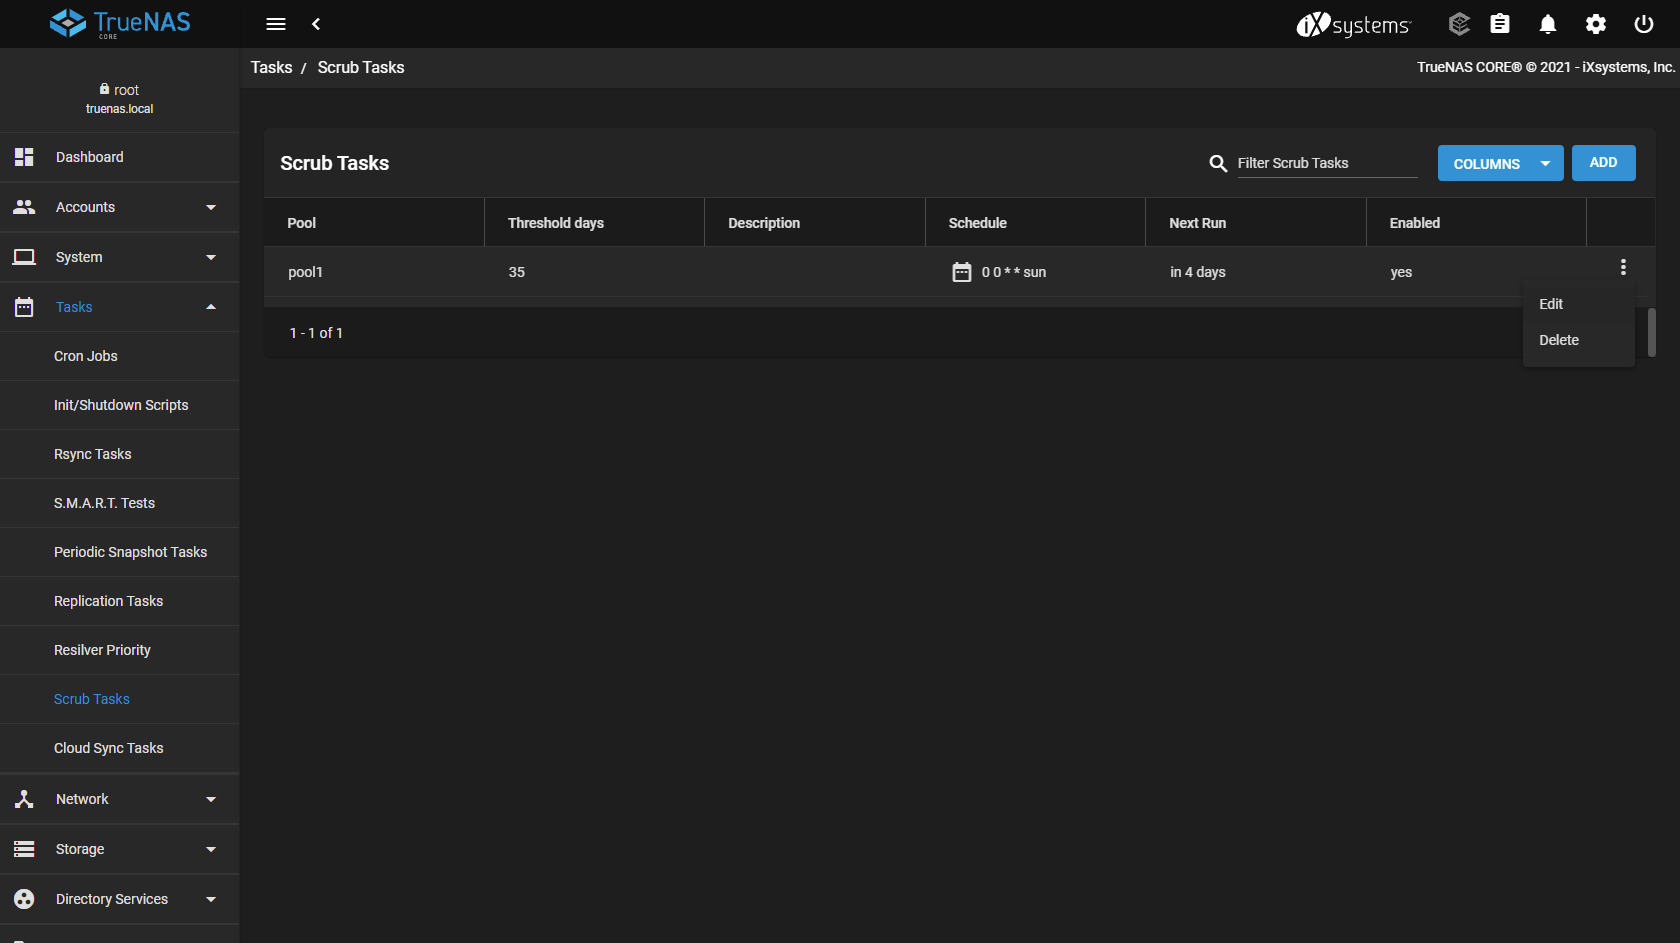
Go to "Tasks" -> "Scrub Tasks". You will see TrueNas created a default task for the pool you created. Click on the "triple dots" icon and choose "Edit"
-
Change the "Threshold days" to
10and give the task a description, for example:SCRUBS: 1st and 15th of the month at 3:00am. Threshold is set to 10 days..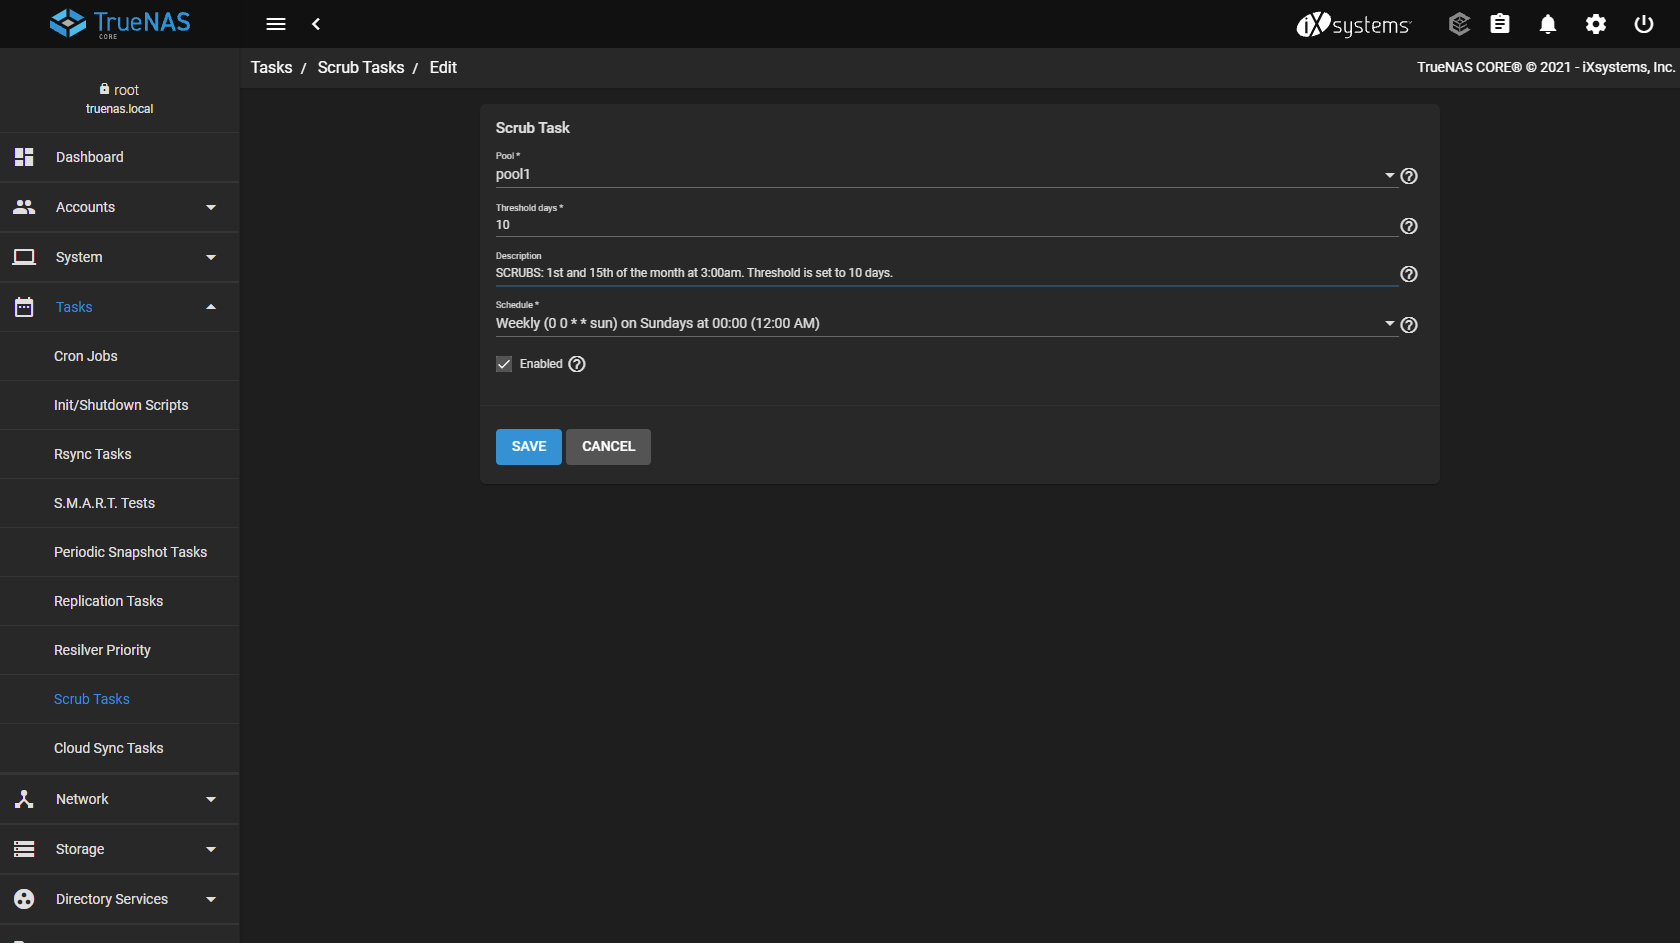
-
Click on the schedule and choose "Custom". This will open a popup where you can enter a schedule. I followed the advice from the forums, see the description in previous step.
-
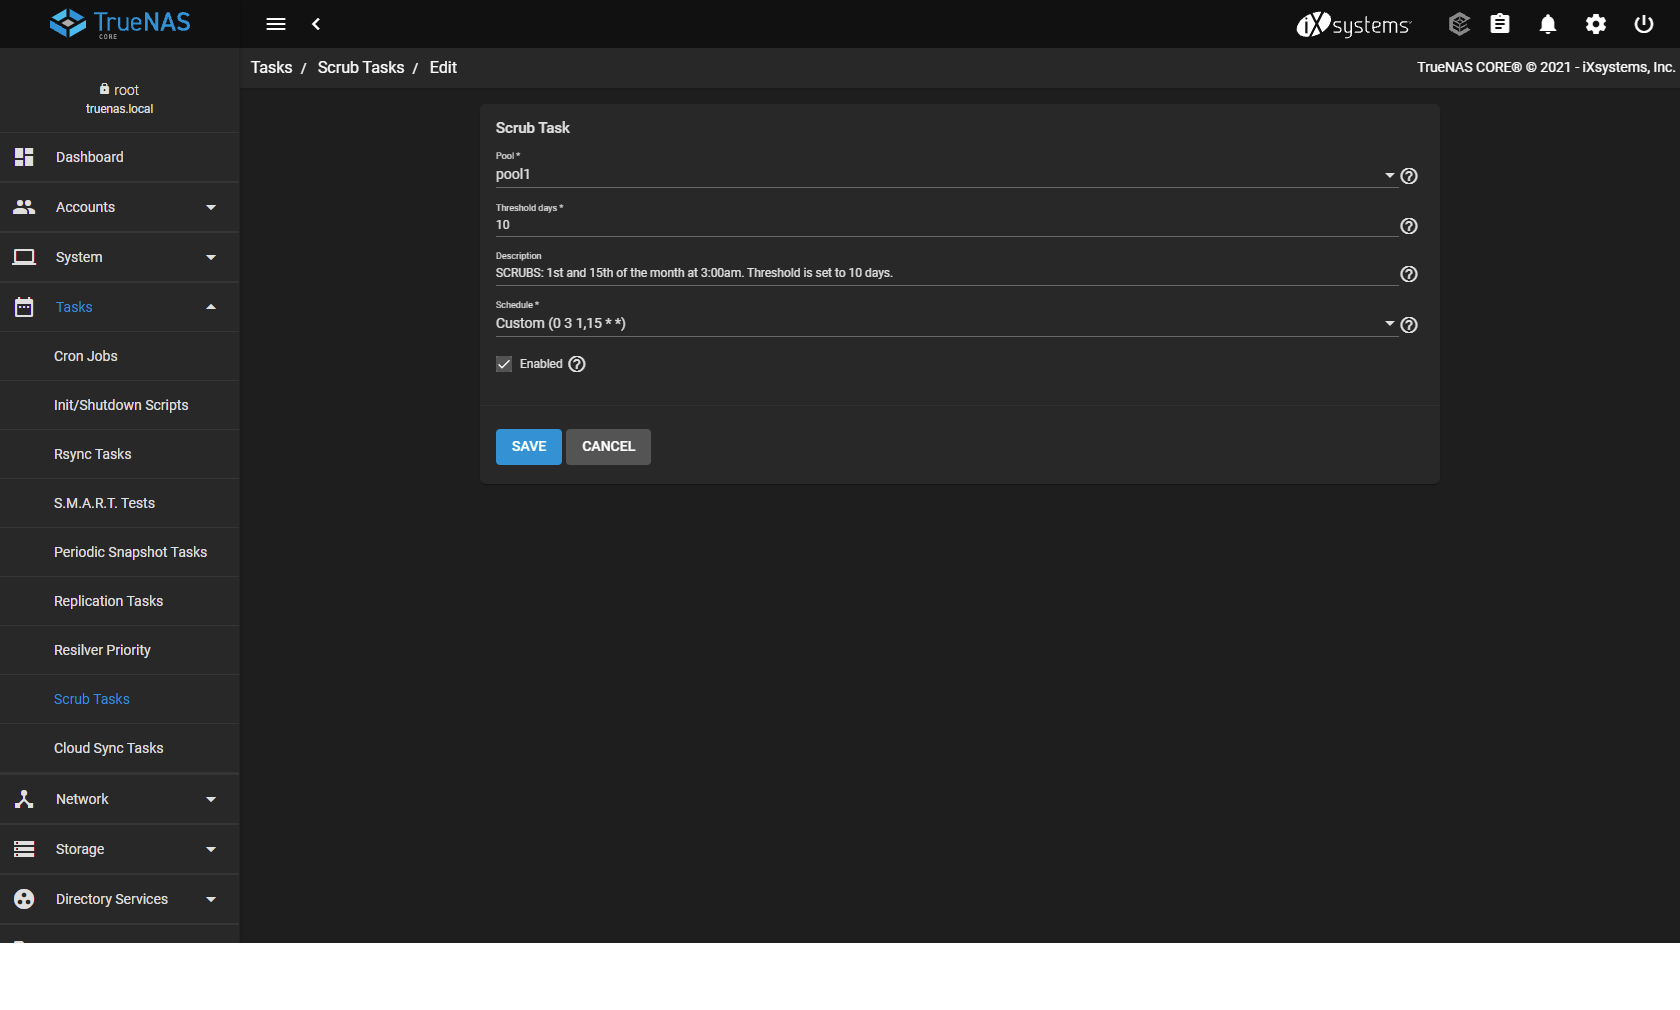
Click "Submit" to save the schedule.
-
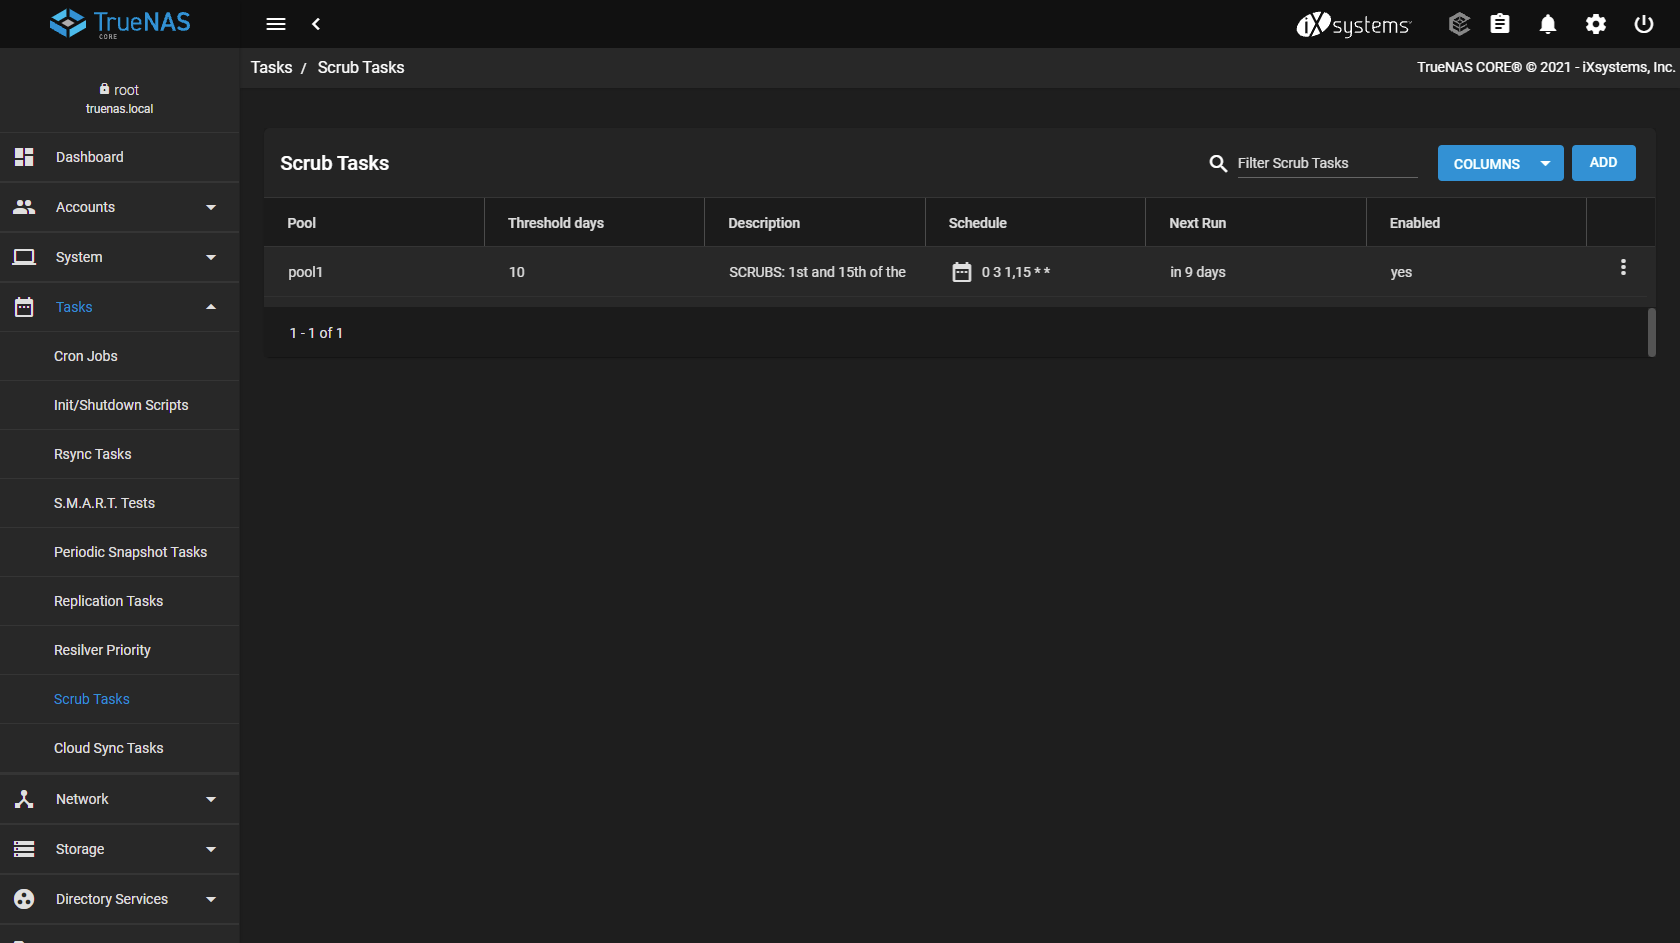
You have now configured (more) scrubs and will be notified by TrueNas is something is wrong. This will be configured in Configure reporting
¶ Users
If you want to enable samba (SMB) sharing, you have to create users (or allow anonymous sharing). For completeness and because it is safer, I will create a user that has access to the SMB shares from a Windows machine.
-
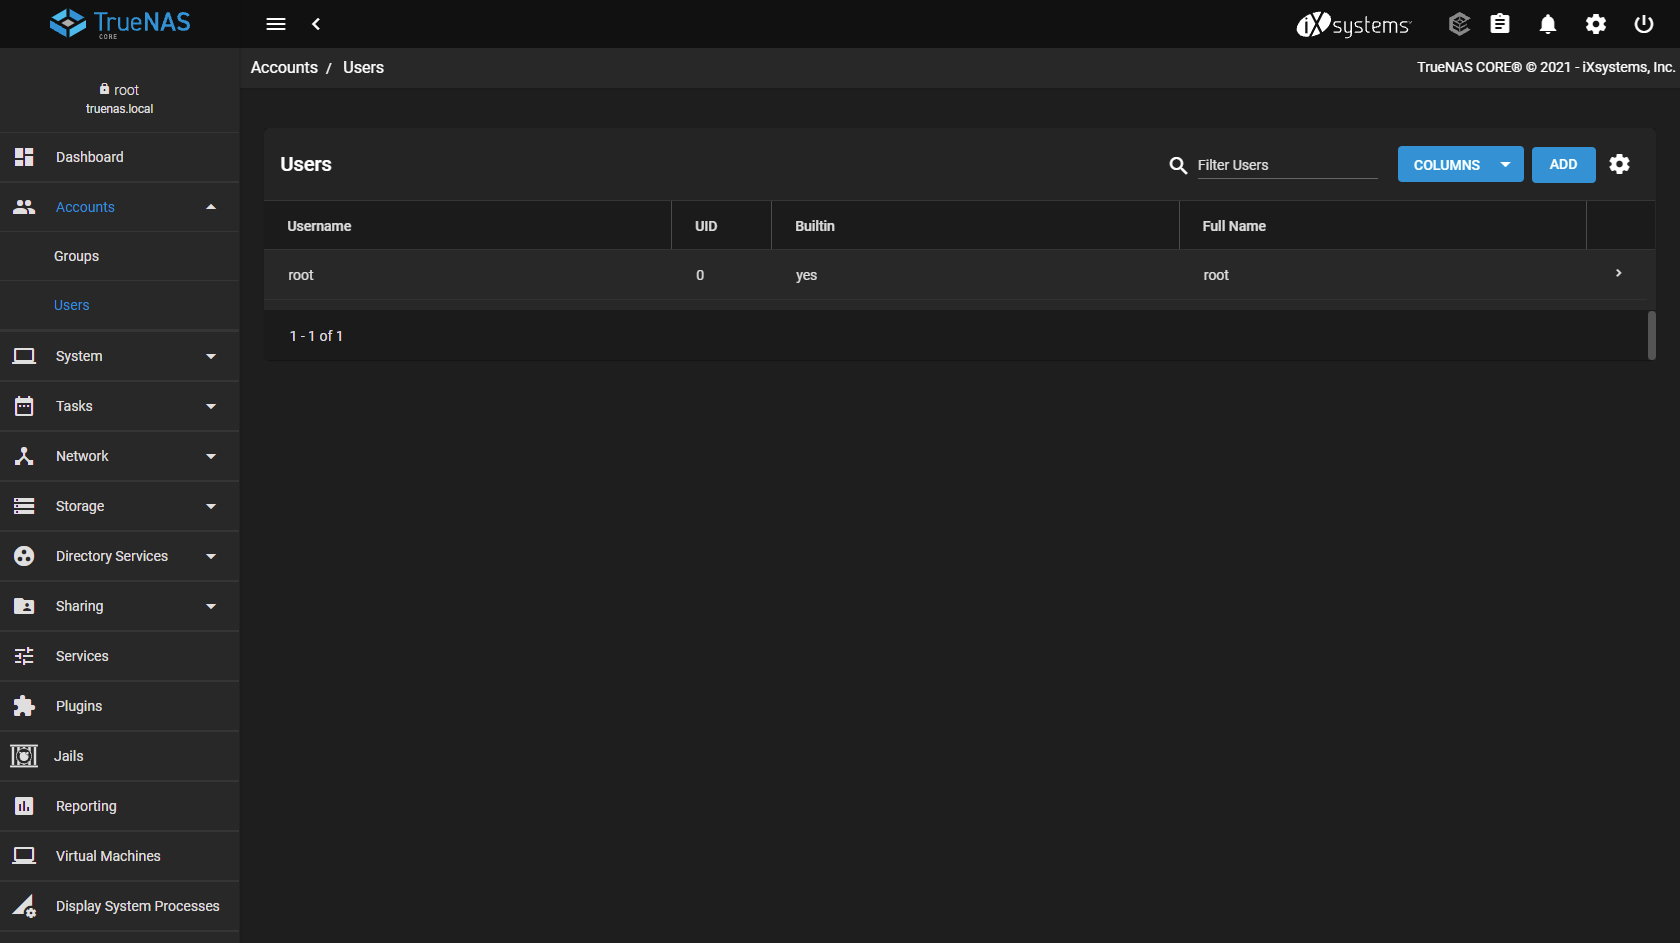
Go to "Accounts" -> "Users" and click the "Add" button
-
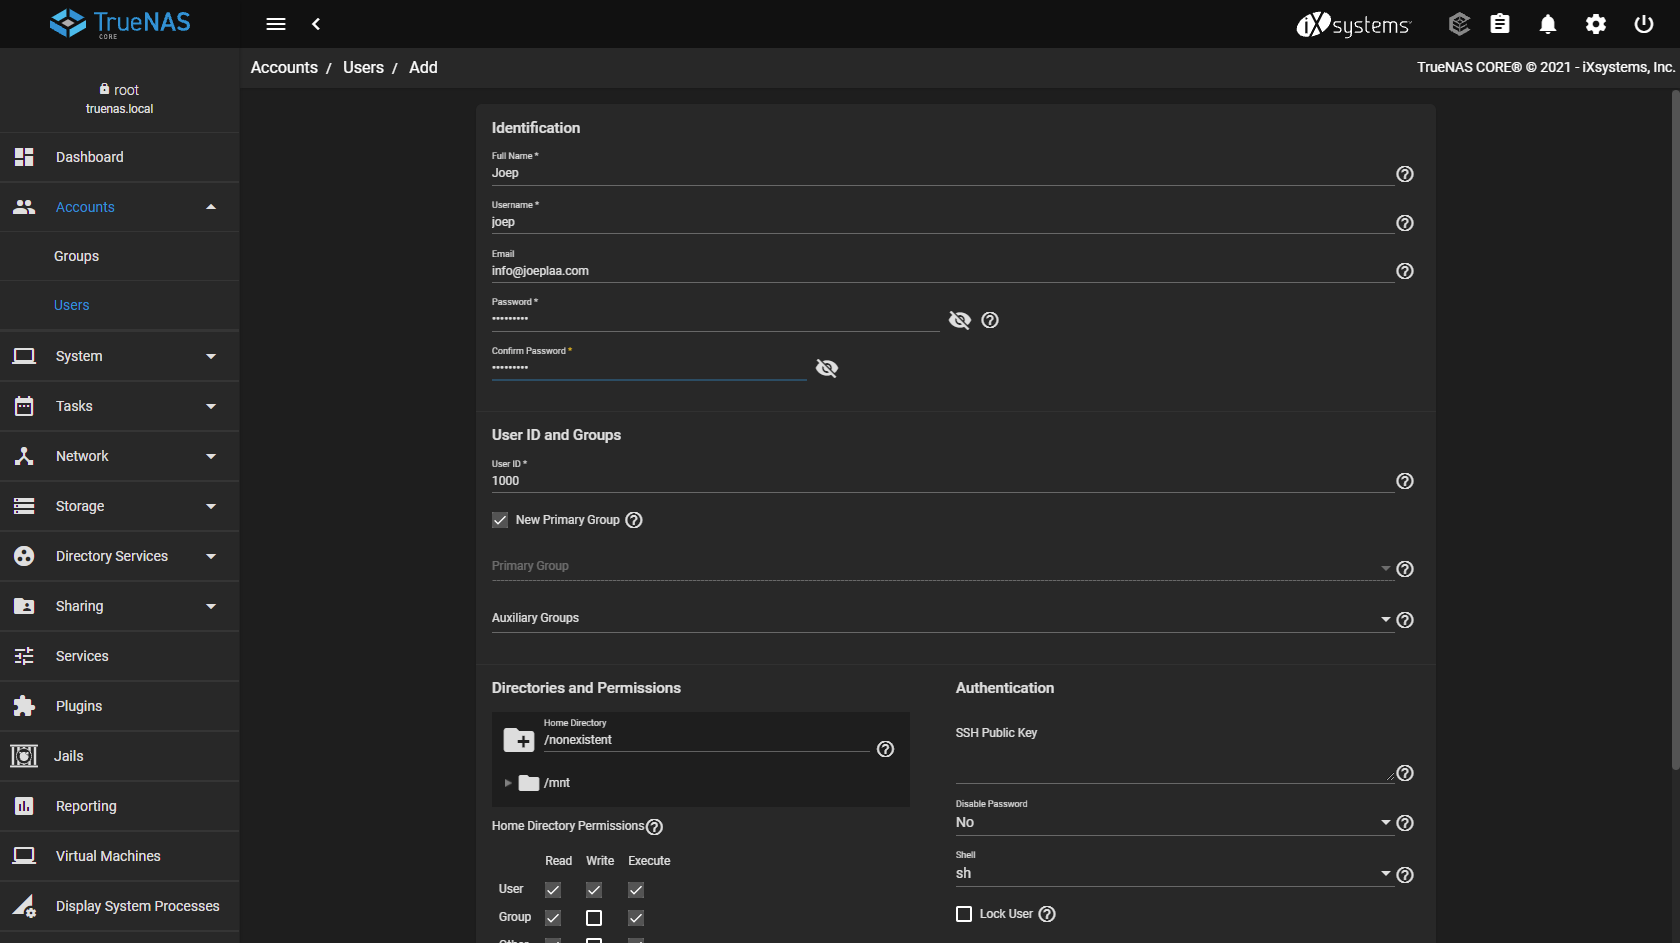
Add "Name", "Username" and "Password".
-
Scroll down and check "Microsoft Account".This is when you use the email and password of your Microsoft account to login to Windows and you want the same credentials to be used for TrueNAS.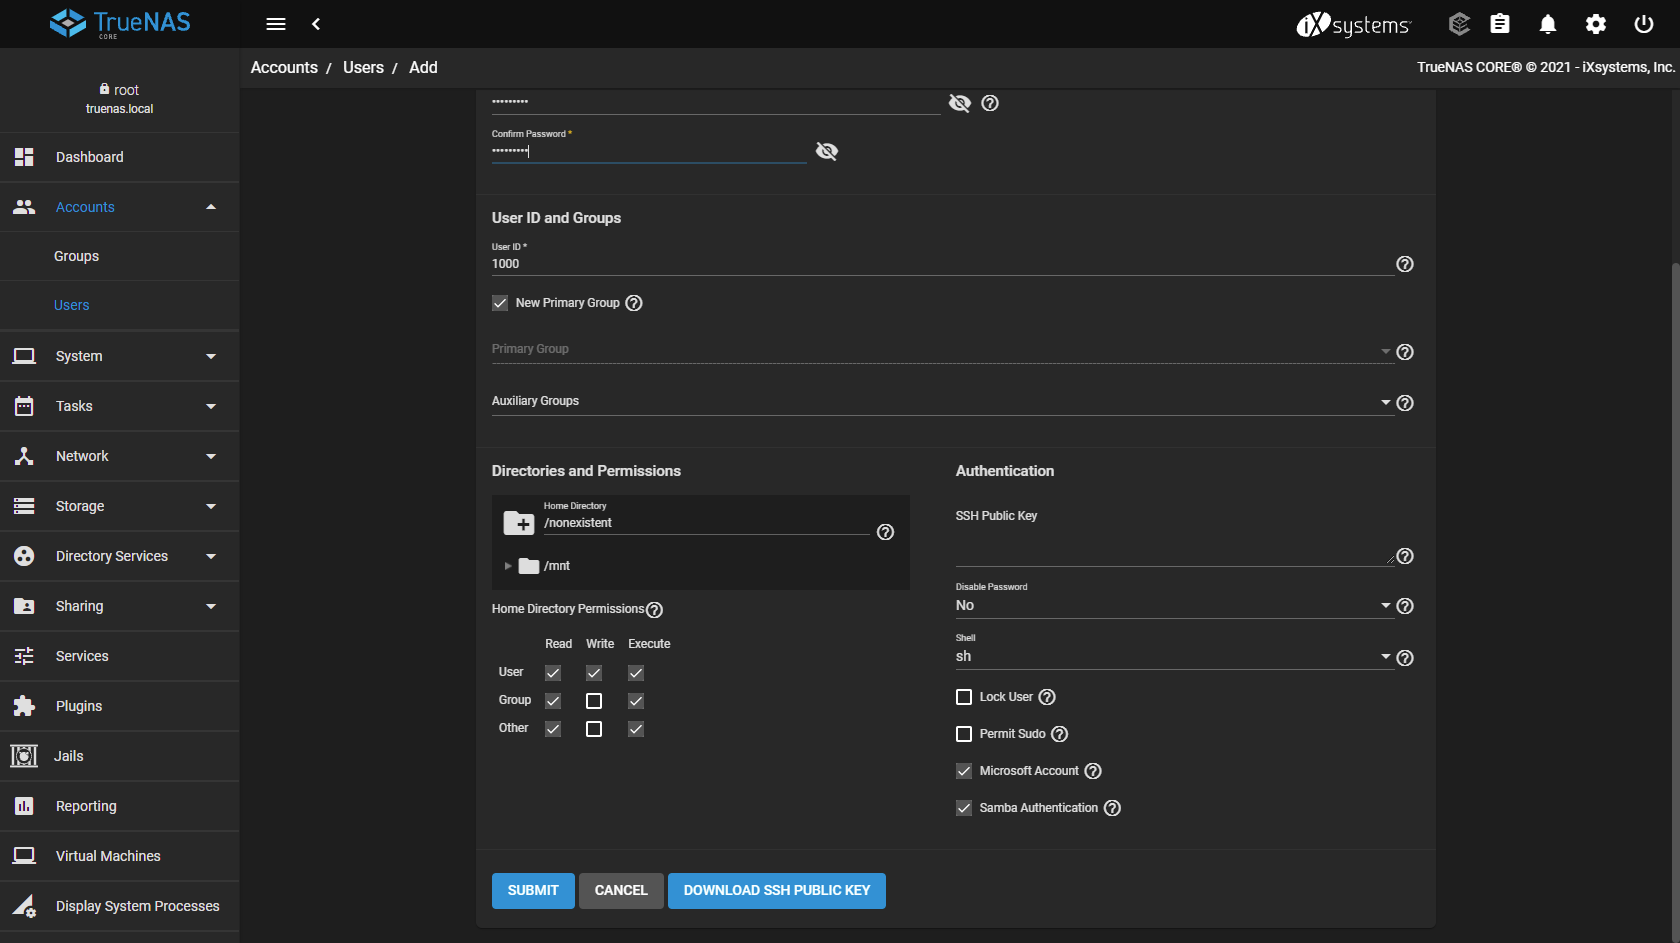
-
Click "Submit" to save the user.

-
Repeat for all users you want to create.
-
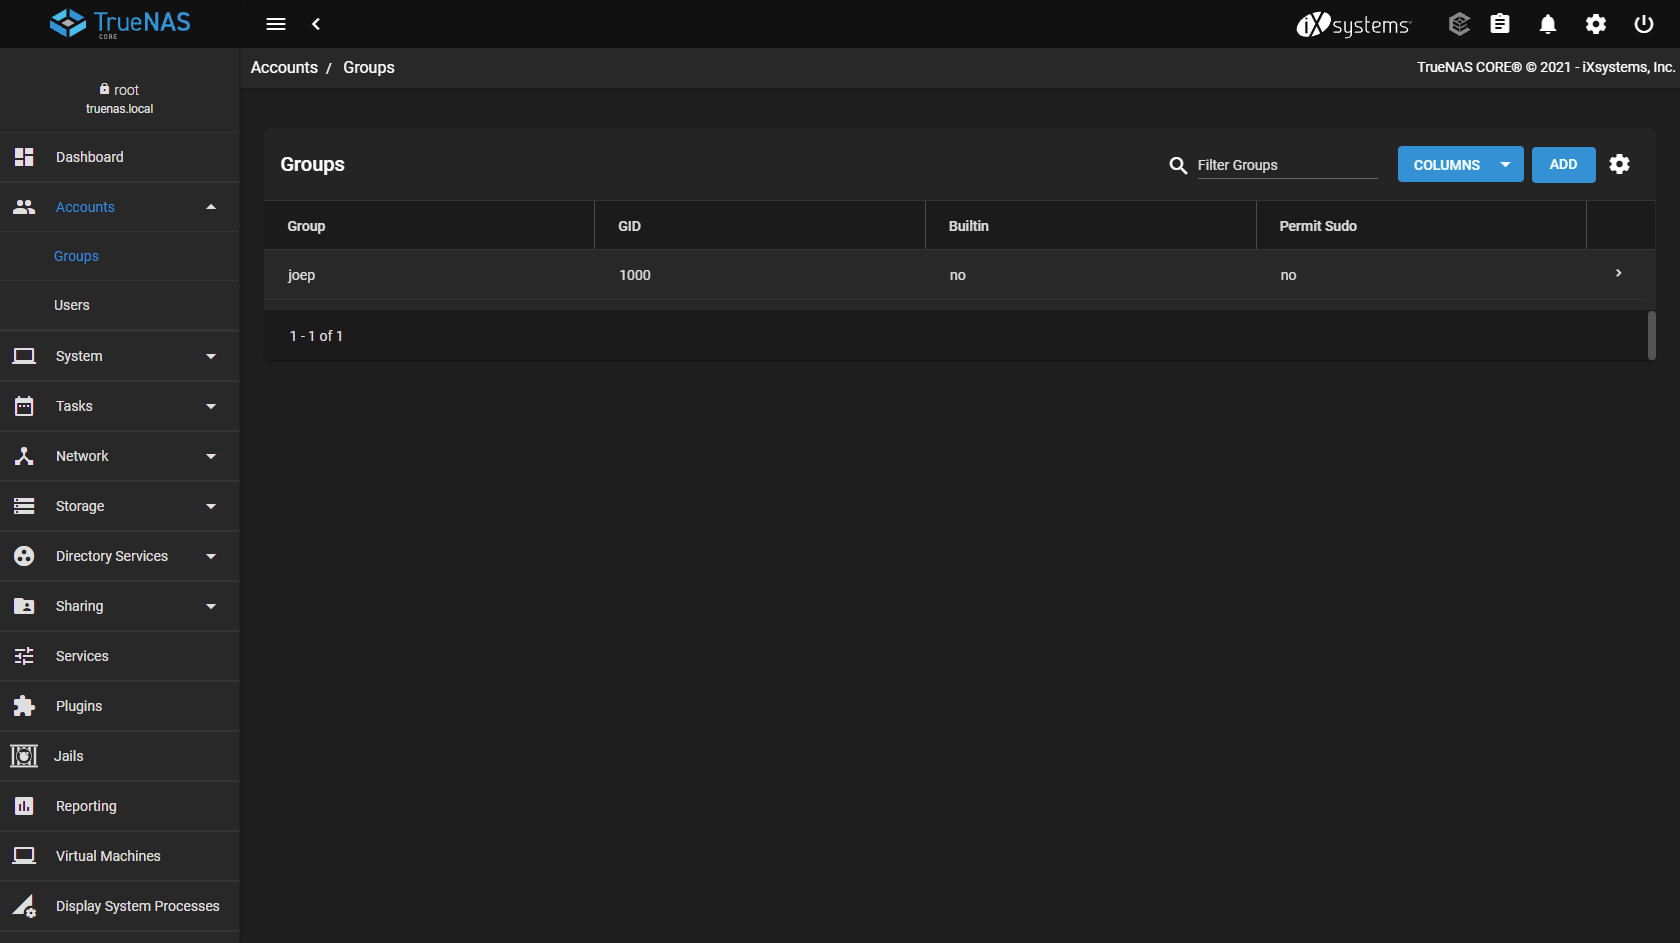
Go to "Accounts" -> "Groups". TrueNas has created a group for each user you just created. This is not convenient when setting folder/file/share permissions. Add another group by clicking the "Add" button.
-
Add a "Name" for the group. I chose
samba-share-rwas it descibes the intention of the group: read-write permissions for samba-shares.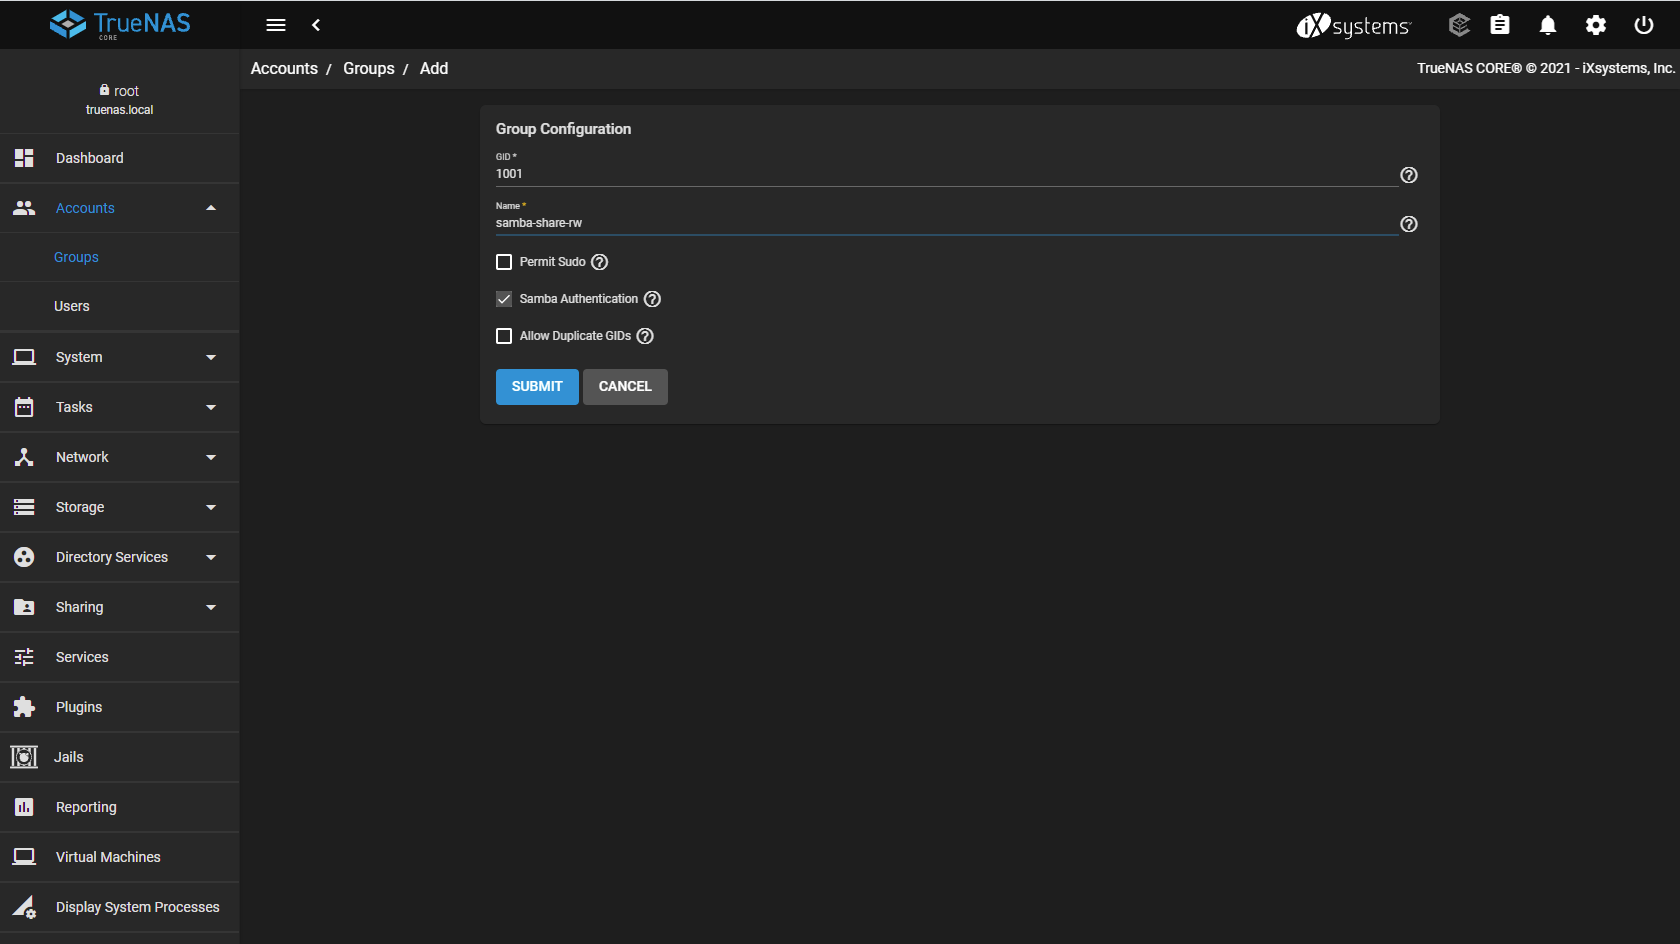
-
Click "Submit" to save the group. In the overview screen click on the
>icon and then on the "Members" button.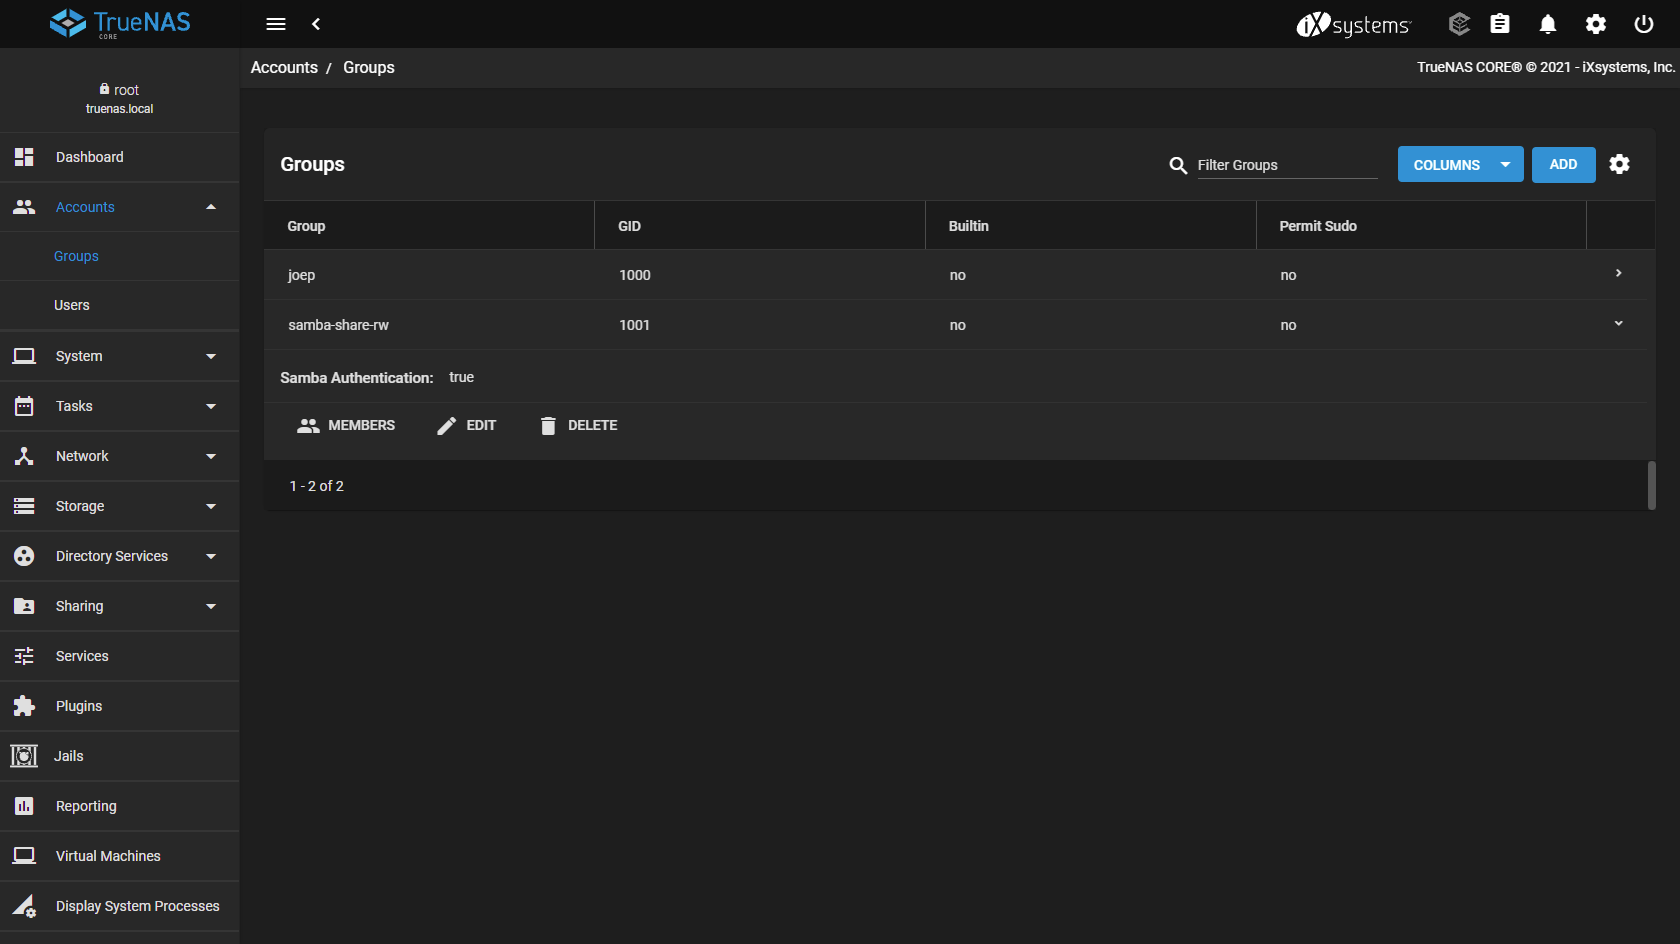
-
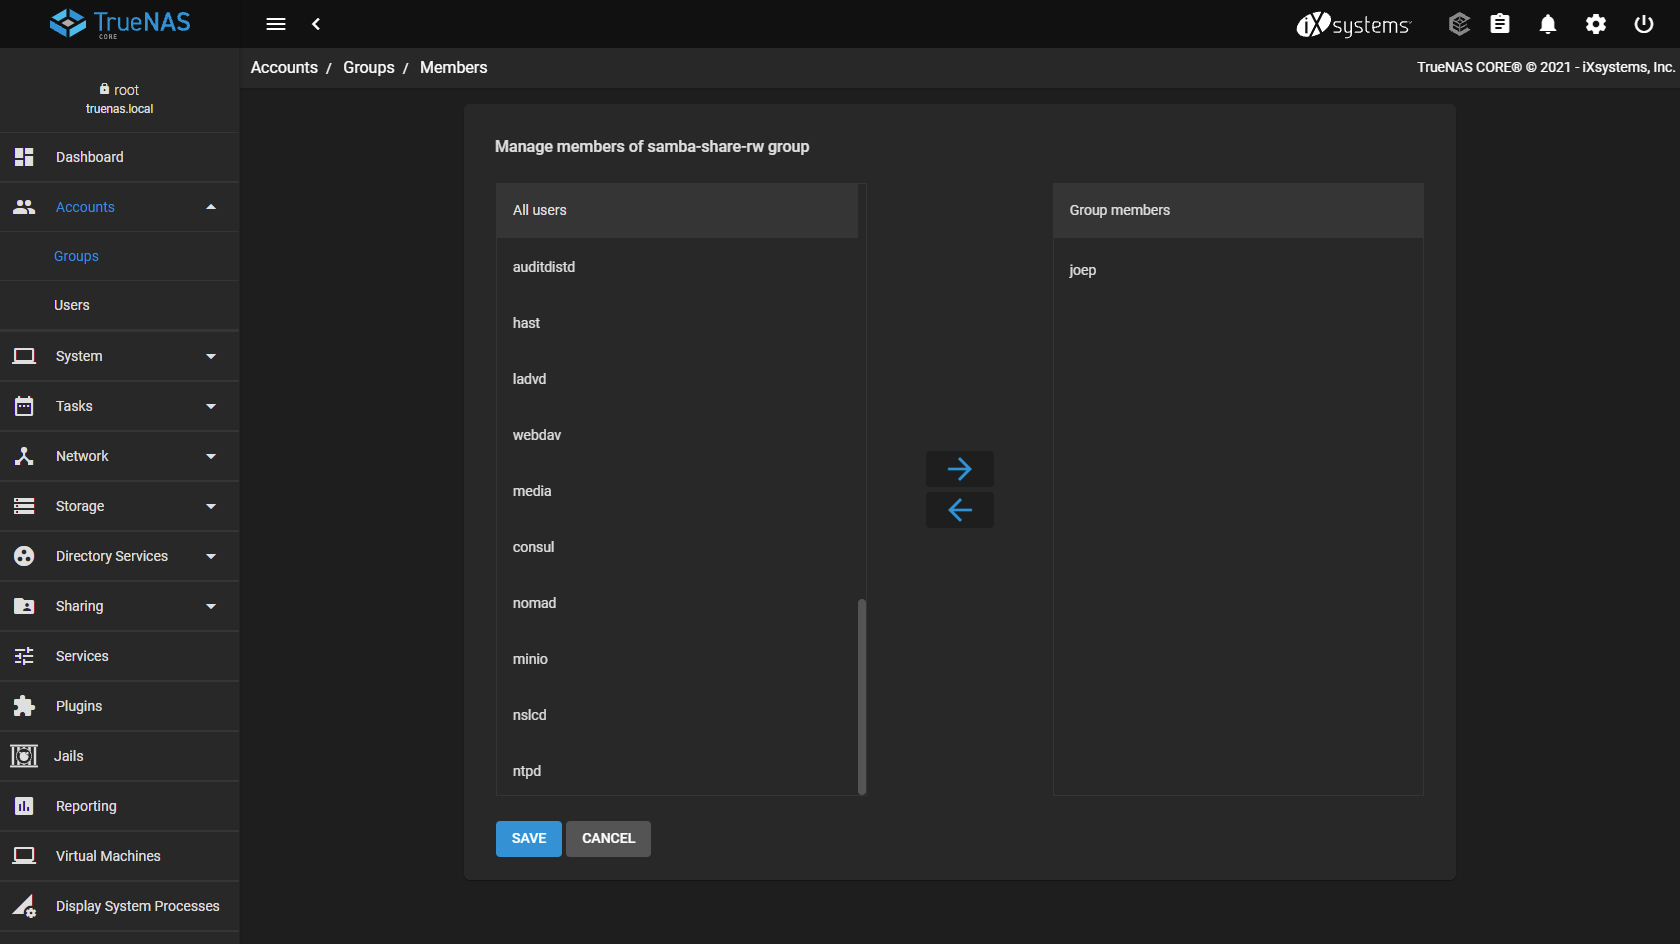
Add the users you want to be members of the group and click save.
¶ Samba sharing
SMB vs NFS:
https://blog.ja-ke.tech/2019/08/27/nas-performance-sshfs-nfs-smb.html
https://ferhatakgun.com/network-share-performance-differences-between-nfs-smb/
-
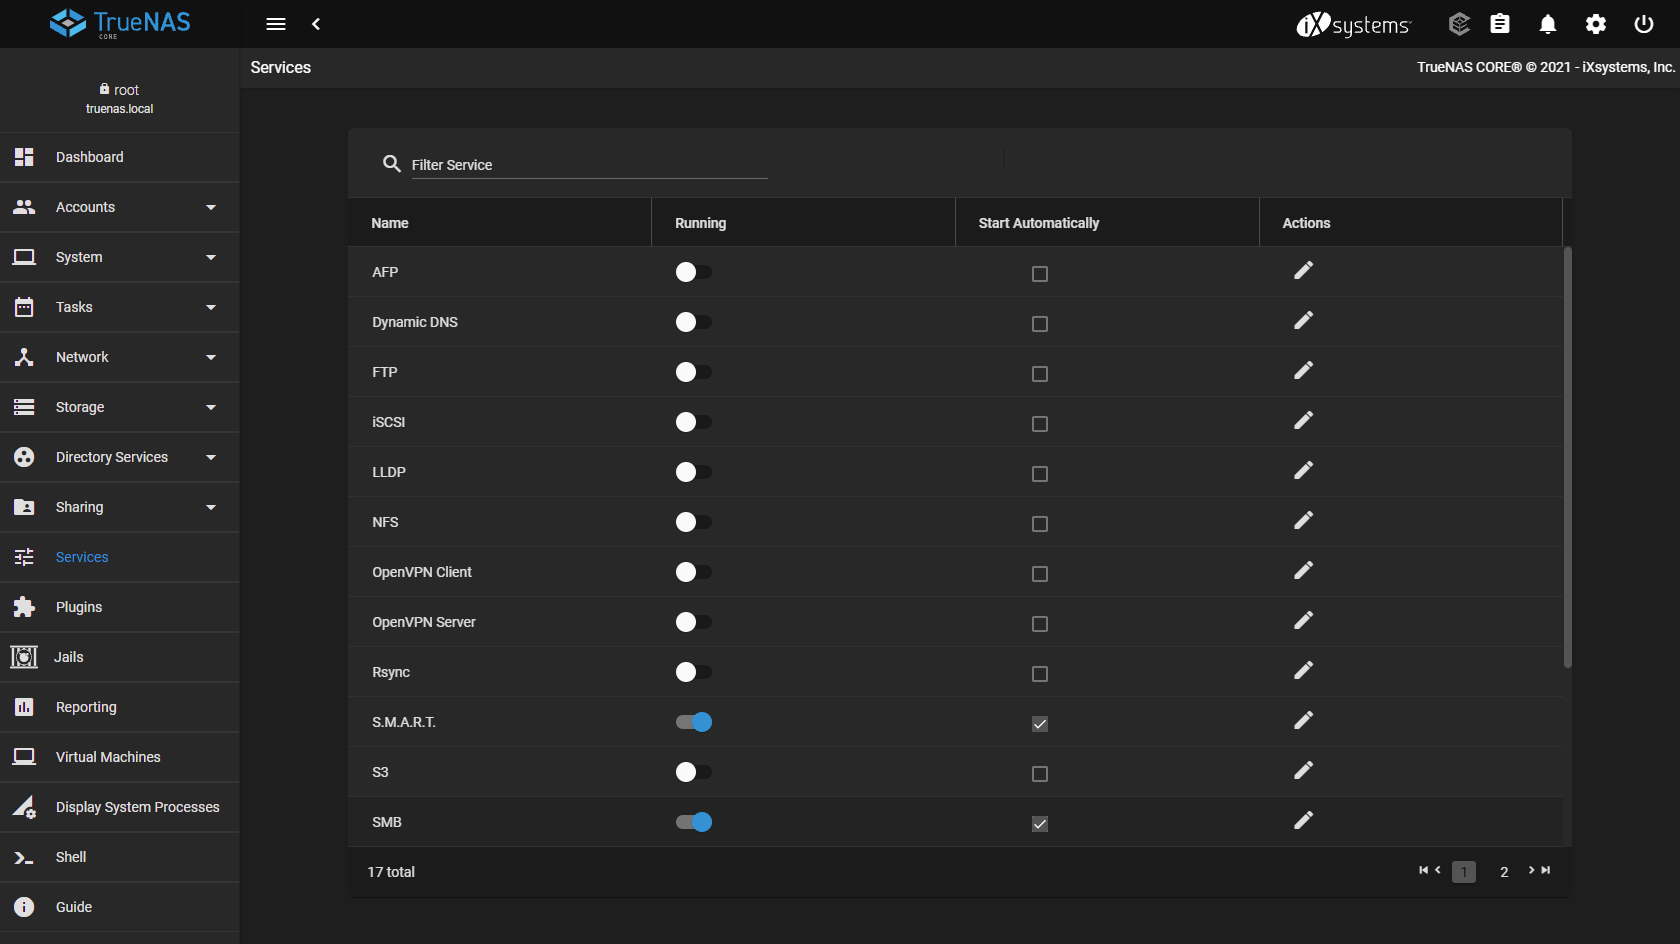
Go to "Services" and enable "SMB". Don't forget to check "Start Automatically".
-
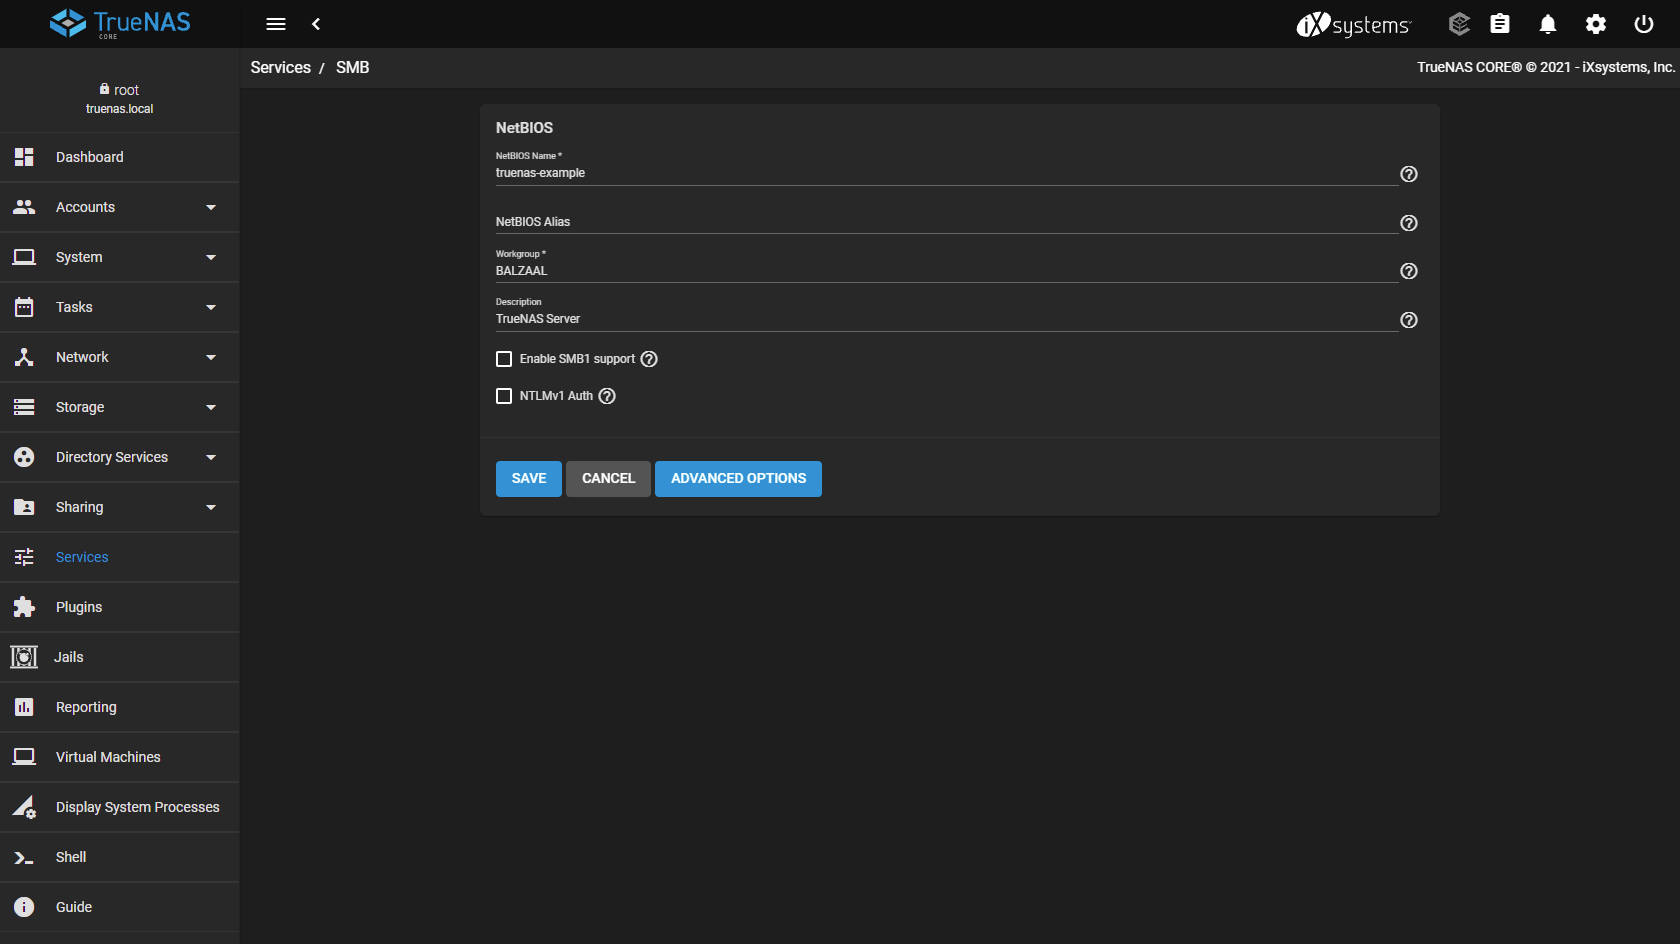
Click on the pencil icon and change the "NetBIOS Name" and "Workgroup".
-
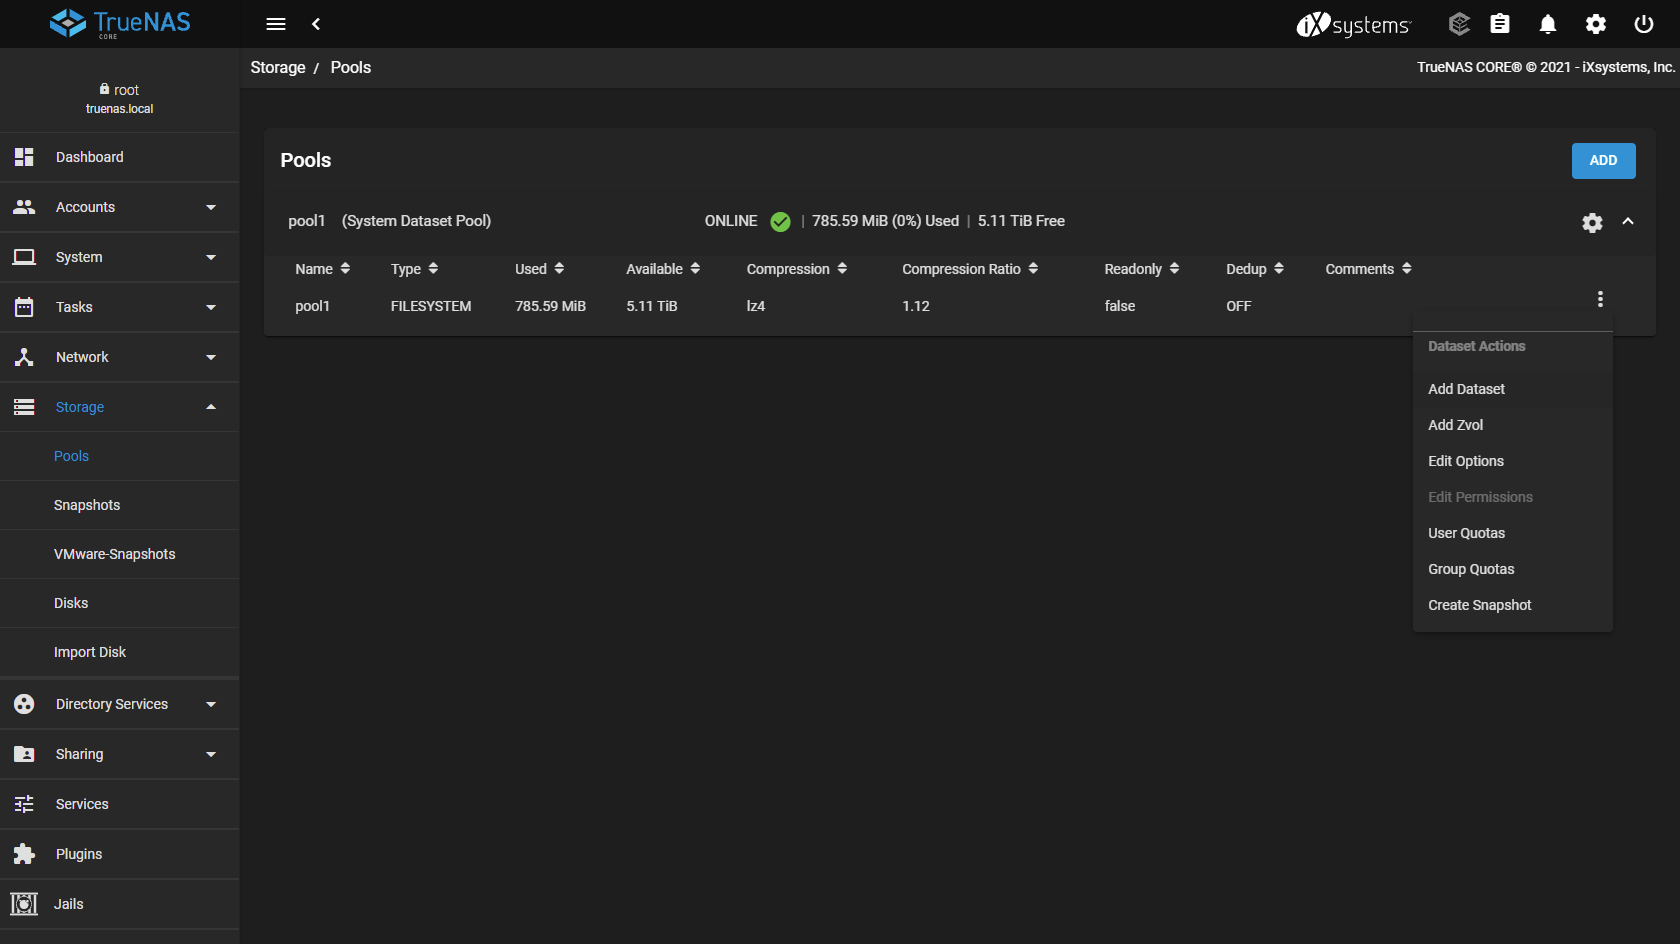
Go to "Storage" -> "Pools" and click on the triple dot icon behind your pool. Click "Add Dataset".
-
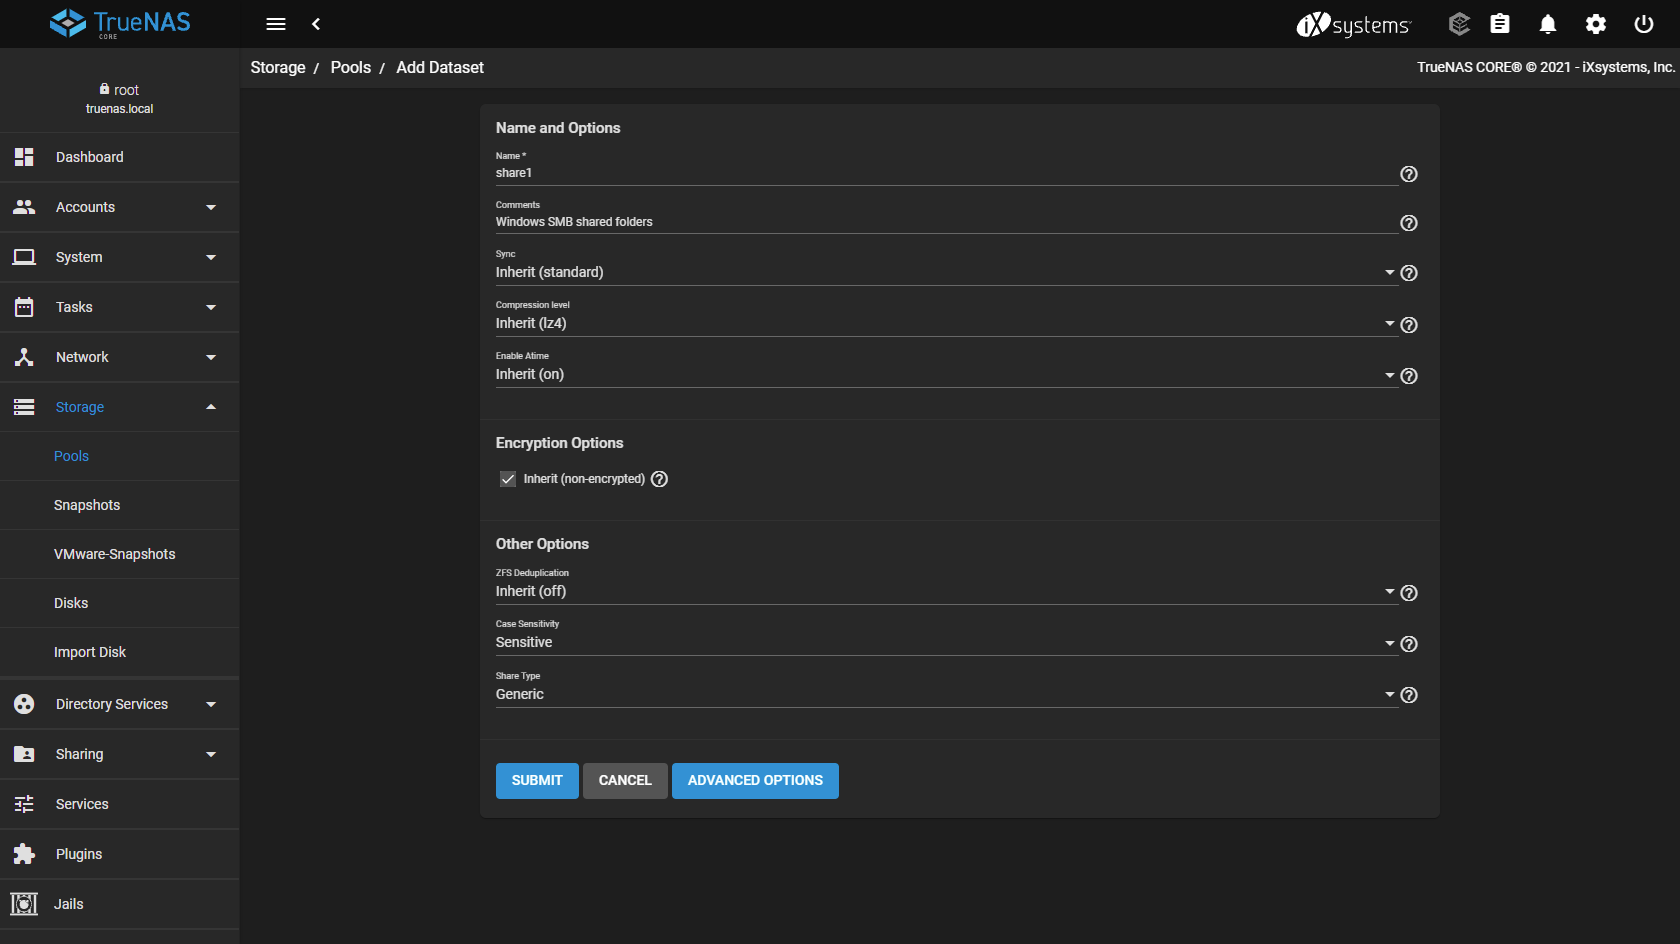
Give the dataset a name and use the comments to explain what data the dataset contains.
-
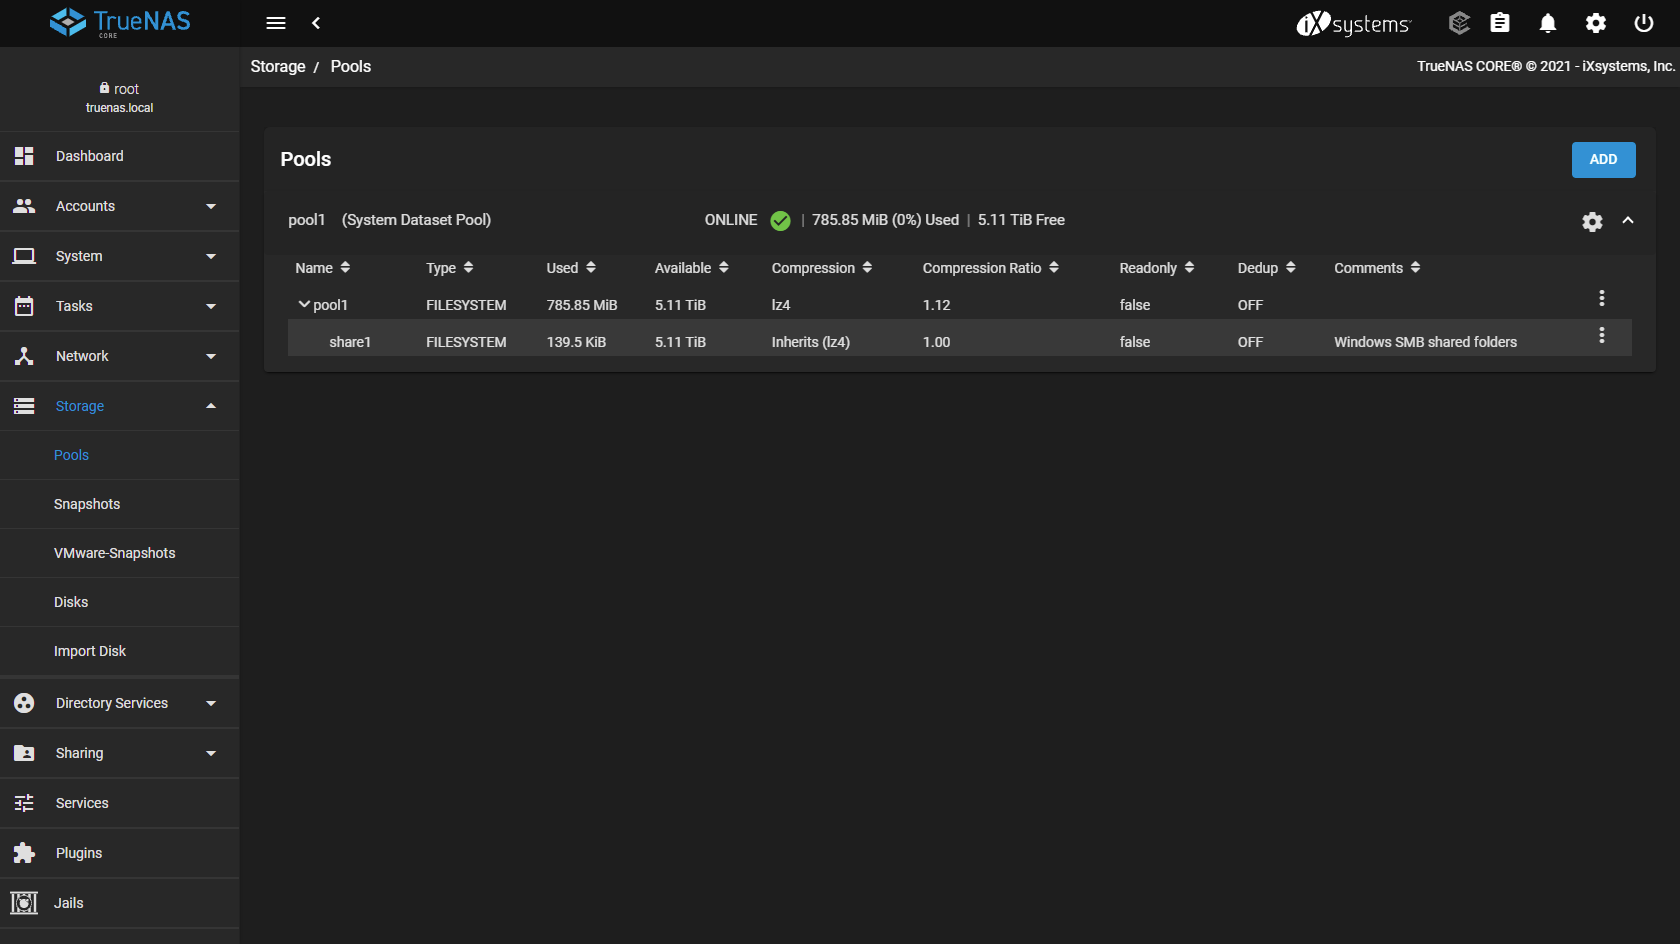
Press "Submit". The dataset is now created.
-
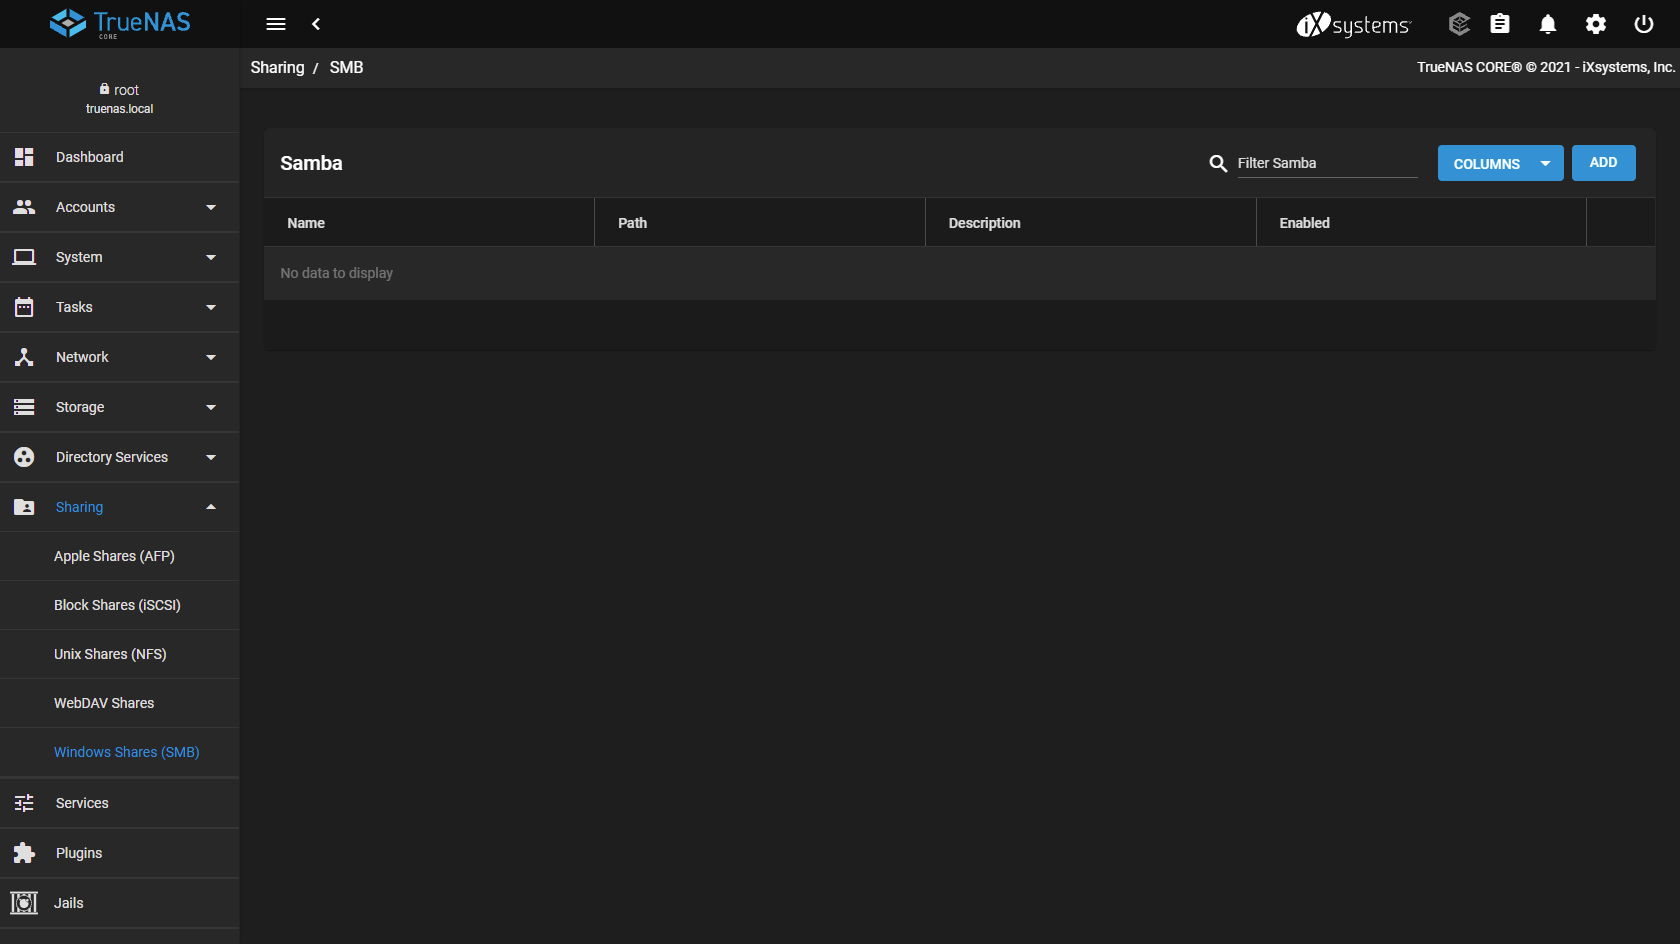
Go to "Sharing" -> "Windows Shares (SMB)" and click "Add".
-
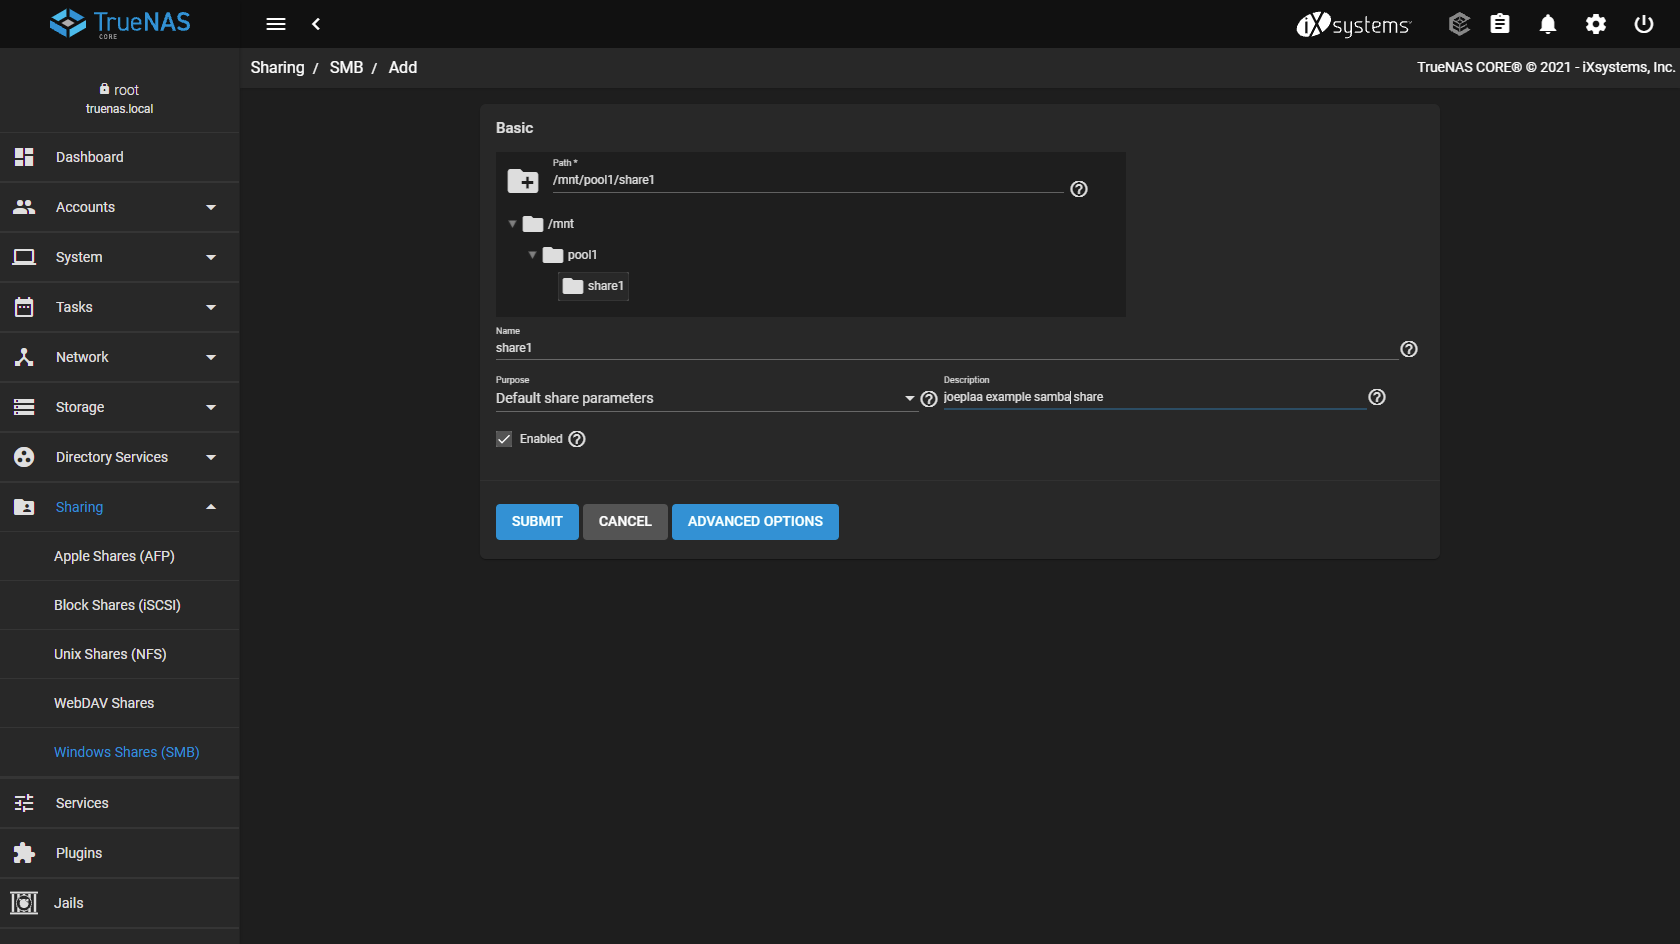
Choose the dataset (folder) you just created and add a description.
-
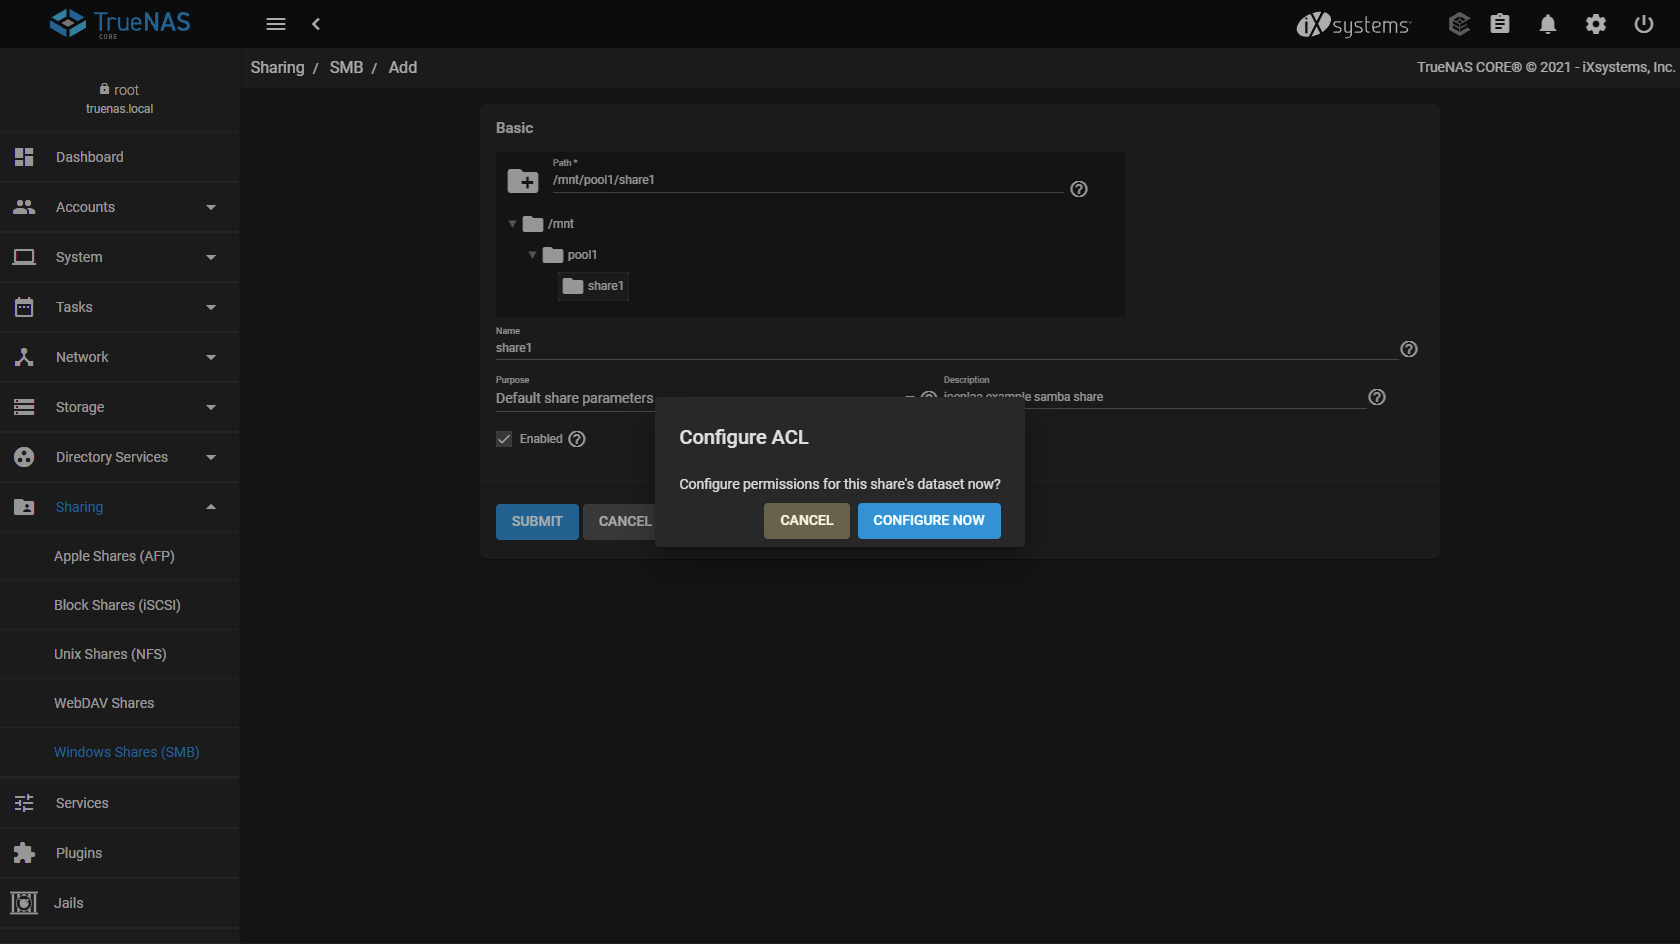
After clicking submit TrueNas will ask if it should configure ACL. Choose to configure it.
-
Click "Add ACL item". Choose
Groupand type the name of the group you created. I wanted read-write permissions so for "Permissions" I chooseModify.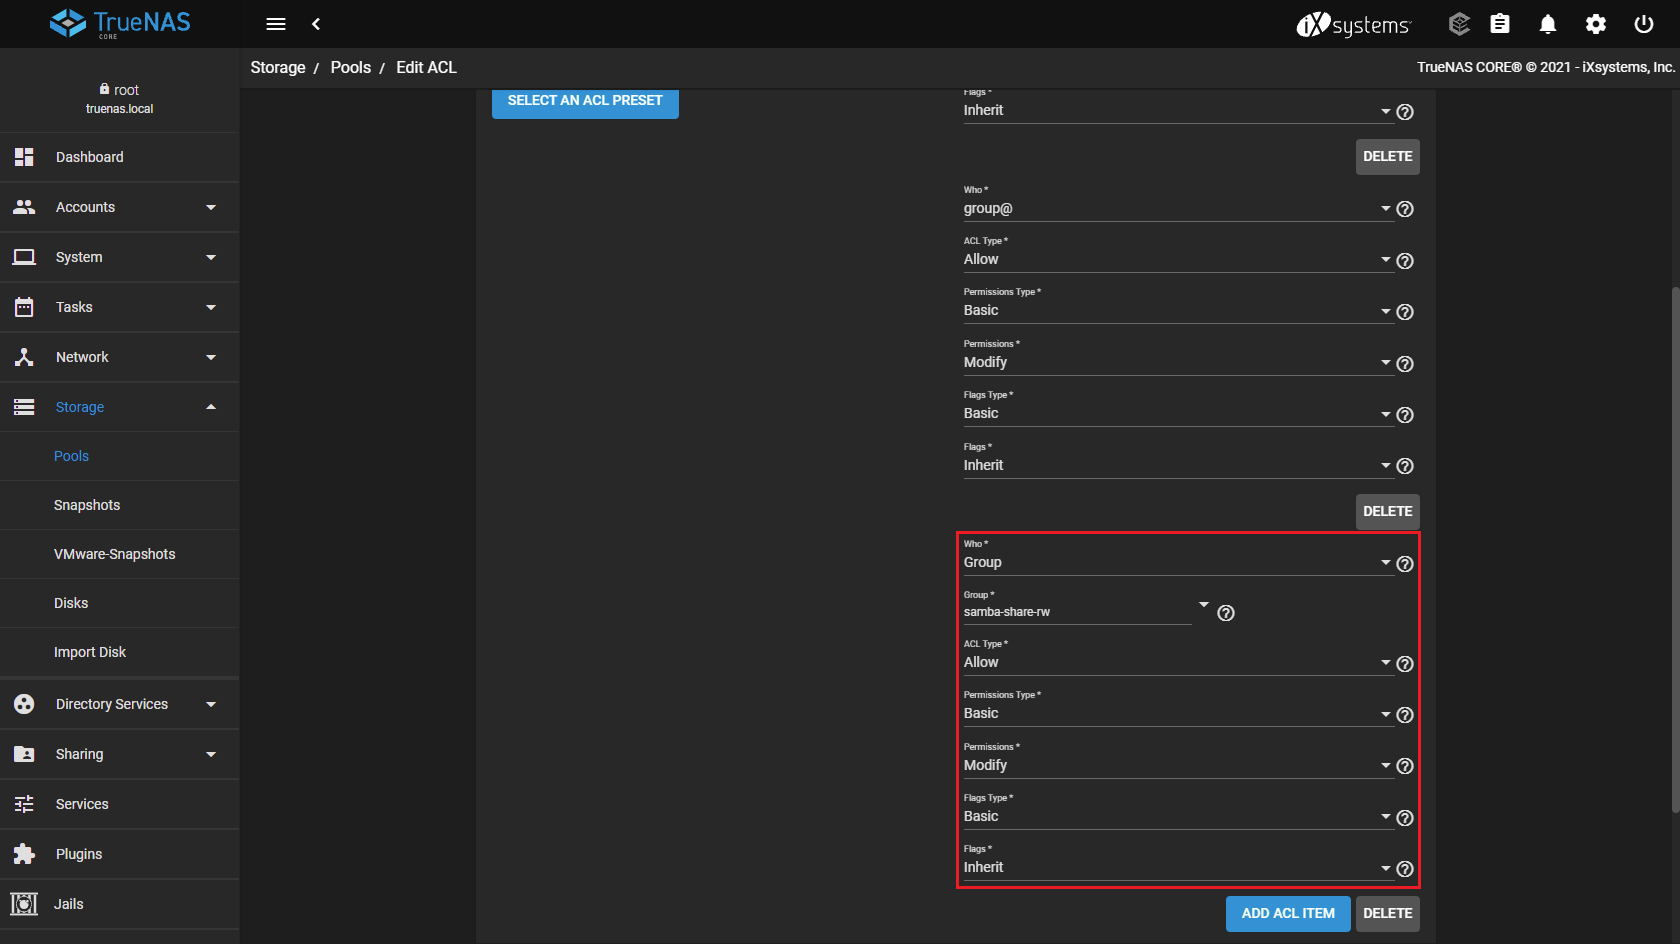
-
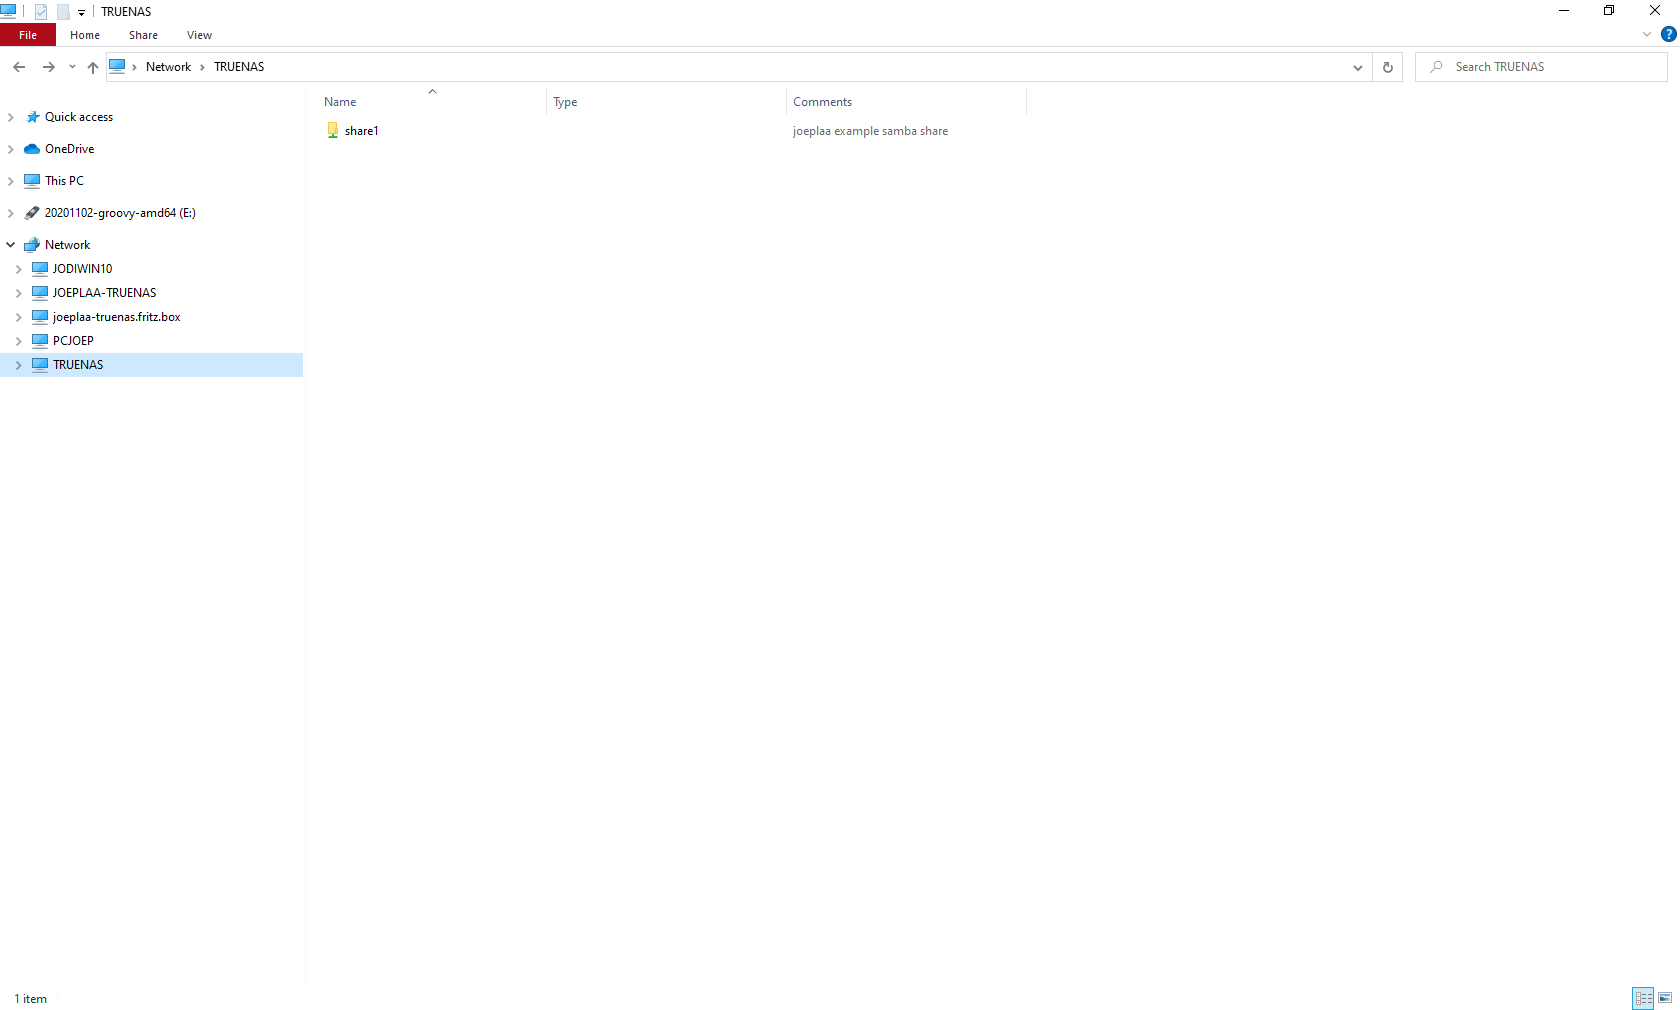
Click save. The share is now visible in Windows. You might need to restart the TrueNas server/VM to get the right NetBIOS name to show.
¶ NFS sharing
SMB vs NFS:
https://blog.ja-ke.tech/2019/08/27/nas-performance-sshfs-nfs-smb.html
https://ferhatakgun.com/network-share-performance-differences-between-nfs-smb/
If you want to share files with Linux machines, NFS might work better than SMB (check the sources at the bottom of this guide).
-
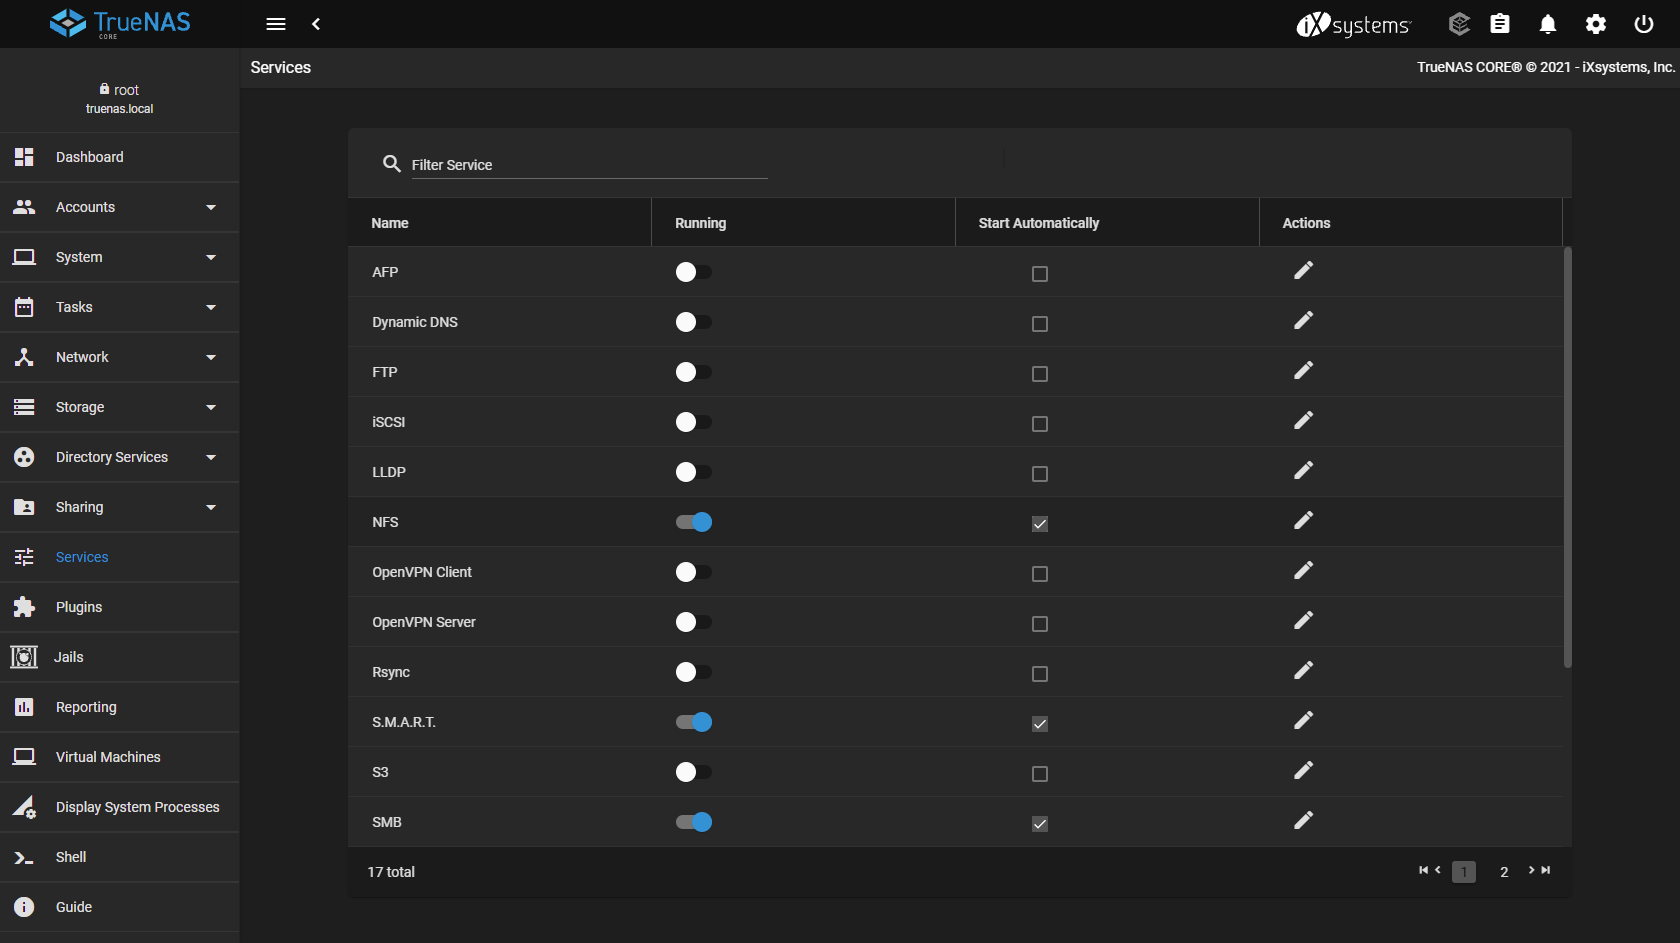
Go to "Services" and enable "NFS". Don't forget to check "Start Automatically".
-
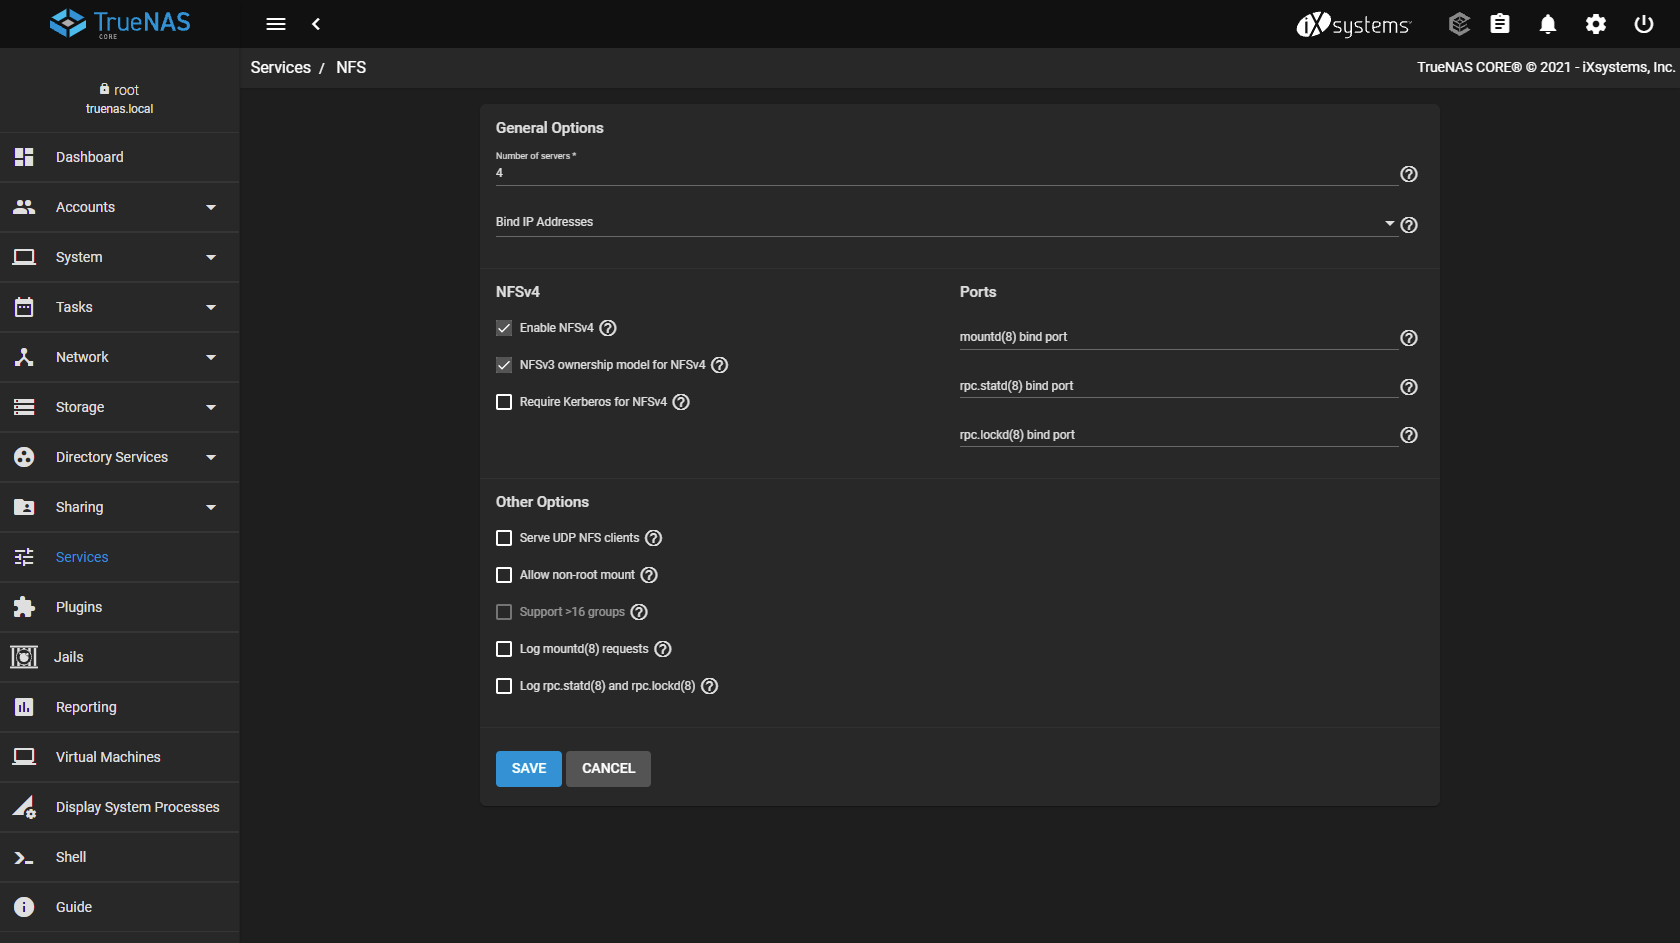
Click on the pencil icon and check "Enable NFSv4" and "NFSv3 ownership for NFSv4".
-
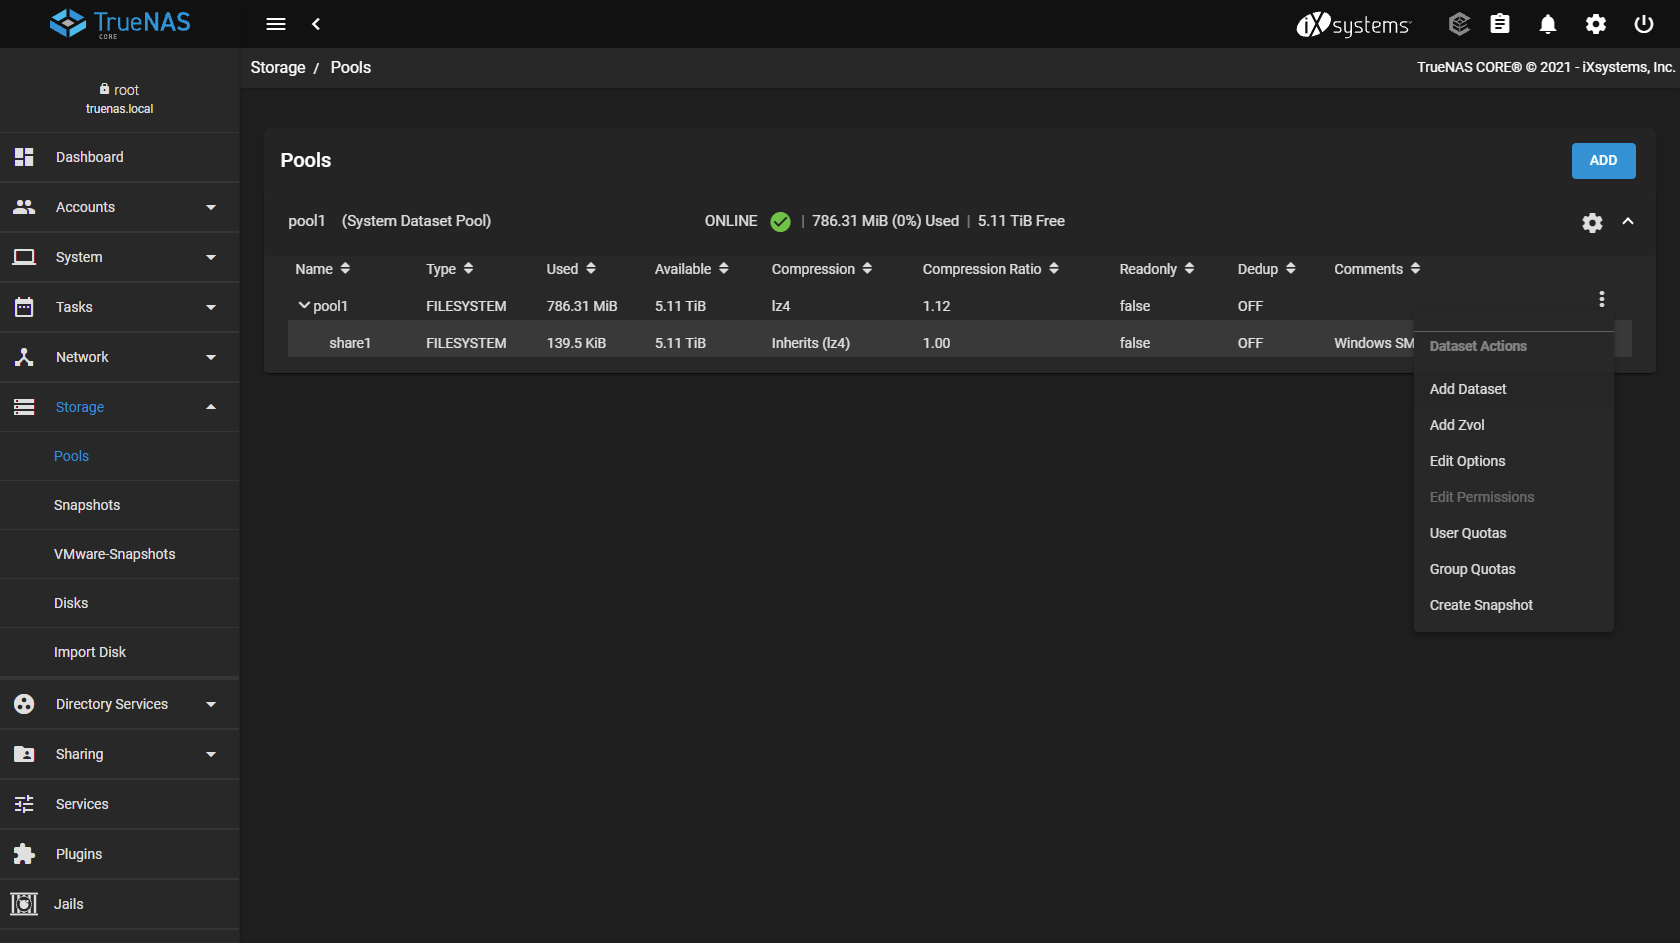
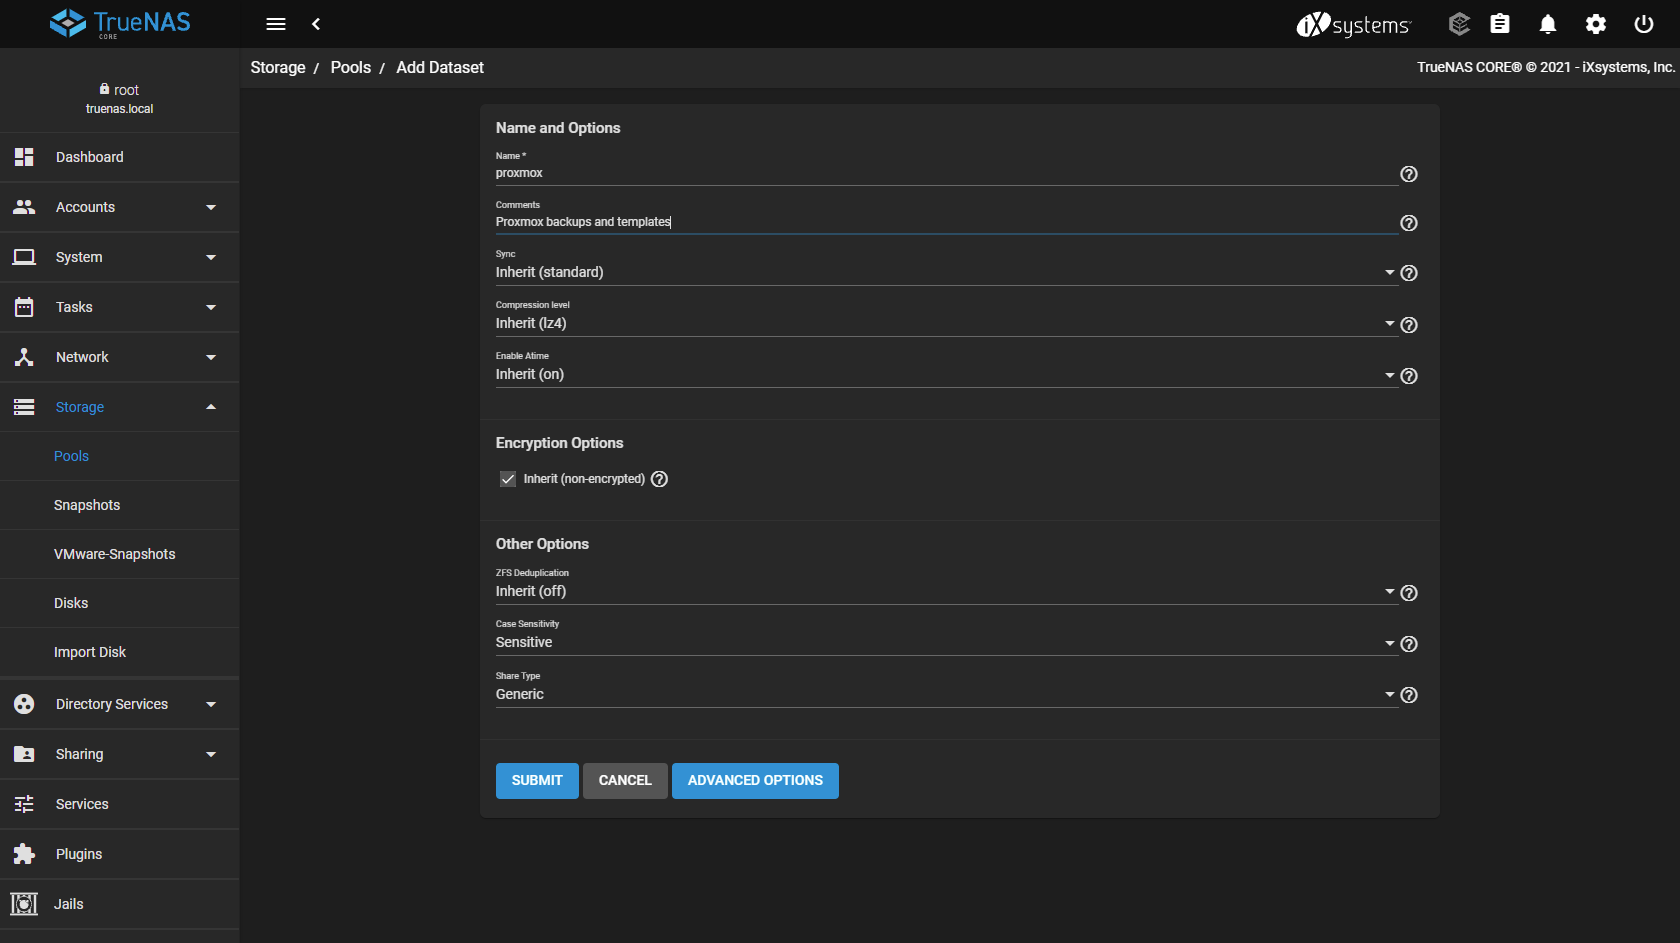
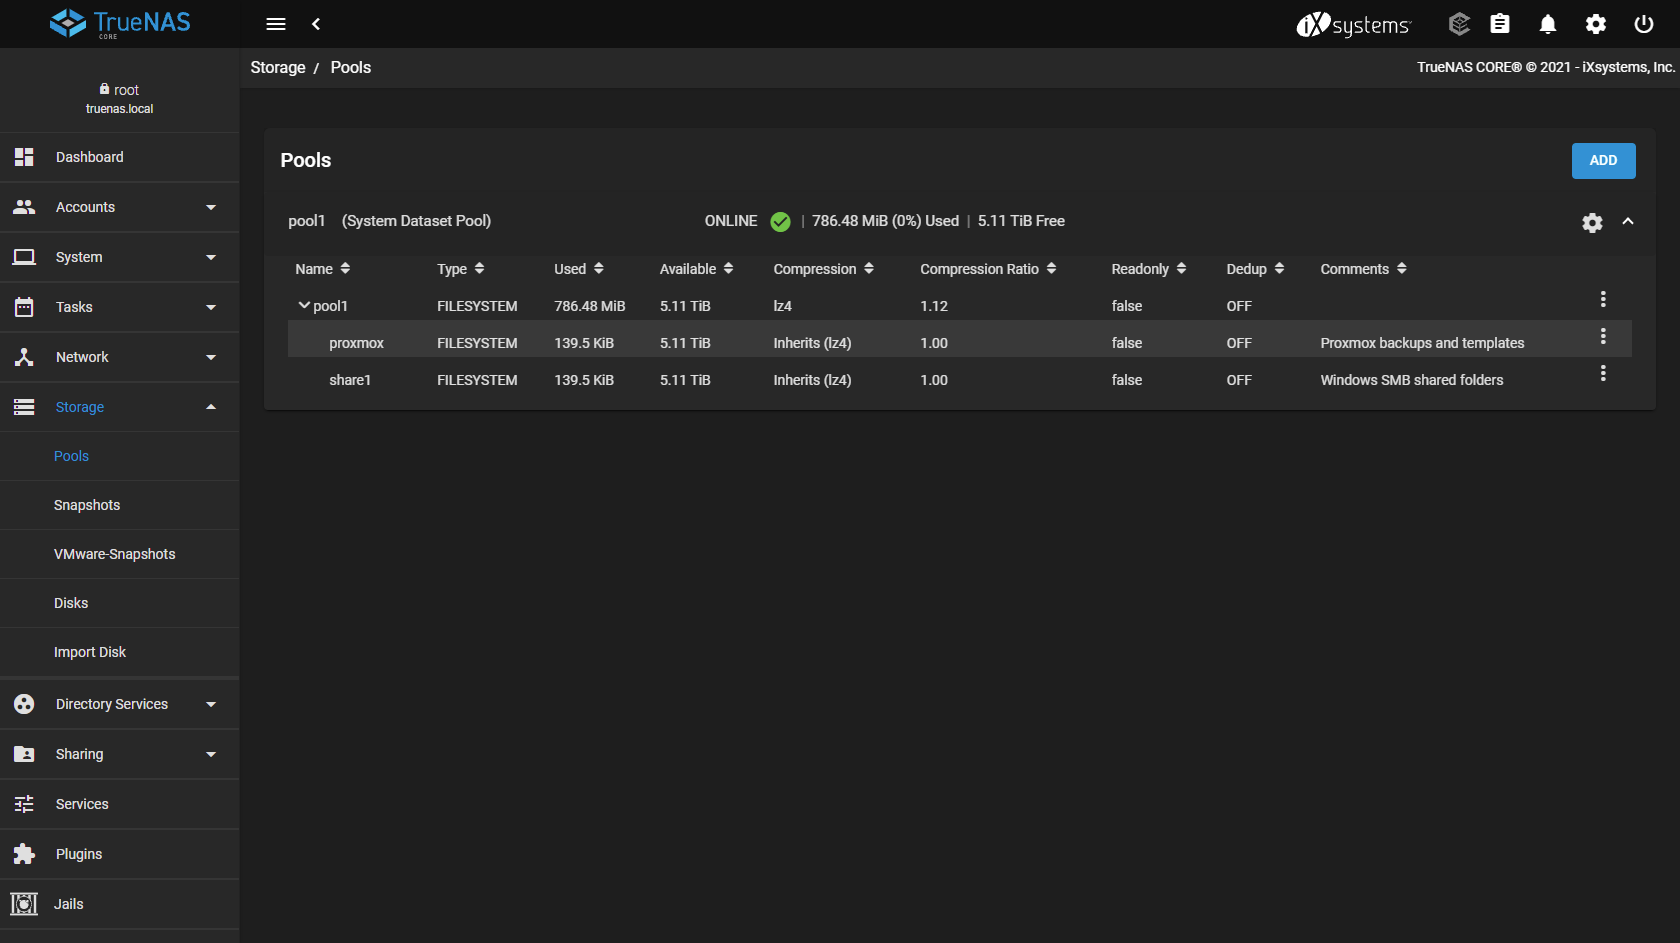
Go to "Storage" -> "Pools" and click on the triple dot icon behind your pool. Click "Add Dataset".
-
Give the dataset a name and use the comments to explain what data the dataset contains.
-
Press "Submit". The dataset is now created.
-
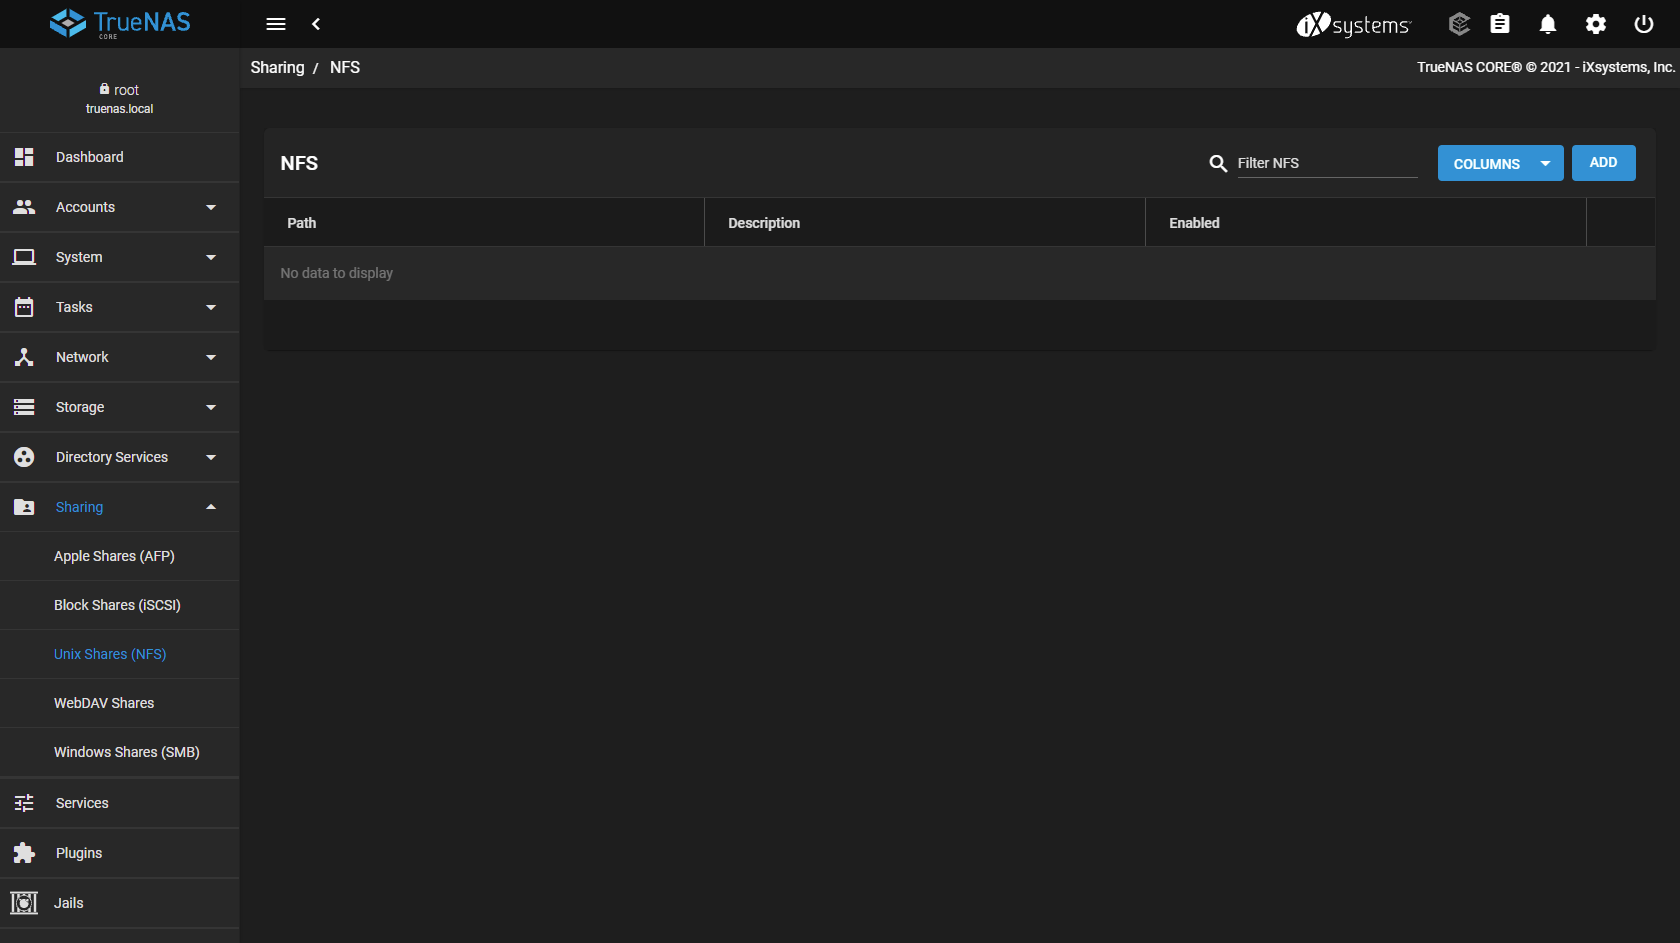
Go to "Sharing" -> "Unix Shares (NFS)" and click "Add".
-
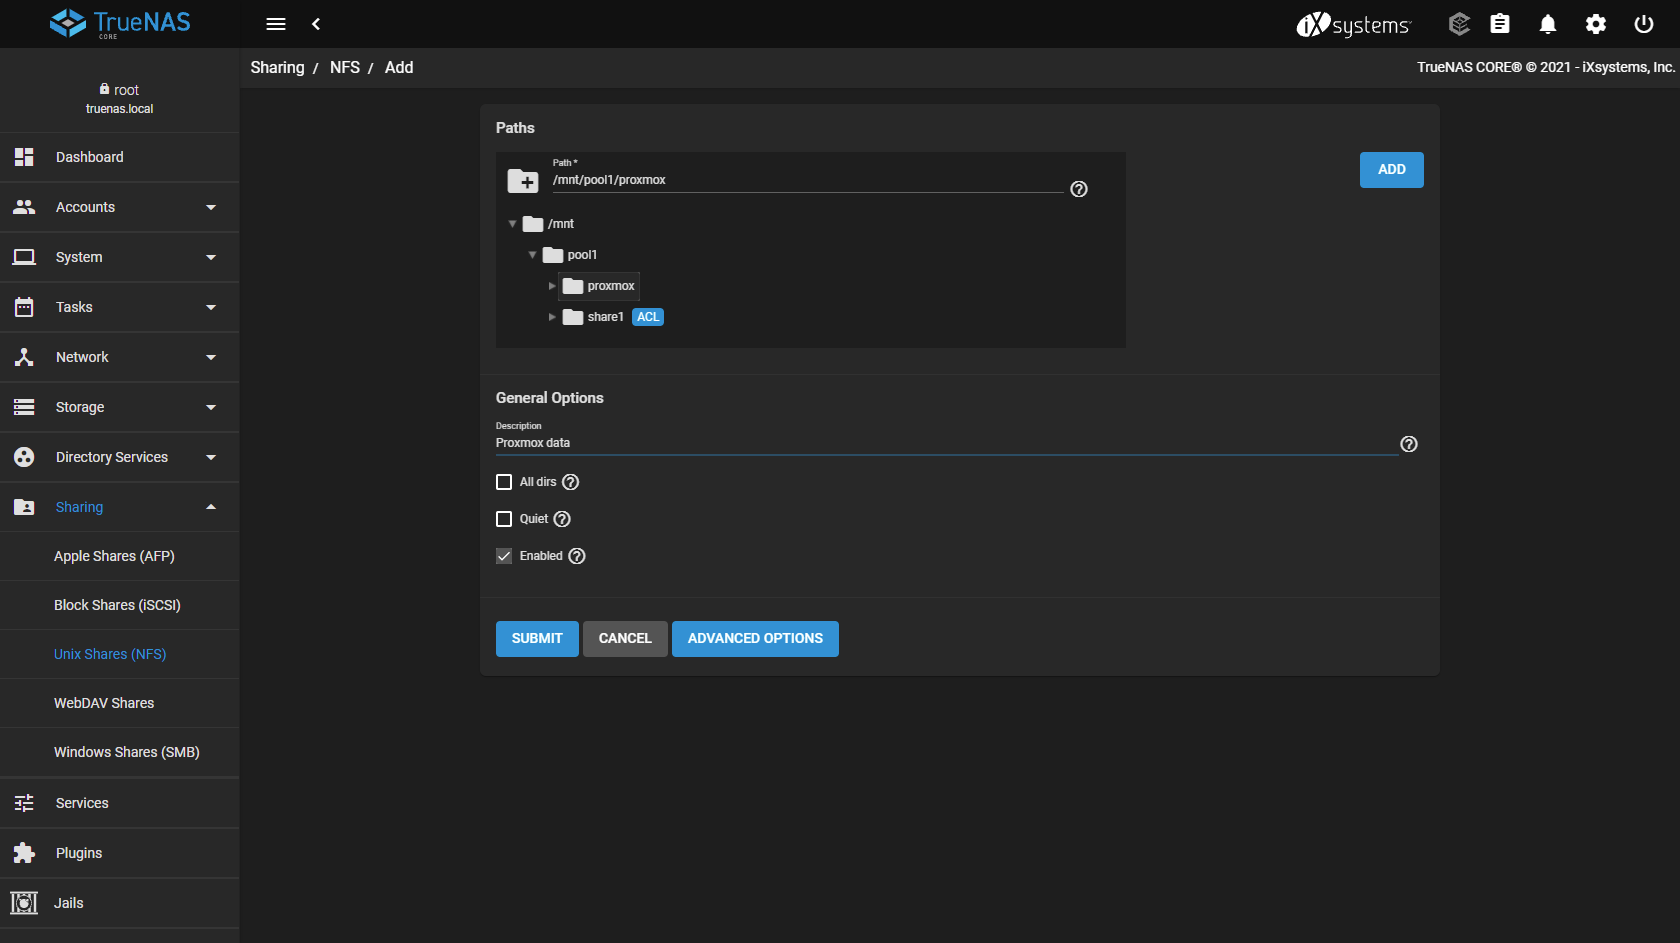
Choose the dataset (folder) you just created and add a description.
-
Click "Advanced Options" and set permissions: Maproot User
root, Maproot Groupwheel. Because I'm making a Proxmox share I only allow the Proxmox host by IP address. Leave this blank if you don't want to restrict access.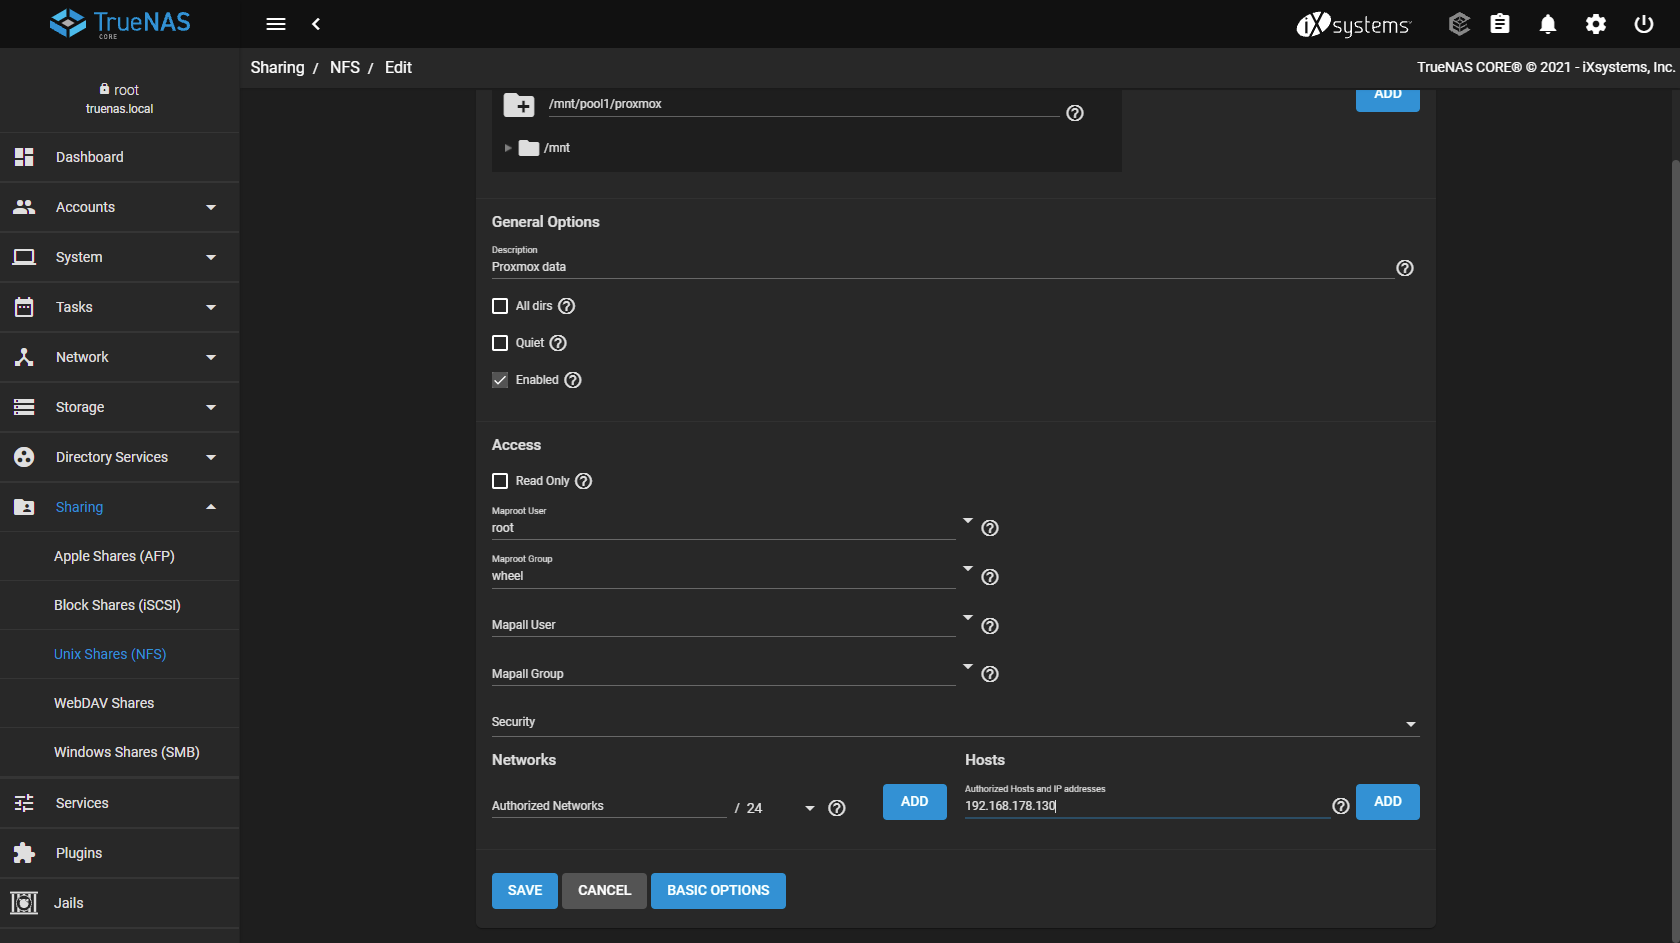
-
Go to "Services" and restart "NFS" (disable -> enable).
-
Now you can add the share (example shows Proxmox).
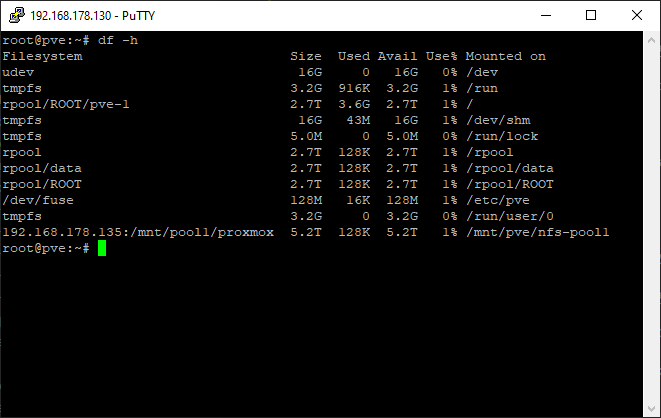
¶ iSCSI disk
Sources:
https://manjaro.site/how-to-create-iscsi-target-on-truenas/
https://manjaro.site/how-to-connect-to-iscsi-volume-from-ubuntu-20-04/
This is something I needed to do very recently for a Storj VM and I don't fully understand it yet. So for now I suggest to look at the sources listed above.
- I followed the first to the letter (ok, I changed the zvol and block share names to
iscsi-pve1) to create an iSCSI target on TrueNAS. - Then in Proxmox I added this target as iSCSI storage.
- On top of that iSCSI storage link I created LVM storage.
- With that I could create a virtual hard disk and link it to the Storj guest.
There is probably a better, more direct approach, but I haven't learned about that yet. I tried running an Ubuntu VM in TrueNAS, but starting this VM would result in a frozen TrueNAS Proxmox guest. This might be a nesting problem, not sure.
¶ Reporting
If something is wrong with a TrueNAS service or the disks, TrueNAS can send you an email.
-
Go to "Accounts" -> "Users" and click the
>icon behind the root user. Click "Edit".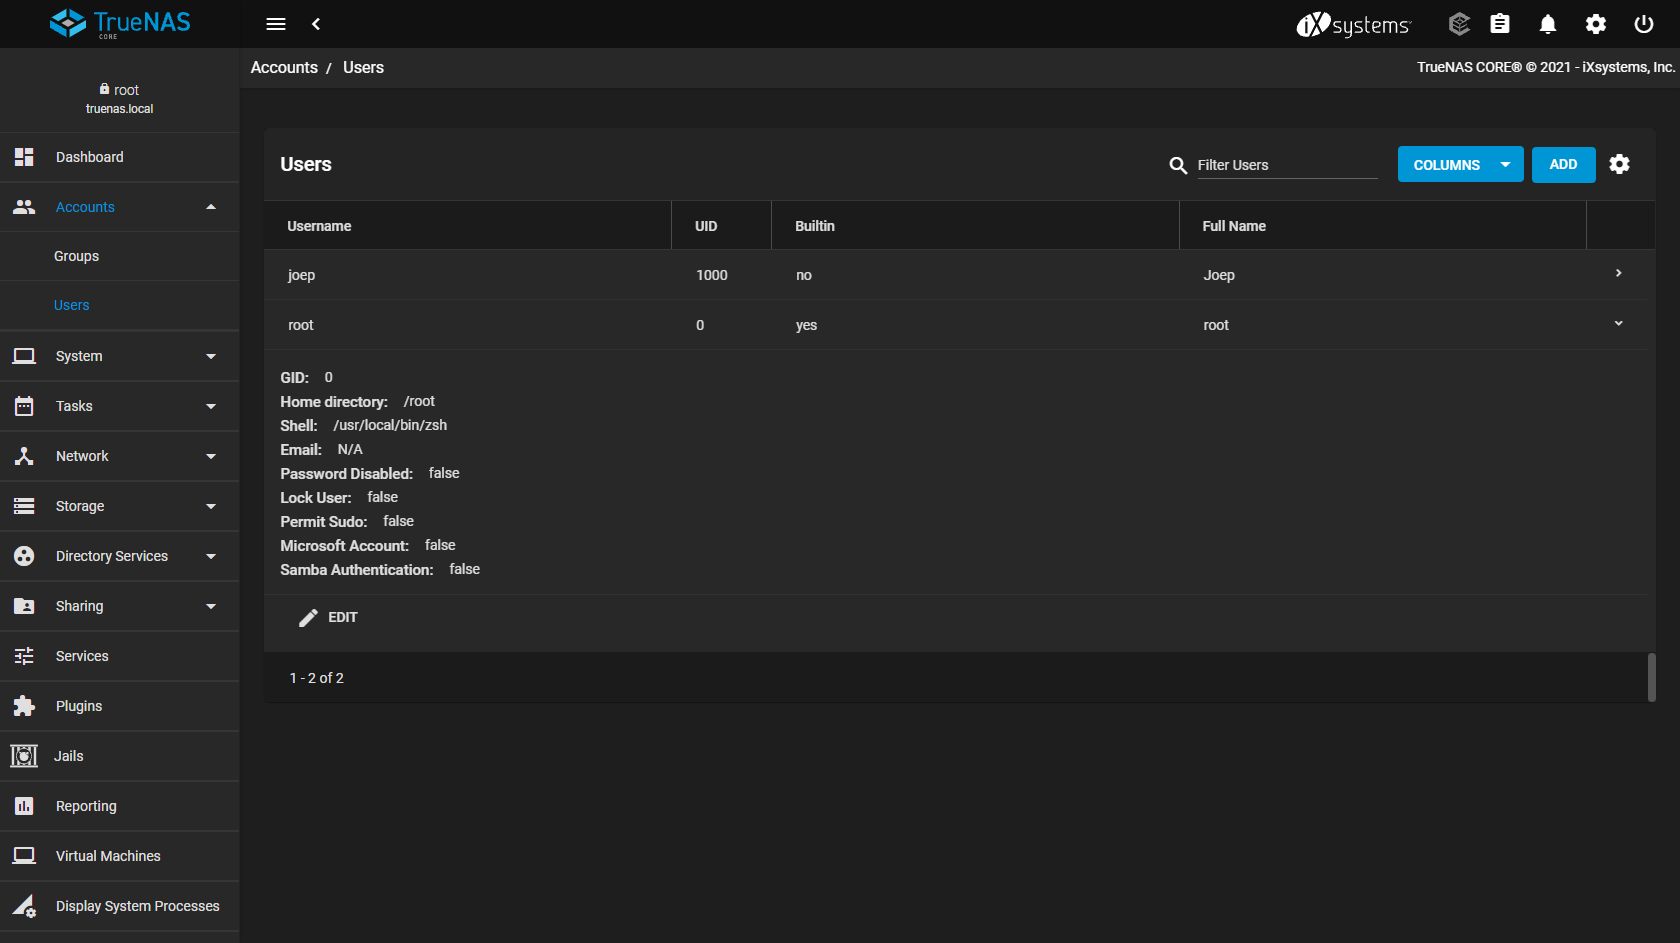
-
Add your email address.
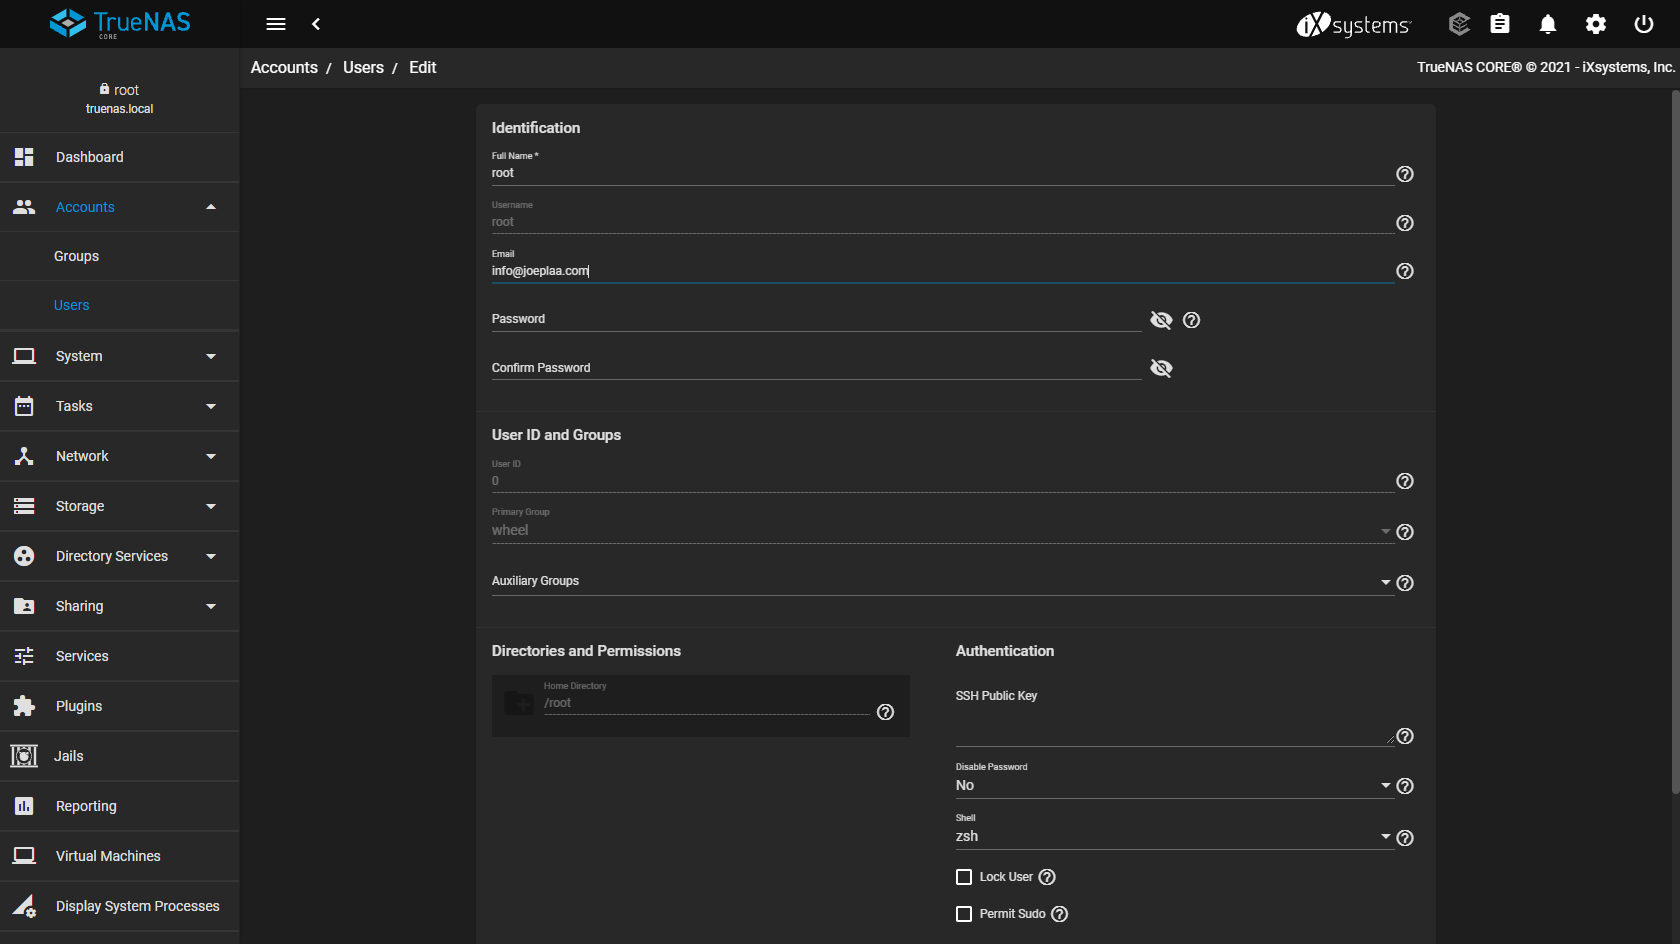
-
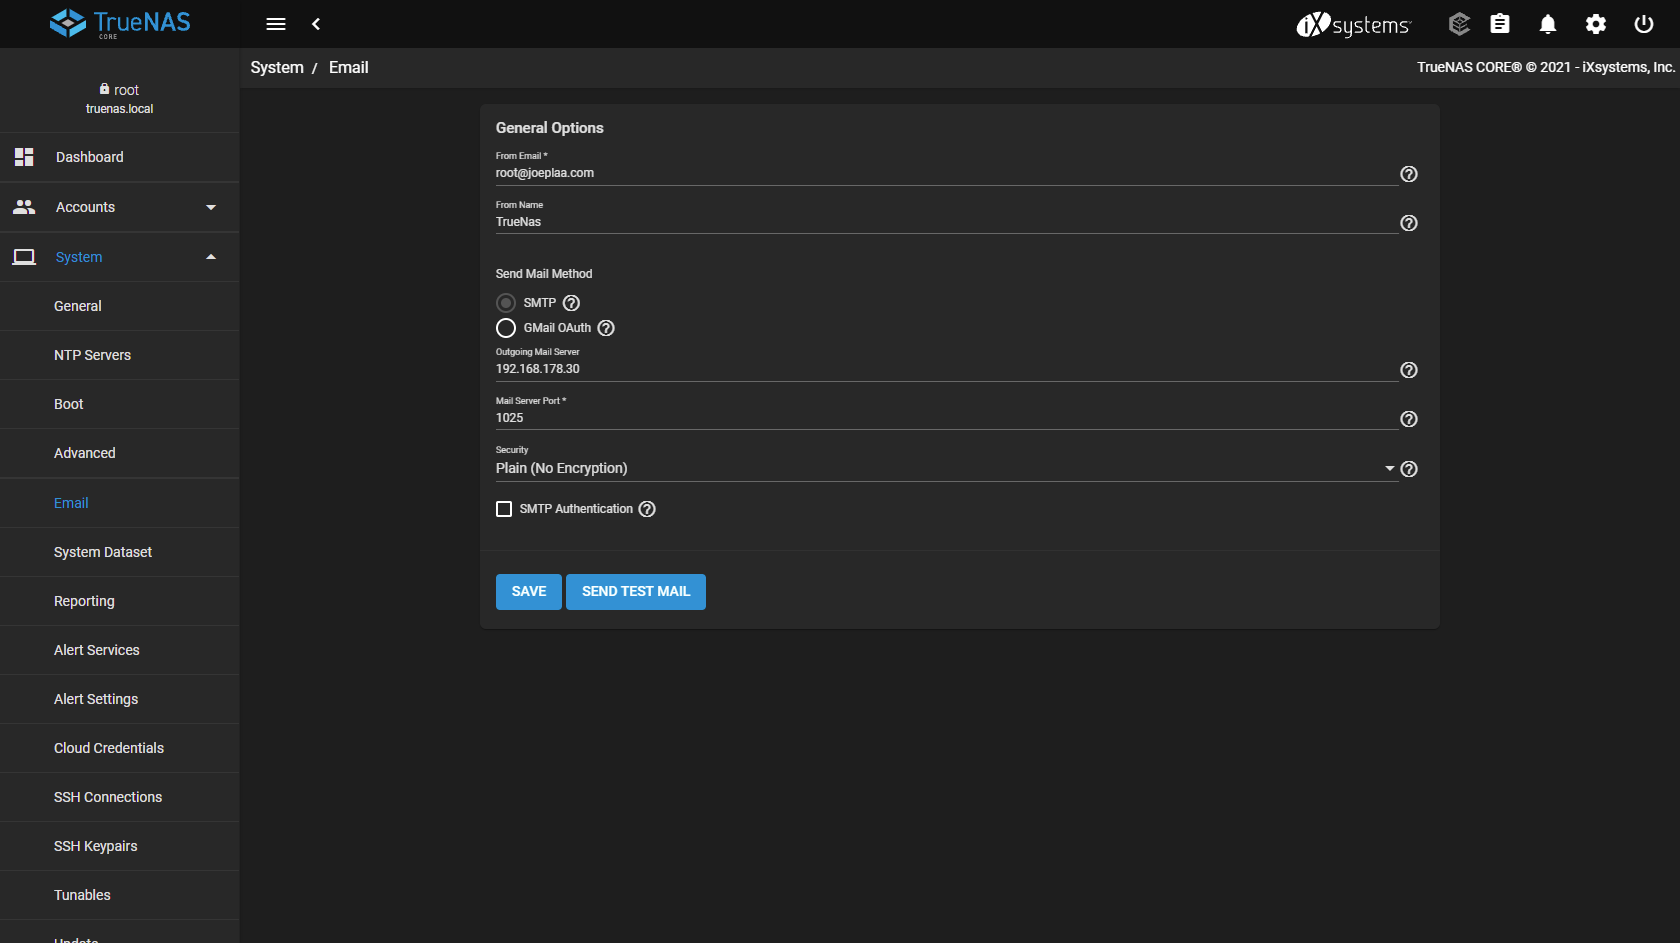
Go to "System" -> "Email" and add a working "From Email" address (for me the domain and email address has to be verified in AWS SES). I'm running my own AWS SMTP relay to which my servers send their system emails. This relay will then use AWS SES to send them to my mailbox. If you want to use Gmail try this, but it seems Google is disabling app passwords needed to authenticate.
-
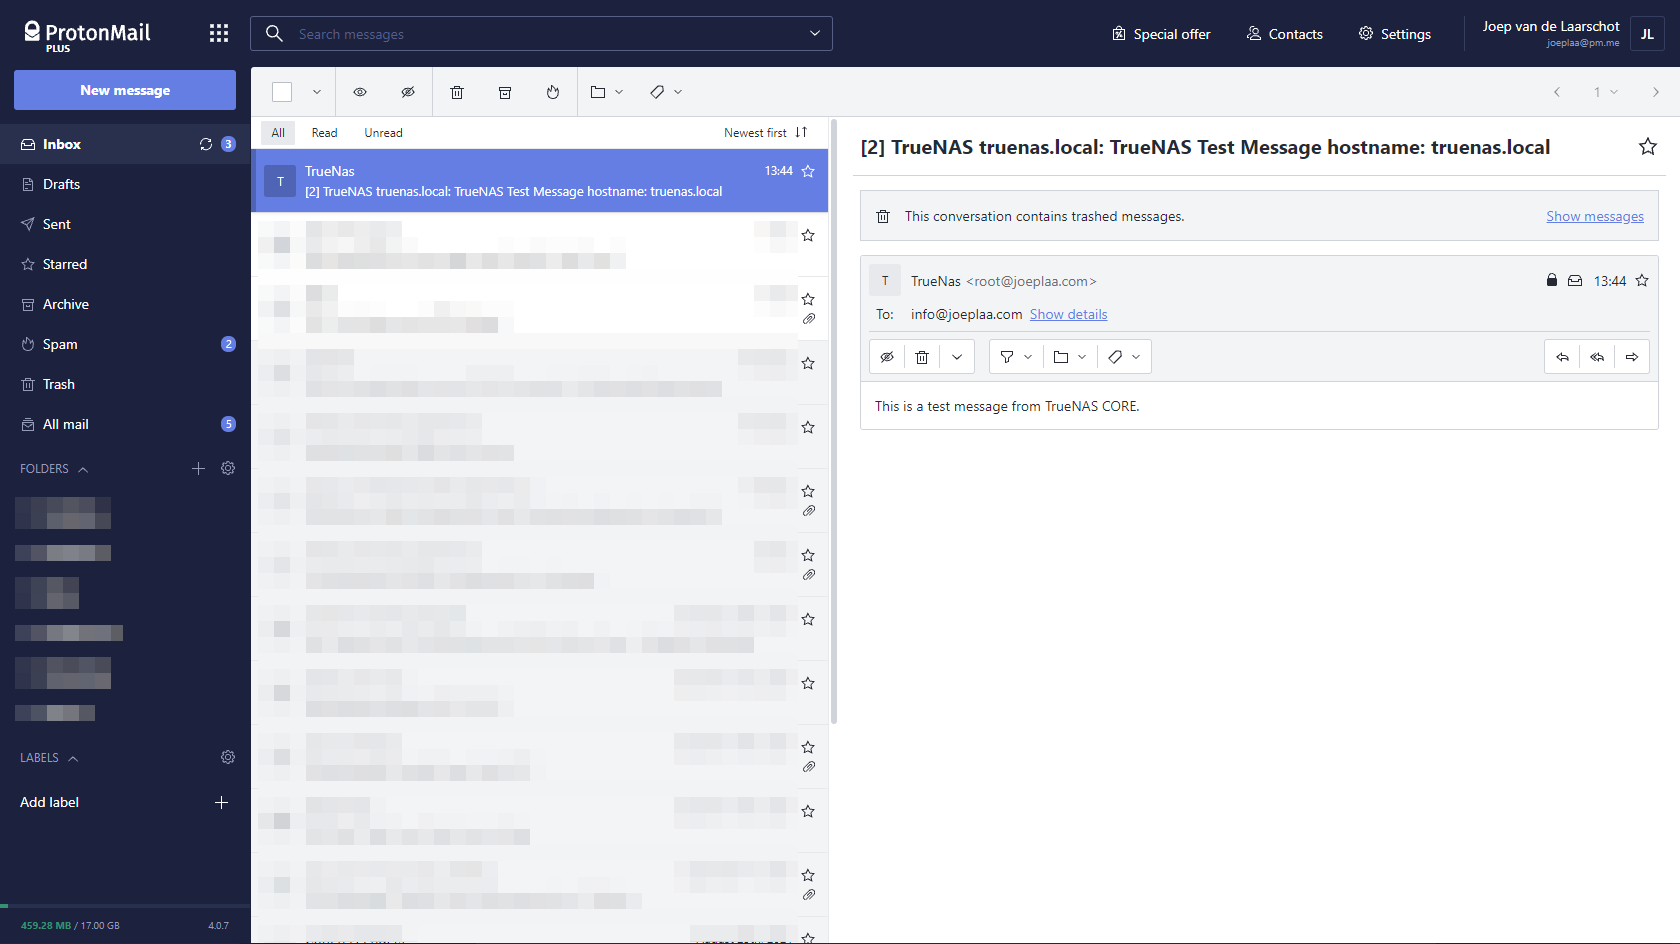
Click "Send test mail". You should receive an email shortly.
¶ TrueNAS on Proxmox
Sources:
TrueNAS community forums: FreeNAS on Proxmox. What's the current state of play?
TrueNAS community resources: QEMU Guest Agent 2021-03-11